
Viewpoint Photography: High, Low, and Eye-Level Angles in Northamptonshire

Introduction to Viewpoint in Photography
This blog is the second of a two-part series on this essential composition technique and explores how your camera position can dramatically impact your images.
Whether you’re taking personalised photography lessons or experimenting on your own, understanding viewpoints is crucial for beginners and advanced photographers alike. This entry focuses on high-angle, low-angle, and eye-level shots, helping you elevate your photography in both creative and professional contexts.

What is the Viewpoint?
In photography, viewpoint refers to the position of the photographer relative to the subject. By changing your viewpoint, you can completely alter the mood, scale, and storytelling of your image. Key options include:
Birdseye / Plan view
High Angle
Eye-level Angle
Low Angle
Have you noticed that you may have naturally used some of these angles without thinking? Understanding when and why to use them is what separates casual shooting from professional-quality images.

High-Angle Photography
A high-angle shot is where the camera looks down on the subject. This perspective can make subjects appear smaller, vulnerable, or overwhelmed. While widely used in filmmaking, this viewpoint also works well in:
Drone photography
Portraits
Street photography
Tips for High-Angle Photography
Avoid over-distorting scale
Experiment with composition for cinematic effect
Resources: StudioBinder, Eric Kim, No Film School

Example resource links:
Use this angle carefully, while it adds cinematic effect, it can distort scale if overused.
The process of using a high angle in your photography has been mainly used within filming and video angles. You can try this effect with a drone, portraits and possibly street photography. On the opposite end of high is low, so you can also attempt to shoot images from a low angle.
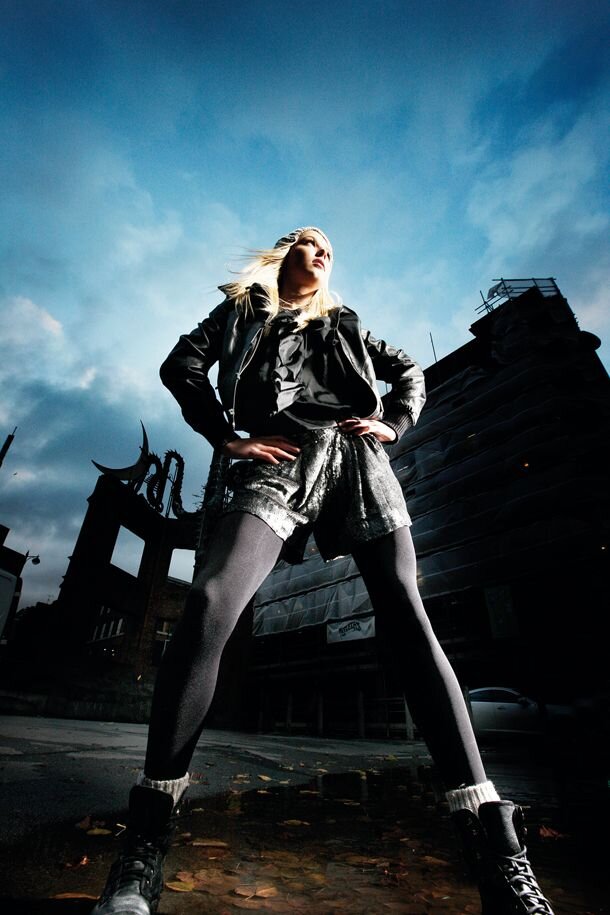
Low-Angle Photography
Conversely, low-angle shots are captured from below the subject, creating a sense of power or elongation. In portrait photography, low angles can make a model appear taller or slimmer. In landscape or street photography, this viewpoint adds dramatic emphasis.
Considerations:
Lens distortions (barrel, pincushion, moustache) can appear with wide-angle lenses.
Correct distortions in post-processing using tools like Photoshop.
Example visuals:
Images demonstrating elongation in portraits
Low-angle urban and landscape compositions
Tip: Always check perspective when framing the subject from a low angle.
Watch this video and try some of the angles mentioned for your angle photography. The best thing to consider per angle is the perspective you will be forming depending on your angle. A set angle for some subjects will cause the object to be deformed, so keep an eye on the perspective.
In portrait photography, low-angled photography can elongate a model’s body, which makes them seem thinner or will make them taller than in reality. Have a look at these two examples:

These two images both look great at this angle, but just be aware that once you decide to zoom in on a person’s face, the images will look like you are looking up their nose and this is an unflattering look.
Another photography genre that this angle perspective is good for, is either street photography or landscape.
With landscape, images make sure you are considering the effects of lens distortion, which are: barrel, pincushion & moustache. This can happen once you move to use a wide-angle lens for your landscape photographs.

Here are some visuals that relate to the three lens distortions mentioned above and I have uploaded a Photoshop video to watch so that you can correct these issues in post-production if they occur.
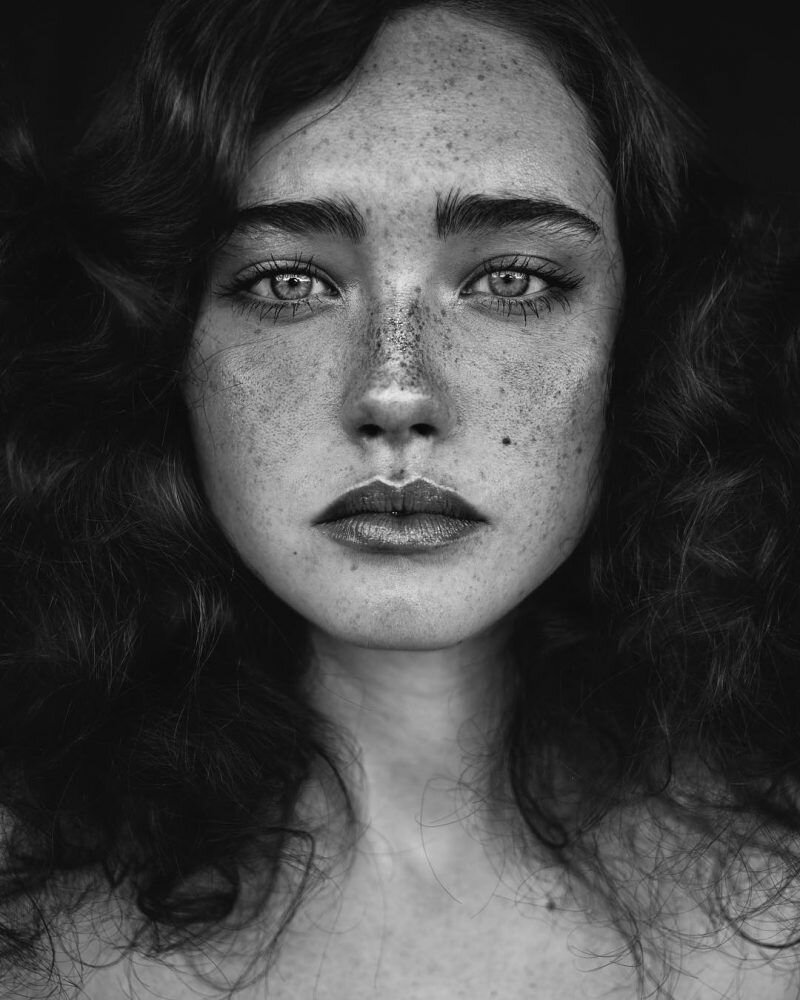
Eye-Level Angle
Eye-level shots are taken with the camera at the same height as the subject. This angle is neutral and ideal for creating a connection with your subject, whether photographing:
People
Animals
Landscapes
It’s a versatile angle for all photography levels, from casual snapshots to professional commercial projects.
Here are some examples of eye-level viewpoints and I have selected an image for portrait, landscape and animal photography.
Example visuals:
Eye-level portraits
Wildlife shots
Landscape images


Why Experiment with Viewpoint?
Changing your viewpoint allows you to:
Add depth, drama, and emotion
Highlight unseen details
Create visual storytelling
Produce professional-quality images for commercial or personal projects
This technique is especially effective in one-to-one photography tuition in Northamptonshire, where you receive hands-on guidance and feedback tailored to your style.
Personalised Viewpoint & Composition Tuition
Want to elevate your photography and master camera viewpoints?
Book a one-to-one photography tuition session in Northamptonshire to learn high, low, and eye-level techniques. Receive personalised feedback, hands-on practice, and expert guidance to enhance your creative and commercial photography, from portraits and landscapes to food and product shots.
Book your session today: sampeel@wellypictures.com