
Tips to make you look like a pro in food photography
Creating a genuinely mouthwatering food image is part art, part science, and a whole lot of practice. Here's the thing, you don't need a studio full of expensive gear to get professional results. You just need to understand a handful of principles that the pros use every single time and then apply them consistently.
Whether you're shooting for Instagram, updating a menu, or building a website, these are the fundamentals that make the difference between a photo that gets scrolled past and one that makes someone stop and crave.

Light is your most important ingredient
In food photography, lighting is everything. It's the difference between a dish looking flat and lifeless, and one that looks genuinely fresh and three-dimensional.
Whenever you can, find a window. Soft natural light is the gold standard, as it's flattering, it's free, and it works for almost any dish. Position it to the side of the food rather than directly behind you. Side light catches the texture of a dish in a way that straight-on light simply doesn't, the crumb on a loaf, the glaze on a piece of meat, the condensation on a glass. That's what makes food look real and appetising rather than flat and photographed.
One thing to avoid: direct camera flash. It creates harsh glares, flattens colour, and gives food an oily, unappetising quality. If the room is dark, use a piece of white card or even a white napkin to bounce whatever natural light you do have back onto the dish. It's a remarkably effective trick for something that costs nothing.
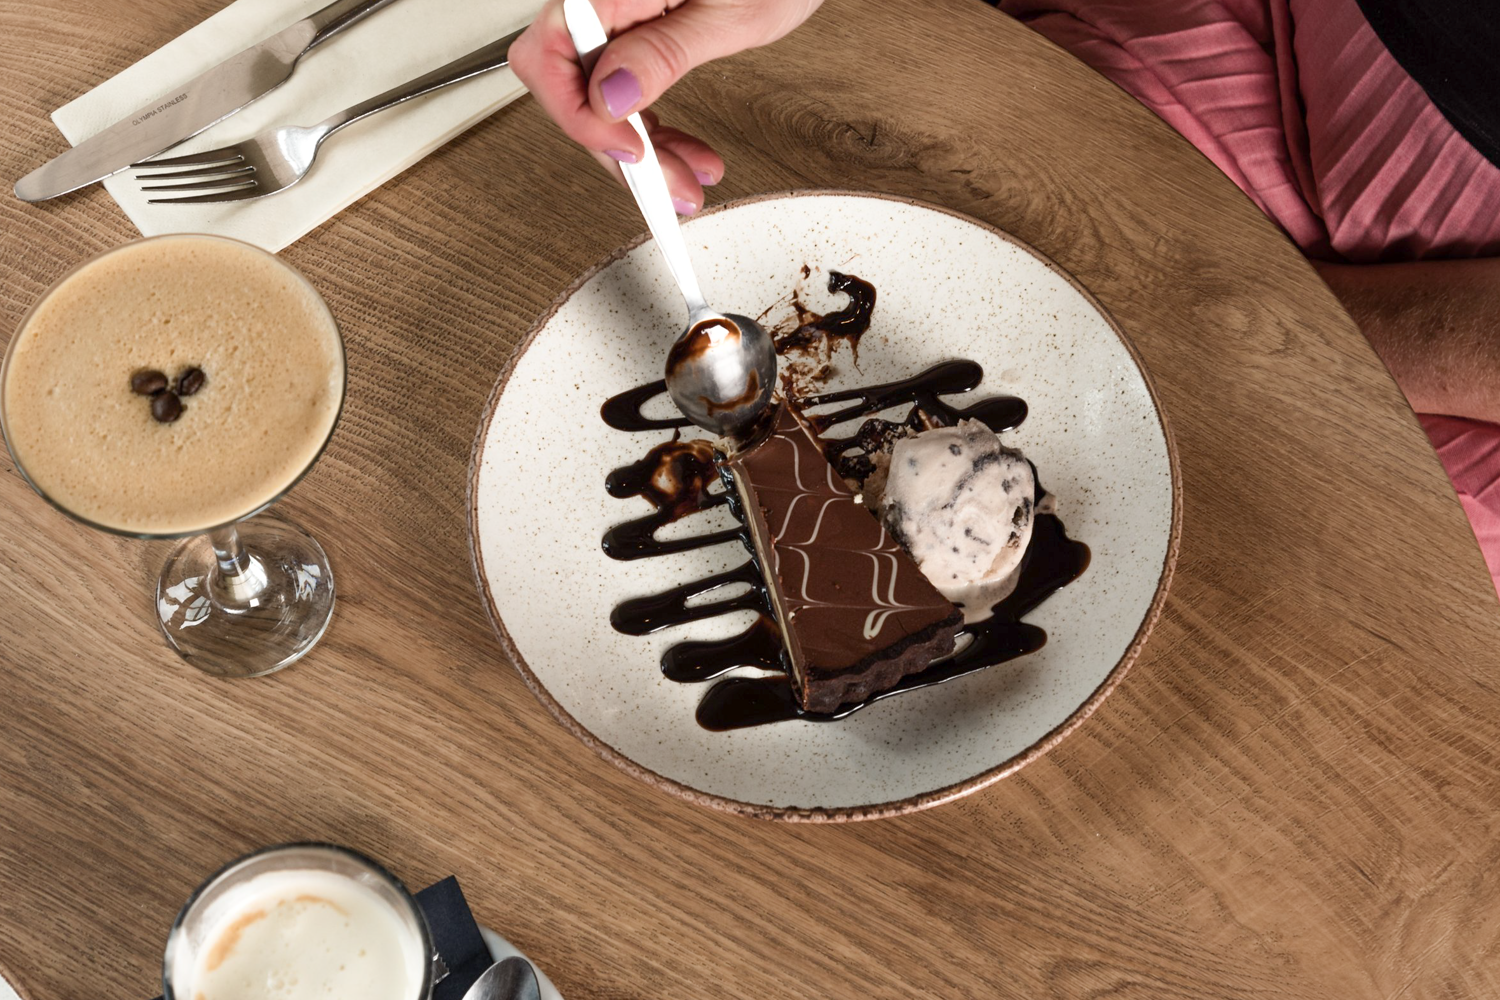
Set the stage before you shoot
A professional shot is a clean shot. You want the viewer's eye to travel straight to the food, not to a stray crumb, a cluttered background, or a prop that doesn't belong.
Keep your surfaces simple and neutral. Rustic wood, light grey stone, marble, these complement almost any dish without competing with it. For props, less is almost always more. A single linen napkin, a piece of cutlery, a sprig of something fresh, these details add context and warmth. But if a prop isn't actively helping to tell the story of the dish, take it out. Every element in the frame should earn its place.

RULE OF THIRDS GRID
Use composition like a pro
How you arrange the frame changes how the brain responds to the image. These three principles do most of the heavy lifting:
The rule of thirds — turn on the grid on your phone or camera and place the main subject where the lines intersect, rather than dead centre. It creates instant balance and gives the image a more considered, professional feel.
Negative space — don't be afraid of emptiness around the plate. Space gives the subject room to breathe and adds a sense of elegance that a cluttered frame simply can't achieve.
Leading lines — use a knife, a fork, the edge of a board, or even the line of a table to guide the viewer's eye naturally toward the focal point of the image. It's a subtle trick, but once you start using it, you'll notice the difference immediately.

DEPTH OF FIELD, AS THE BACKGROUND IN BLURRED FOCUS
Find the right angle for the dish
Different foods have different best sides, and choosing the right angle is one of the quickest ways to level up your shots.
The flat lay, straight down from above, is perfect for pizza, smoothie bowls, full table spreads, and anything where the top of the dish tells the whole story. The side-on angle, shot from low down, is essential for burgers, stacked cakes, tall cocktails, or anything where the layers and height are the point. And if your camera or phone has a portrait mode or a wide aperture setting, use it, blurring the background slightly makes the food pop as the undisputed star of the frame in a way that's immediately striking.
The one thing that makes everything look more professional
Before you press the shutter, take thirty seconds to tidy the scene. Wipe away stray sauce. Replace a wilting garnish. Straighten the napkin. Move the fork an inch.
It sounds small, but a clean, considered scene is what separates a quick snapshot from an image that genuinely represents your brand well. Food photography is a craft and like any craft, it improves every single time you do it.
Ready to make your visuals as good as your food?
Whether you'd like me to handle the creative direction for your next shoot, or you'd prefer to develop these skills yourself, I'm always happy to have a chat about what would work best for you, no pressure, no jargon.
Need a pro for your next shoot? Explore my Food & Drink photography services.
Want to develop your own skills? Book a 1-on-1 Photography Masterclass.
Just want to talk it through? Book a free 15-minute consultation, let's figure out the best next step for you.
Sam Peel (MA) | Welly Pictures | Food Photographer, Northamptonshire