
How Do You Make Sourdough Bread?

Do you own a bread maker or do you prefer to buy freshly made bread from a bakery?
Do you own a bread maker, or do you prefer to buy freshly made bread from a bakery? I recently visited the fantastic Magee Street Bakery in Northampton, which makes some of the best sourdough bread in the area. If you want to explore more about this bakery, check out their website here.
Making Sourdough Bread at Home
Here’s a simple ingredient list to try making sourdough bread yourself:
150g bubbly, active sourdough starter
250g warm filtered water
25g olive oil
500g bread flour
10g fine sea salt
Fine ground cornmeal for dusting
Part of the process involves maintaining a sourdough starter, which is what gives the bread its unique flavour. Magee Street Bakery calls theirs "Olive" and keeps it carefully nurtured.
What’s next?
MAKE THE DOUGH - Whisk the starter, water, and olive oil in a large bowl. Add the flour and salt. Squish everything together with your hands until all of the flour is absorbed. The dough will be dry and shaggy. Cover the bowl and let it rest for 30 minutes or up to 1 hour. Stretch & fold the dough within 30min of your rise time and before dividing the dough. After the dough has rested, work the dough in the bowl into a rough ball, for about 15 seconds.
You could follow Magee Street process by dividing the dough once after leaving the dough
“We only divide ours once after roughly 7 hours to cut and shape before we overnight refrigerate.”

DIVIDE UP THE DOUGH - Make sure that once divided you cover the bowls with plastic wrap or a very damp kitchen cloth. Leave these to rest in a warm spot to rise. The dough is ready when it looks dense and has doubled in size and this can take anywhere from 3-12 hours.
CUT & SHAPE THE DOUGH - Remove the dough from the bowls, and place it onto the floured section so that it does not stick. You do not need to ‘punch down the dough; it will gently deflate as you fold and shape it. Cut the dough in half or leave it whole for a single loaf. The quantity of bread will depend if you have increased the ingredients from the list above. Leave these for a second time to rise and this can be for a shorter period.
Preheat your oven to 450º F/ 232º C towards the tail end of the second rise.
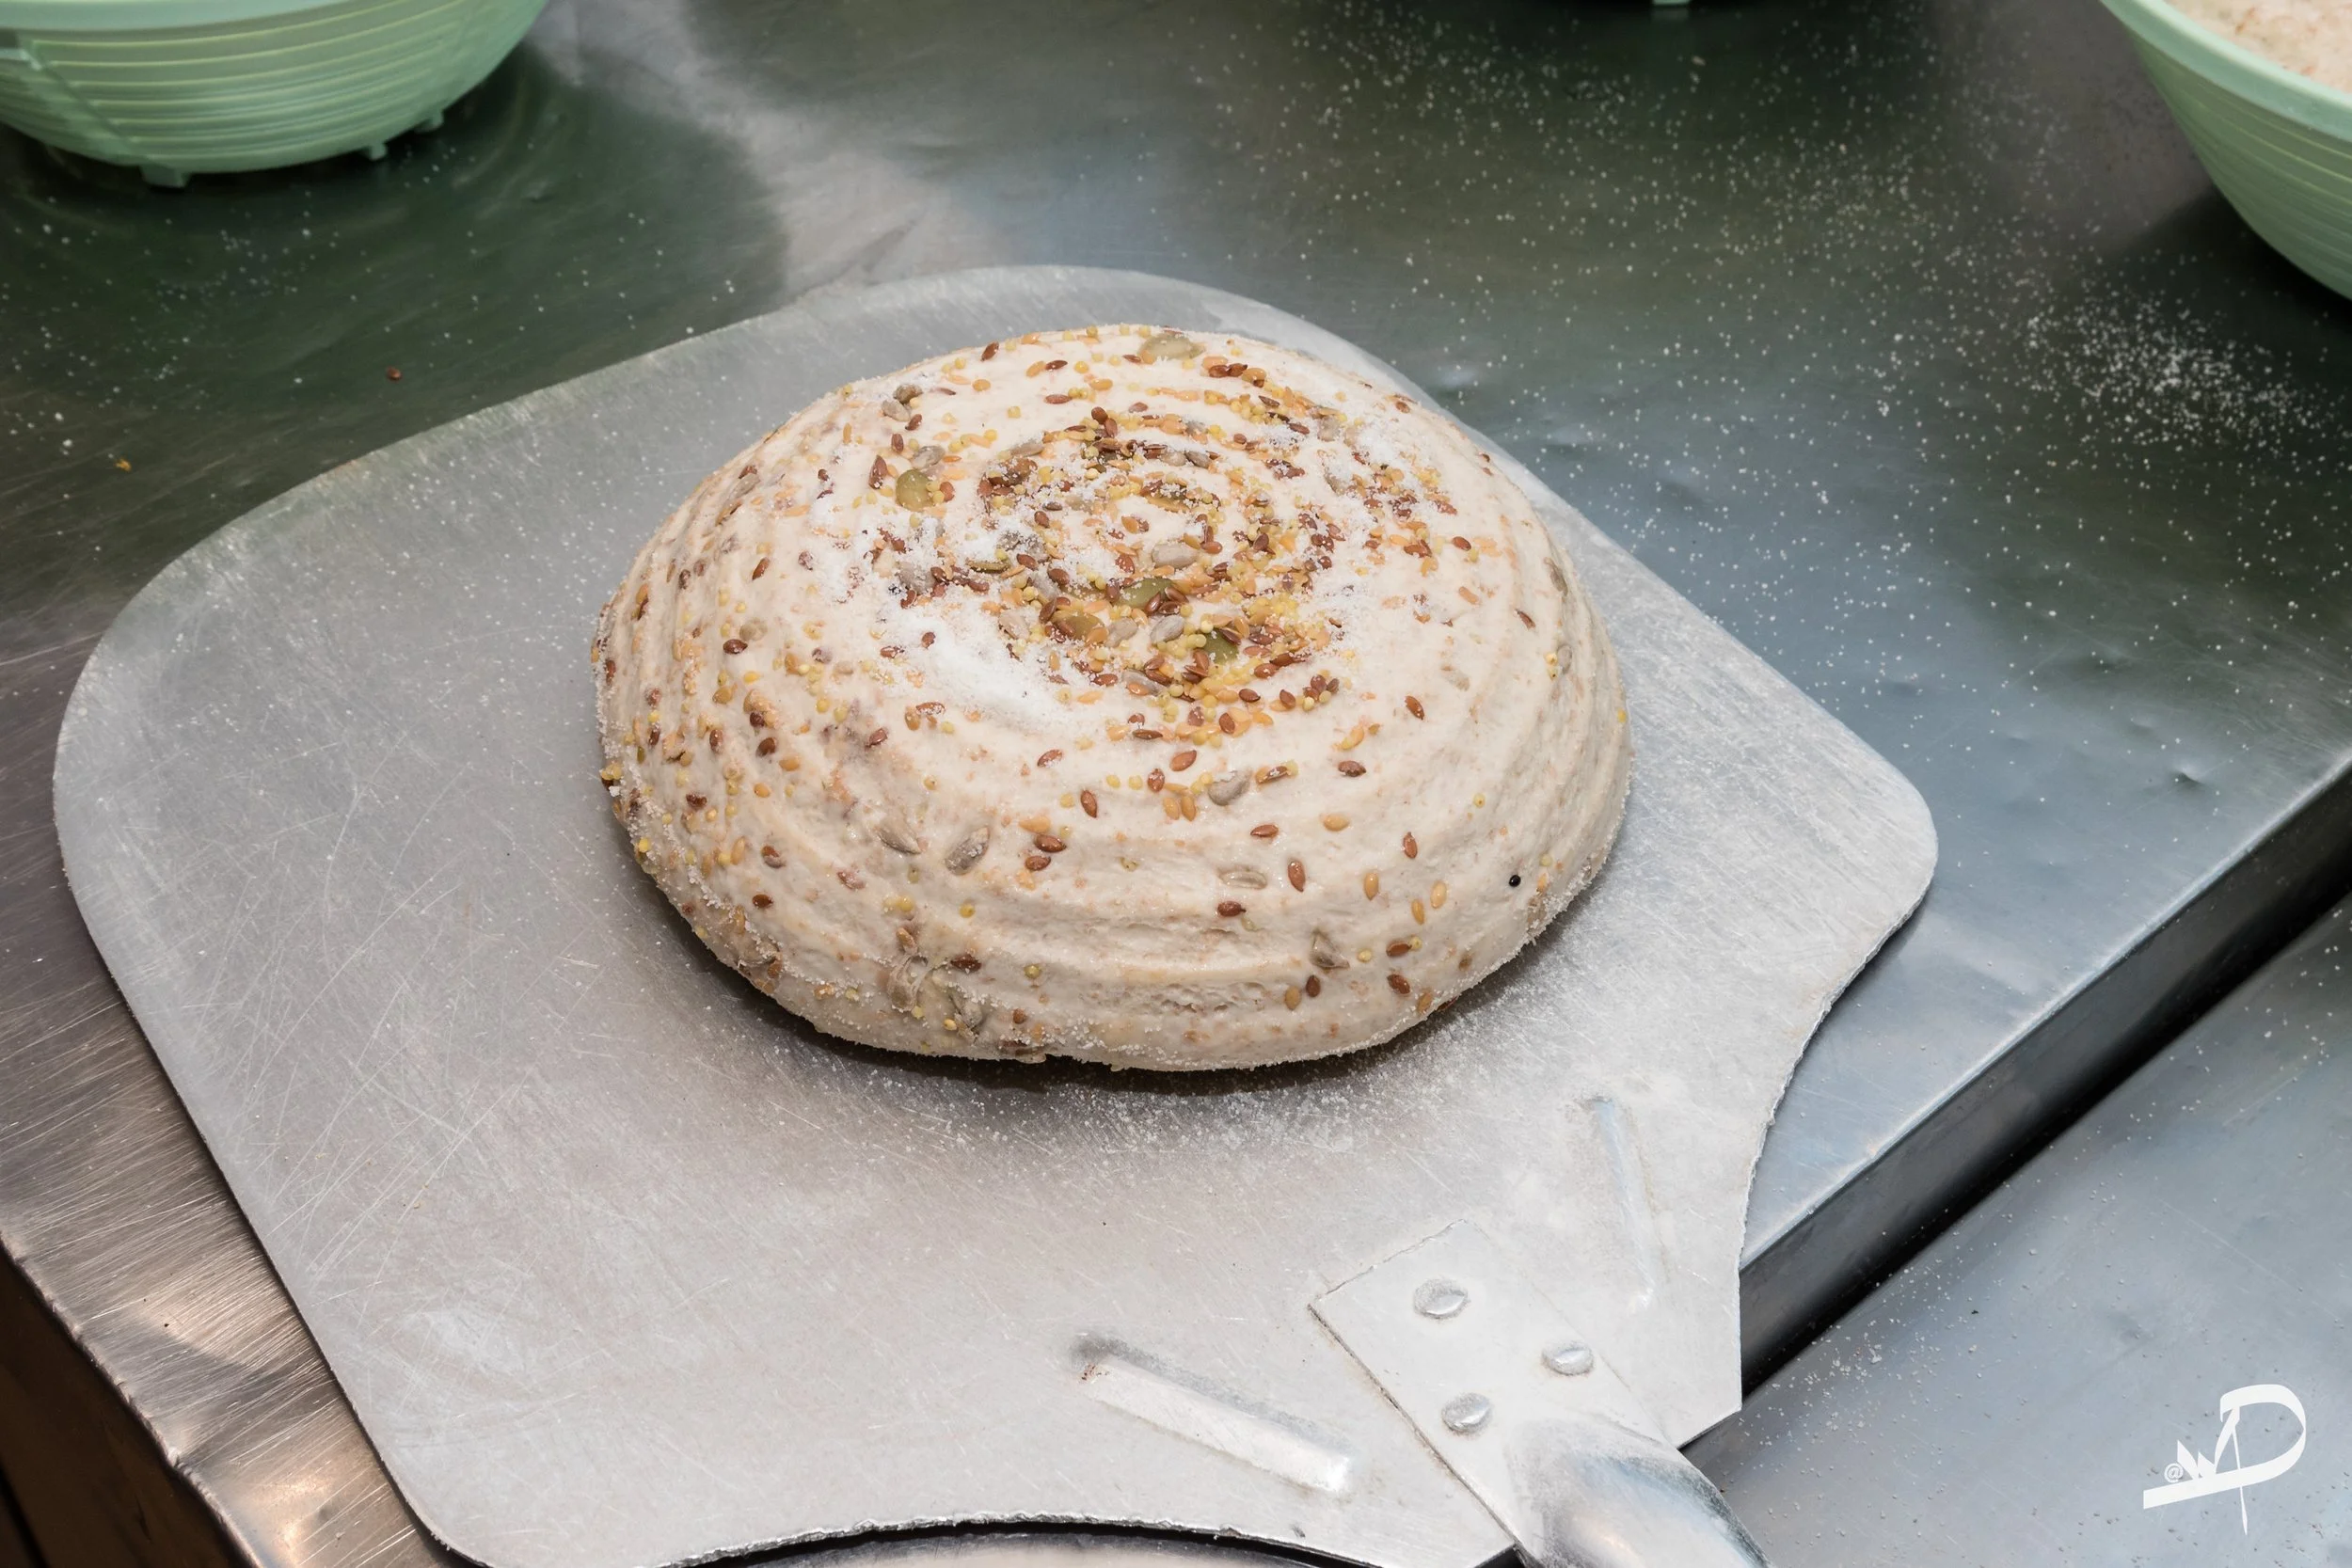
SCORE THE DOUGH - Before putting your bread into the oven, make a shallow slash about 2-3 inches long (or more) in the centre of the dough. Use a bread lame or a small serrated steak knife. The cut should be about 1/4-inch deep.
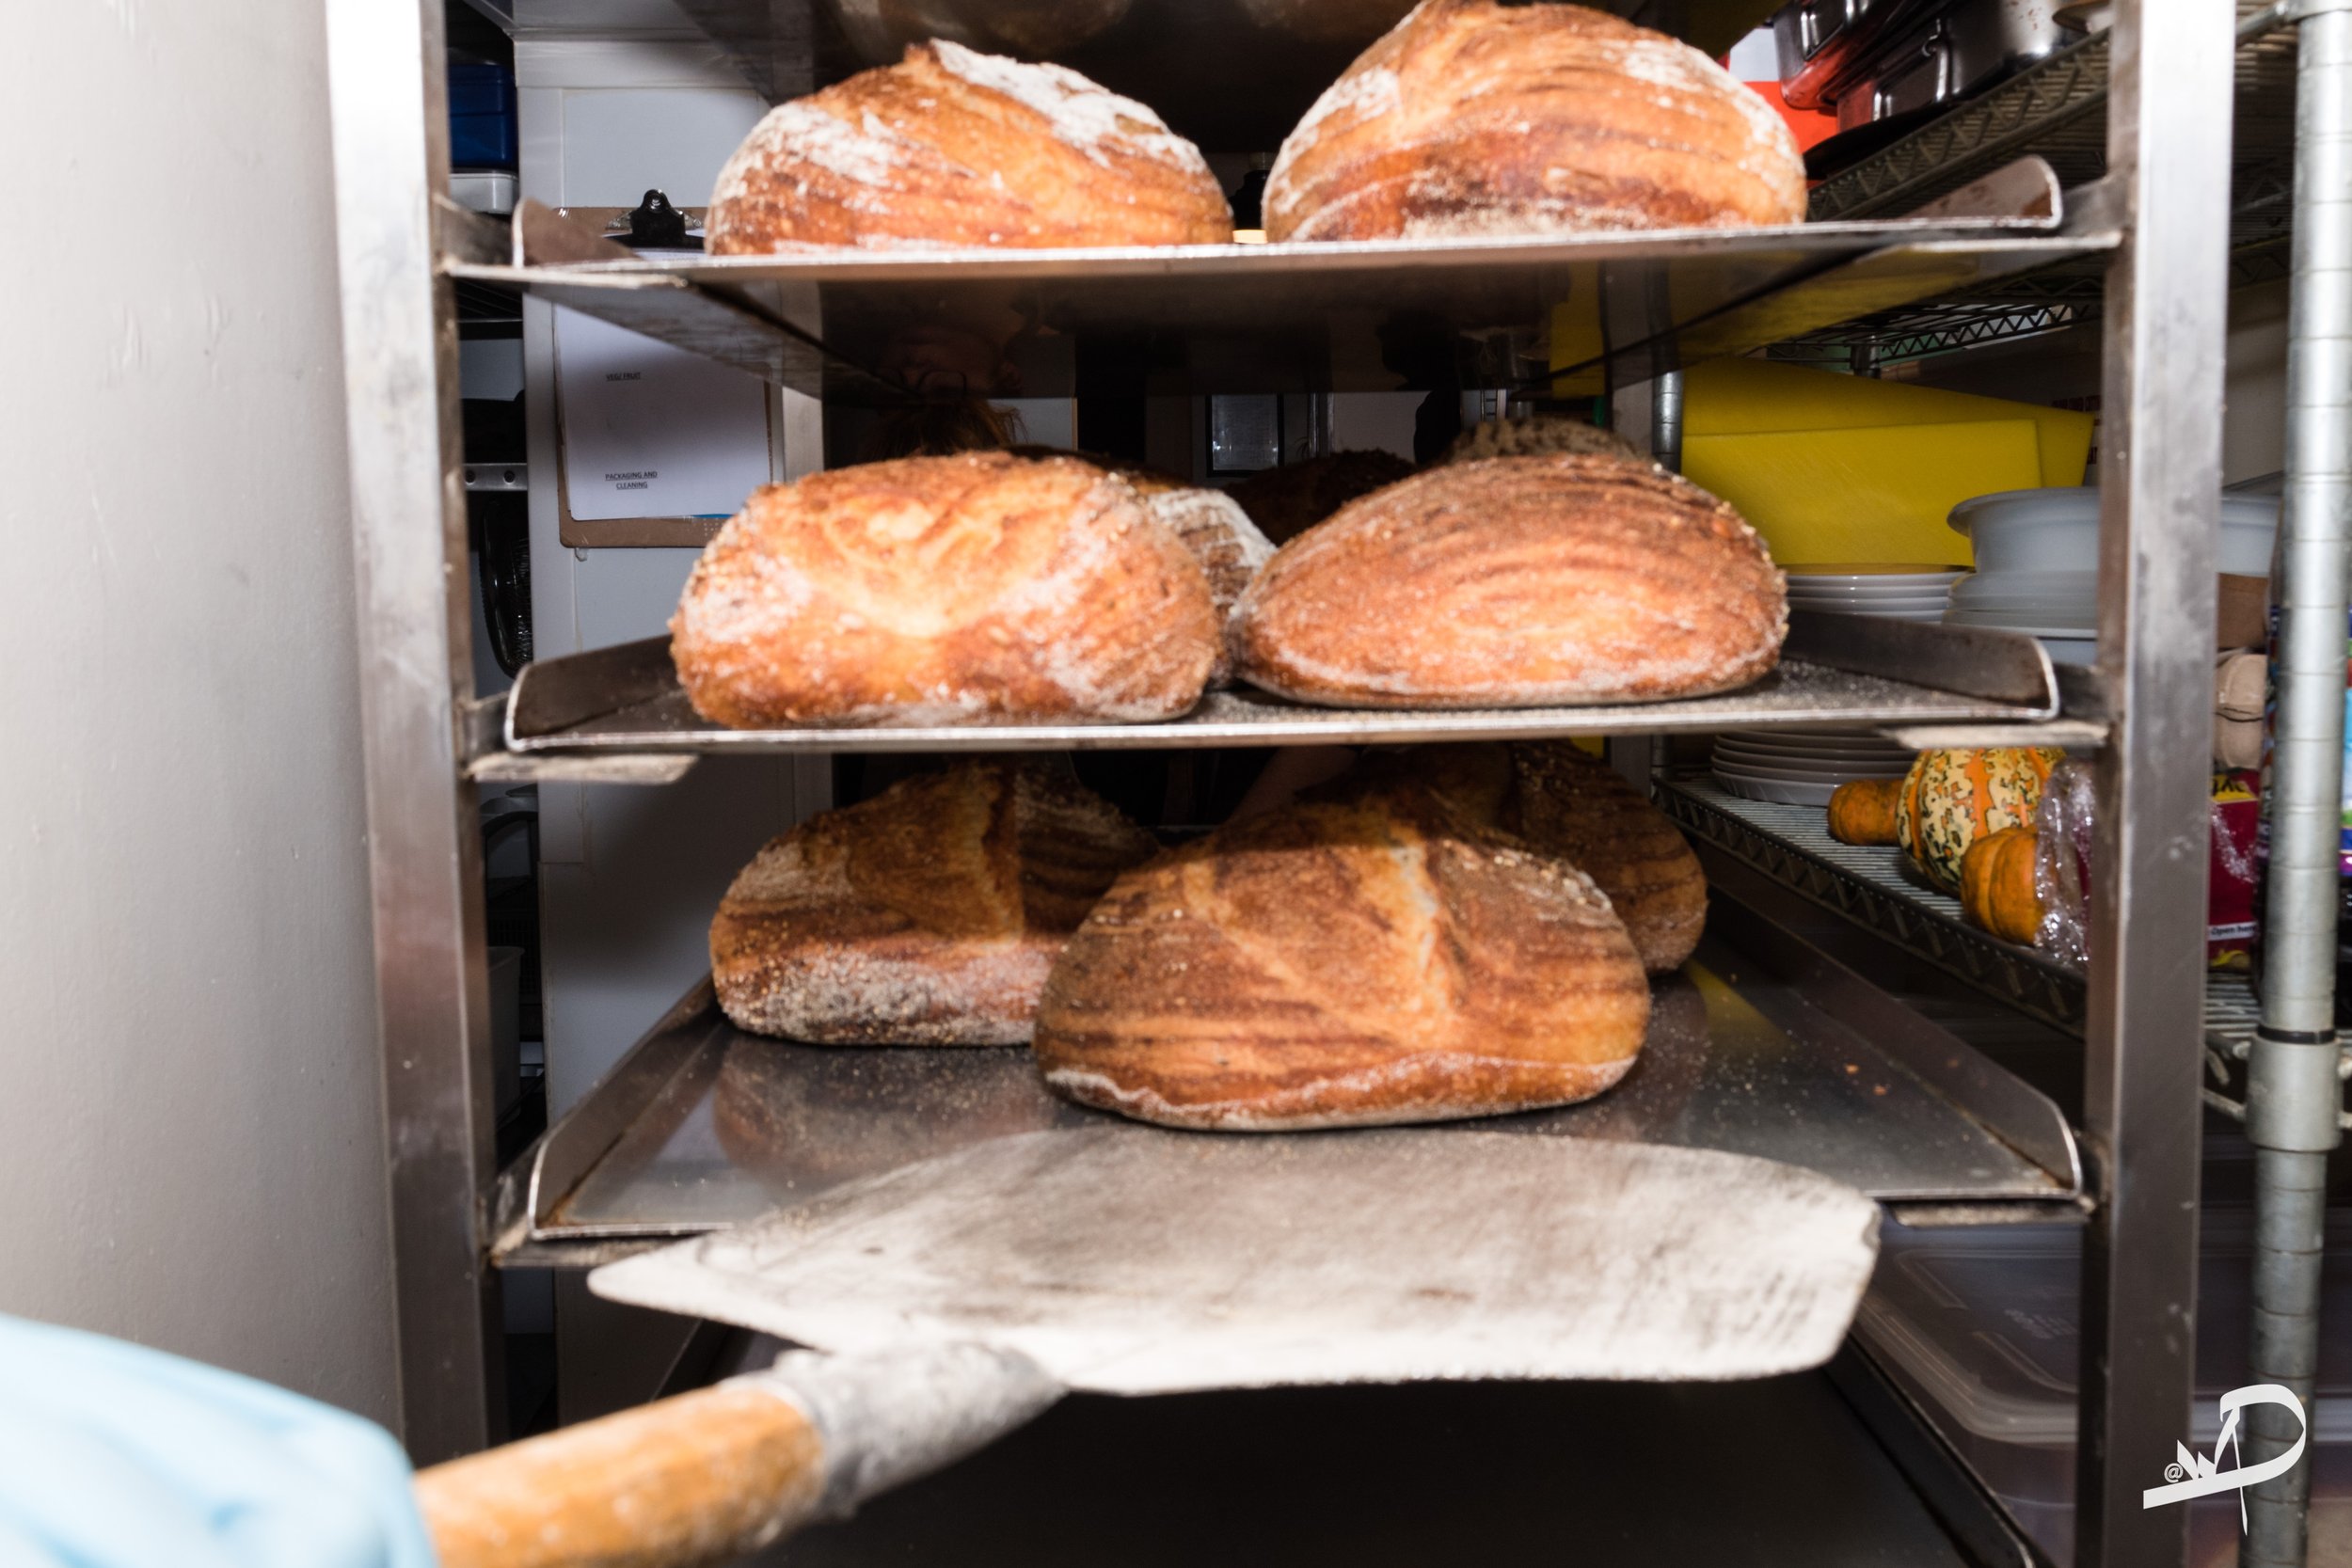
BAKE THE DOUGH - Place the bread into the oven on the centre rack and reduce the temperature to 400 F. Bake for 20 minutes covered for home baking. Remove cover and continue to bake for an additional 40 minutes or until deep, golden brown. Keep in mind that all ovens are different; you might have to make minimal adjustments to these temperatures. You can also take the internal temperature of your bread to double-check that it is done. For sourdough, it should read about 205-210º F/ 96-98º C.
Remove the bread from the oven, and cool on a wire rack for at least an hour before slicing. Don’t cut too soon or else the inside will have a gummy texture!

Behind the Scenes: Food Photography & Styling
During this sourdough journey, I had the pleasure of capturing the process for product photography for restaurants, working alongside Magee Street Bakery. As a Food photographer in Northamptonshire, I focused on lighting, composition, and texture to highlight each stage of bread making, from the bubbly starter to the golden, baked loaves.
Whether you are creating content for your bakery, documenting recipes for a cookbook, or showcasing artisanal breads for restaurant photography, capturing the process with care ensures your images are as appetizing as the final product.
Thank you to Magee Street Bakery for allowing me to photograph their sourdough process, with a cameo of Carl scoring and removing the bread from the oven!
What’s Next?
Enjoyed this post? Drop a comment below and let us know your thoughts!
Subscribe for More: Get monthly tips, tricks, and inspiration to elevate your photography skills.
Take Your Skills Further: Level up with one-to-one personalized tutorials and transform your food photography.
Book a Professional Session
Need professional imagery for your brand?
Collaborate with a specialist in restaurant photography, food photography in Northamptonshire, or product photography for restaurants to create stunning visuals