
The Complicated Complexities of Landscape Photography

Learn All About Landscape Photography
This blog is divided into two key areas:
Setting Filters and When to Use Them for Landscape Photography
Understanding the Bracketing and HDR Process
WHAT IS LANDSCAPE PHOTOGRAPHY?
Landscape photography is a genre of photography that captures the beauty of the natural world, as well as urban environments. It emphasizes large, scenic views and is often used to showcase the grandeur of nature or the intricate details of cityscapes. Here are some popular types and examples of landscape photography:
Seascape photography
Mountain landscape photography
Forest landscape photography
Cloudscape photography
Cityscape photography
Urban landscape photography
Winter & Fall landscape photography
Night, Moon, Golden Hour, Sunset/Sunrise photography
Panorama, Long Exposure, Star Trail, Light painting photography

2. FILTERS TO USE FOR LANDSCAPE PHOTOGRAPHY
Filters are essential tools that can dramatically improve your landscape photography by controlling light, reducing reflections, and enhancing colours. Here are some filters to consider adding to your kit if you’re developing your landscape photography practice:
Polarizing Filters
Purpose: Polarizing filters act like sunglasses for your camera lens. They help reduce glare from reflective surfaces, such as water or glass, while enhancing colour saturation.
Key Benefits:
Enhance colour: Polarizers deepen blues in skies, making them more vivid, and increase contrast between clouds and the sky.
Reduce reflections: They are especially useful when shooting near water or glass, as they minimize reflections and glare, allowing the true colours and details to come through.
Saturate colours: By cutting down reflections from non-metallic surfaces, they improve overall colour saturation, making green foliage more vibrant and landscapes appear richer.
When to Use: Ideal for sunny days when reflections or glare might be an issue, and when you want to boost colour contrast in skies, water, or foliage.

Captured in the midday sun.
This image highlights the blue sky enhanced by a polarizing filter. I've also taken multiple shots to add more depth.
Neutral Density (ND) Filters
Purpose: ND filters reduce the amount of light entering the lens, allowing you to use slower shutter speeds or wider apertures without overexposing your shot.
Key Benefits:
Long exposure photography: ND filters are perfect for capturing long exposures, especially in bright light conditions. This is essential for creating smooth water effects in rivers, waterfalls, and oceans, or capturing cloud movement.
Wider apertures in bright light: In sunny environments, ND filters enable you to use wide apertures for a shallower depth of field, which is otherwise difficult in bright light without overexposing the image.
When to Use: Ideal for long-exposure shots during the day (e.g., silky water effects, cloud movement), or when you want to shoot with a shallow depth of field in bright conditions.

Used a neutral density filter.
This picture was taken with an ND screw-on filter. I recently bought a variable ND filter that adjusts from ND2 to ND400.
Graduated Neutral Density (GND) Filters
Purpose: GND filters are half clear and half shaded, allowing you to balance the exposure between a bright sky and a darker landscape in a single shot.
Key Benefits:
Balance exposure: In scenes with high dynamic range (such as sunsets or sunrises), GND filters help control the bright sky while keeping details in the darker foreground.
Avoid overexposed skies: GND filters help prevent overexposing skies, maintaining detail and colour without darkening the land too much.
When to Use: Perfect for situations where the sky is significantly brighter than the landscape, like during sunrise, sunset, or overcast days.
These types of filters come as different options. Take a look at:
Hard-Edge GND Filter – A filter with a sharp transition between the neutral grey half (for darkening) and the clear half (for leaving other areas unaffected).
Soft-Edge GND Filter – This filter features a gradual transition from dark to clear, which is less pronounced compared to the hard-edge filter.
Reverse GND Filter – Designed specifically for shooting sunrises and sunsets, this filter has the darkest part near the center and becomes lighter toward the top. The bottom half remains clear for the foreground.
These different GND filters allow landscape photographers to handle a variety of lighting conditions, from high-contrast sunsets to subtle light transitions, helping create well-exposed and visually striking images.
Bracketing and HDR Process in Landscape Photography
Bracketing and HDR (High Dynamic Range) photography are important techniques used to capture landscapes with a wide range of light and dark tones, especially when the camera's sensor cannot capture the full range of detail in a single exposure. Here’s a breakdown of the process and how it works.
What is Bracketing?
Bracketing is the process of taking multiple shots of the same scene at different exposure levels. These images are later merged into one well-balanced photo that contains detail in both the shadows and highlights. This technique is particularly helpful when photographing landscapes where there's a big difference between the bright sky and the dark ground.
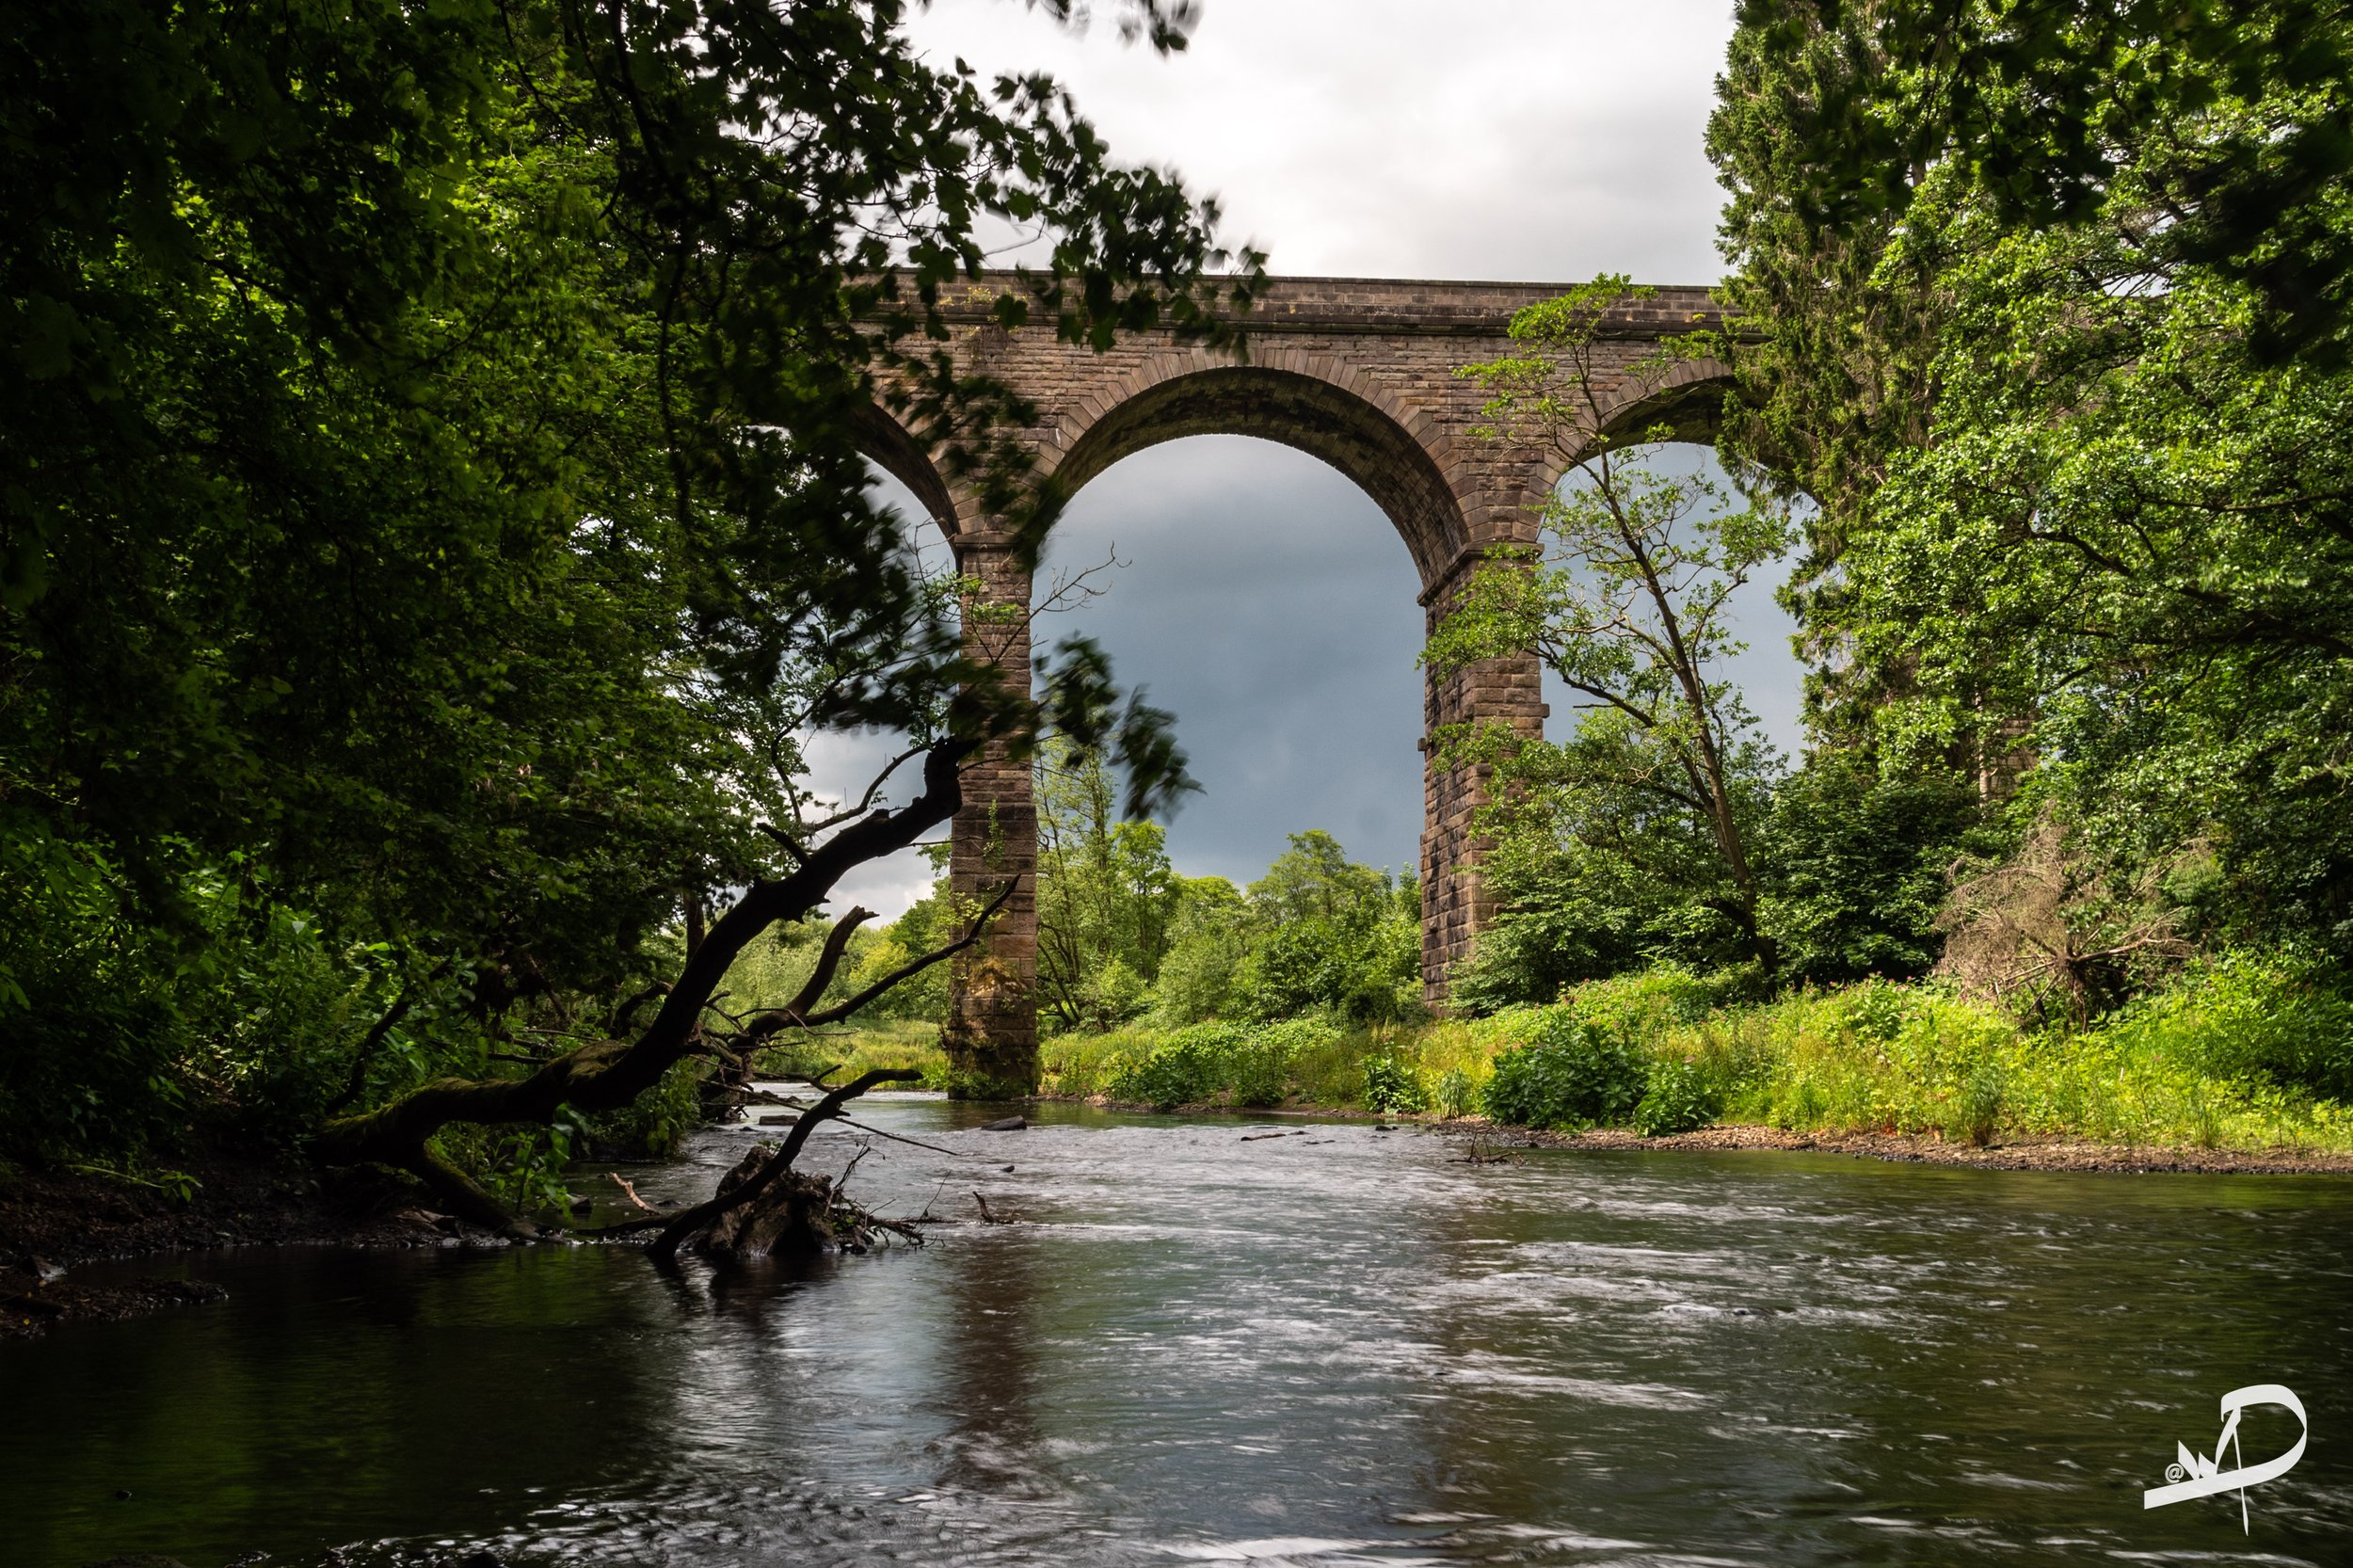
This picture shows wind moving the leaves, captured in a slow-speed shot.

Bracketing Process Steps:
Manual Bracketing:
Set the camera to RAW format: This provides the highest amount of detail and flexibility in post-processing.
Set the camera to manual mode: This allows control over exposure settings.
Choose the lowest ISO setting: Keeps the image quality high by reducing noise and maintaining dynamic range.
Select an aperture: Keep the same aperture for all photos to maintain a consistent depth of field across exposures.
Note the base shutter speed: This is the speed for the “correct” exposure (0EV).
Manually adjust the shutter speed: Start with an underexposed shot (e.g., -4EV) and gradually adjust the shutter speed by 1-stop increments until you reach the desired overexposed shot (+4EV). This typically results in three to five images with varying exposure levels.
Auto-Exposure Bracketing (AEB):
Most modern cameras have an AEB mode that automates this process. In this mode, the camera automatically takes three or more photos at different exposure levels (e.g., -2EV, 0EV, +2EV) with just one press of the shutter button.
Why Use AEB: This saves time in fast-changing light conditions (e.g., sunset), and is useful for scenes where manual bracketing may be too slow.

+ 1 exposure

Correct exposure

- 1 expsoure
What is HDR (High Dynamic Range) Photography?
HDR photography is the process of combining multiple bracketed images into one final photo that captures a greater dynamic range of brightness and colour than a single image can achieve. The goal of HDR is to create an image that retains detail in both the highlights (bright areas) and shadows (dark areas), providing a more realistic view of the scene.
HDR Process:
Capture Multiple Exposures:
Use the bracketing process to capture underexposed, correctly exposed, and overexposed images of the same scene.
Merge Photos in Post-Processing:
Software like Adobe Lightroom, Photoshop, or dedicated HDR programs
The software analyses the exposure levels in each photo and combines the best parts of each exposure into a single image, creating a balanced, well-exposed photo.
Adjustments:
After merging, adjustments such as contrast, saturation, and sharpness are often made to fine-tune the final image.
HDR can be used to create either natural-looking images or highly stylized, dramatic effects depending on the photographer's vision.

FINAL EDITED HDR IMAGE
Why Does HDR Matter?
In landscape photography, there is often a large contrast between the bright sky and the darker land, especially at sunrise or sunset. A single photo might either blow out the sky (overexposed) or lose detail in the shadows (underexposed). By using HDR, photographers can:
Recover more detail in the highlights and shadows.
Create a balanced exposure where all areas of the scene are well-lit and retain texture.
Reproduce what the human eye sees more accurately, as our eyes naturally adjust to both bright and dark areas in a scene.
Considerations for Bracketing and HDR:
Wind or Moving Objects: HDR may not work well if there are moving elements in the scene (e.g., leaves blowing in the wind, moving water) as it can result in "ghosting" where parts of the image appear blurry or doubled.
Exposure Range: Typically, 3-5 shots (-2, 0, +2 EV) are sufficient for most landscapes. However, more shots might be required for scenes with extremely high contrast.
Final Look: While HDR can enhance details, over-processing can lead to unnatural-looking images. Subtlety is key for realistic HDR.
By mastering the bracketing and HDR process, landscape photographers can tackle challenging lighting situations and produce stunning images with rich detail and dynamic range.
Did you enjoy this blog? Stay tuned for the next Landscape Photography post to learn more or book a one-on-one session.
Thank you for reading! If you have questions or comments, please leave them below. If you want more information or have blog suggestions, share them in the comments.
Thank You For Reading My Blog
If You Enjoyed This Blog, Then Please Sign Up For My Regular Blog Newsletter.
Please leave any comments or subject suggestions that you would wish for me to cover on the subject of Photography.
Thank you for reading.