
Take depth of field photographs around your home & garden

Blog entry
26th May
What do you know about depth of field?
Depth of field is the zone of acceptable sharpness within a photo that is in focus. When attempting to capture an image that represents this technique, you are required to consider these three points:
Aperture (f-stop)
Distance from the subject to the camera
The focal length of the lens on your camera
Take a quick watch of this 2 min video to find out more.
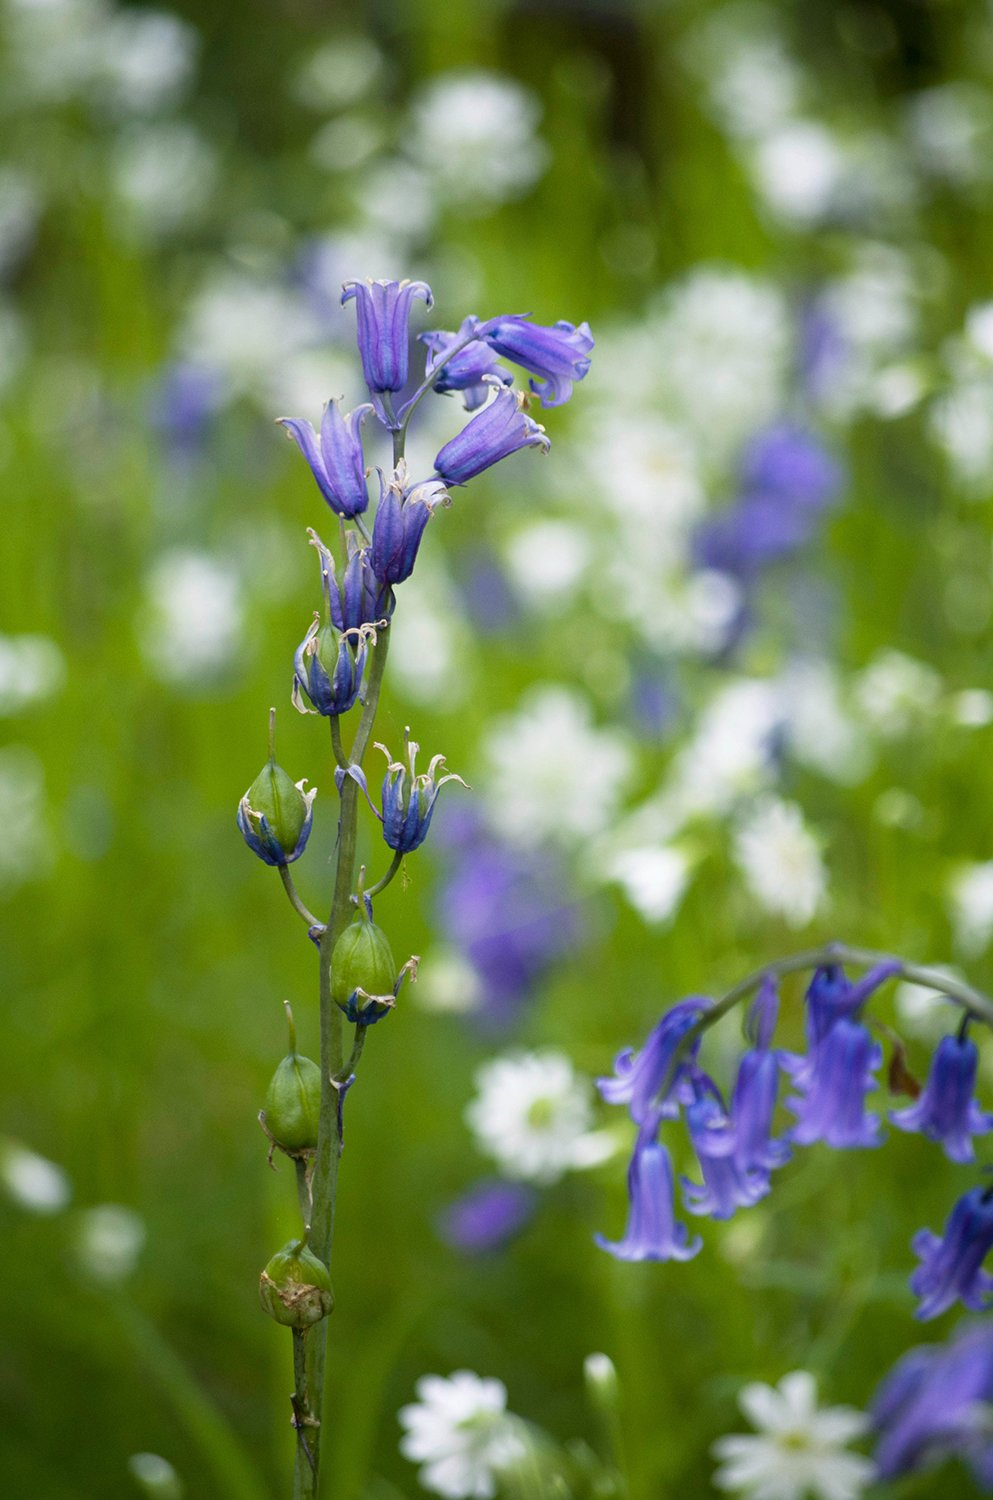
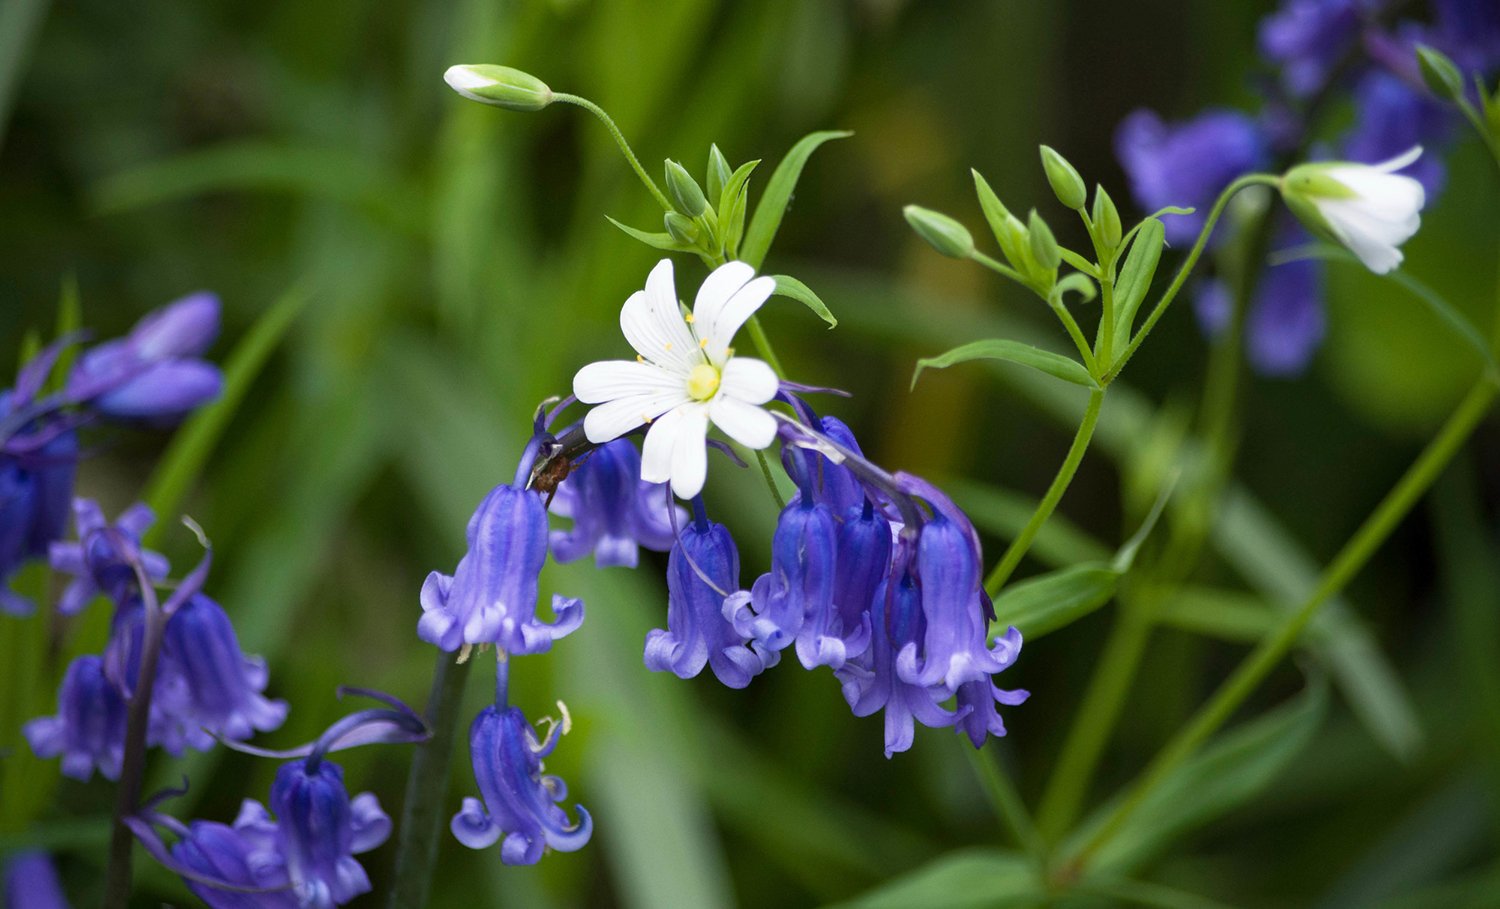
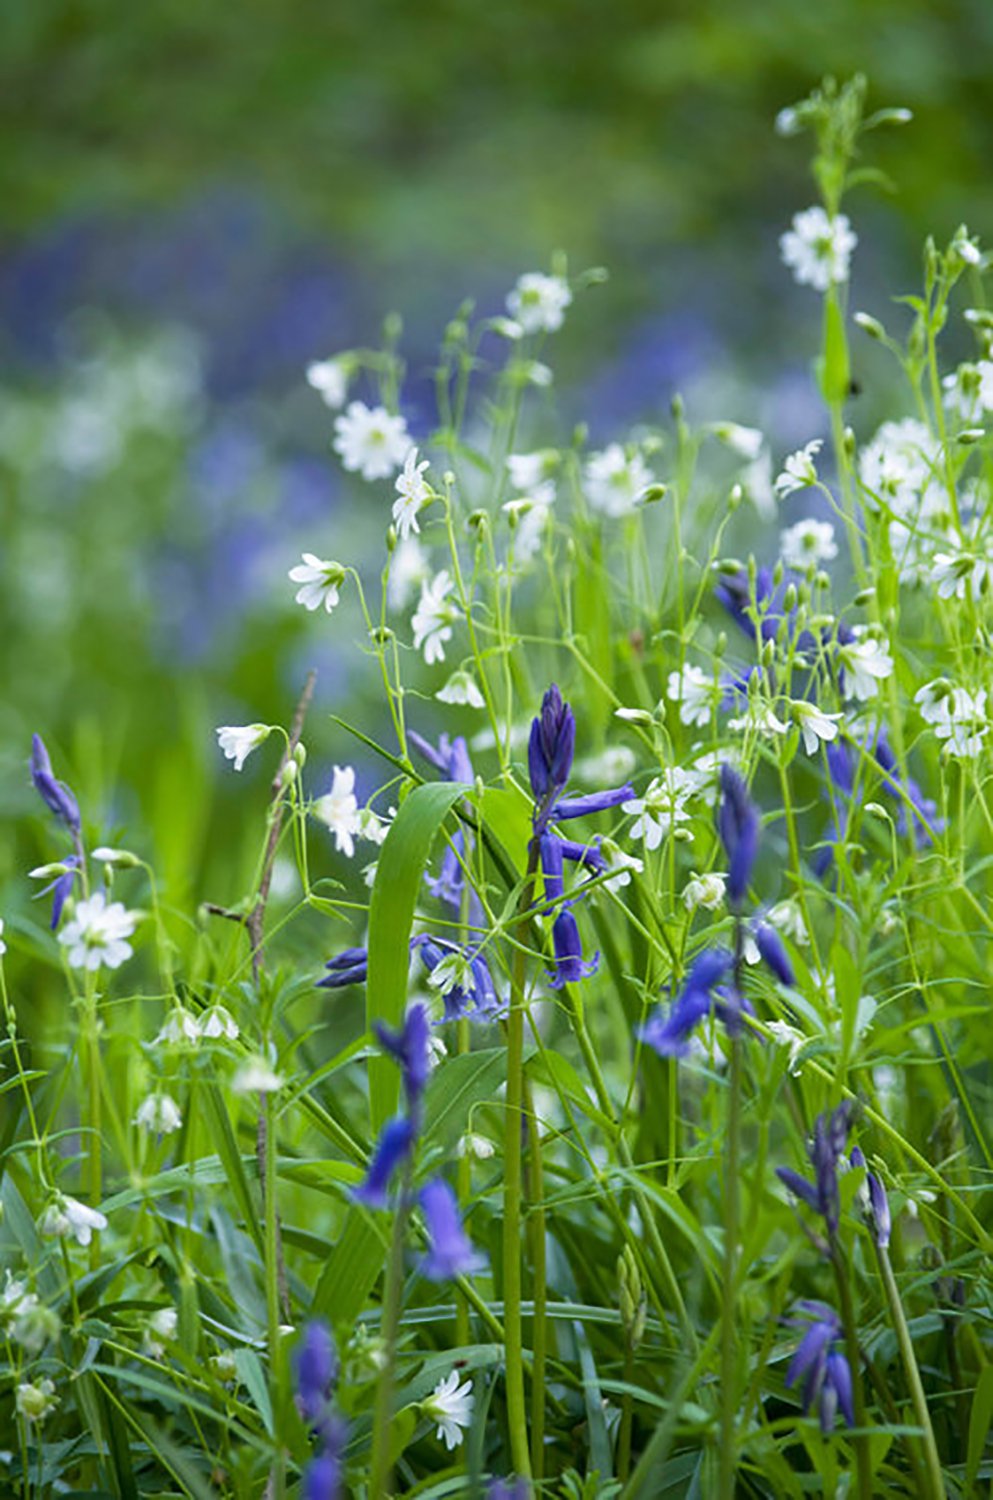
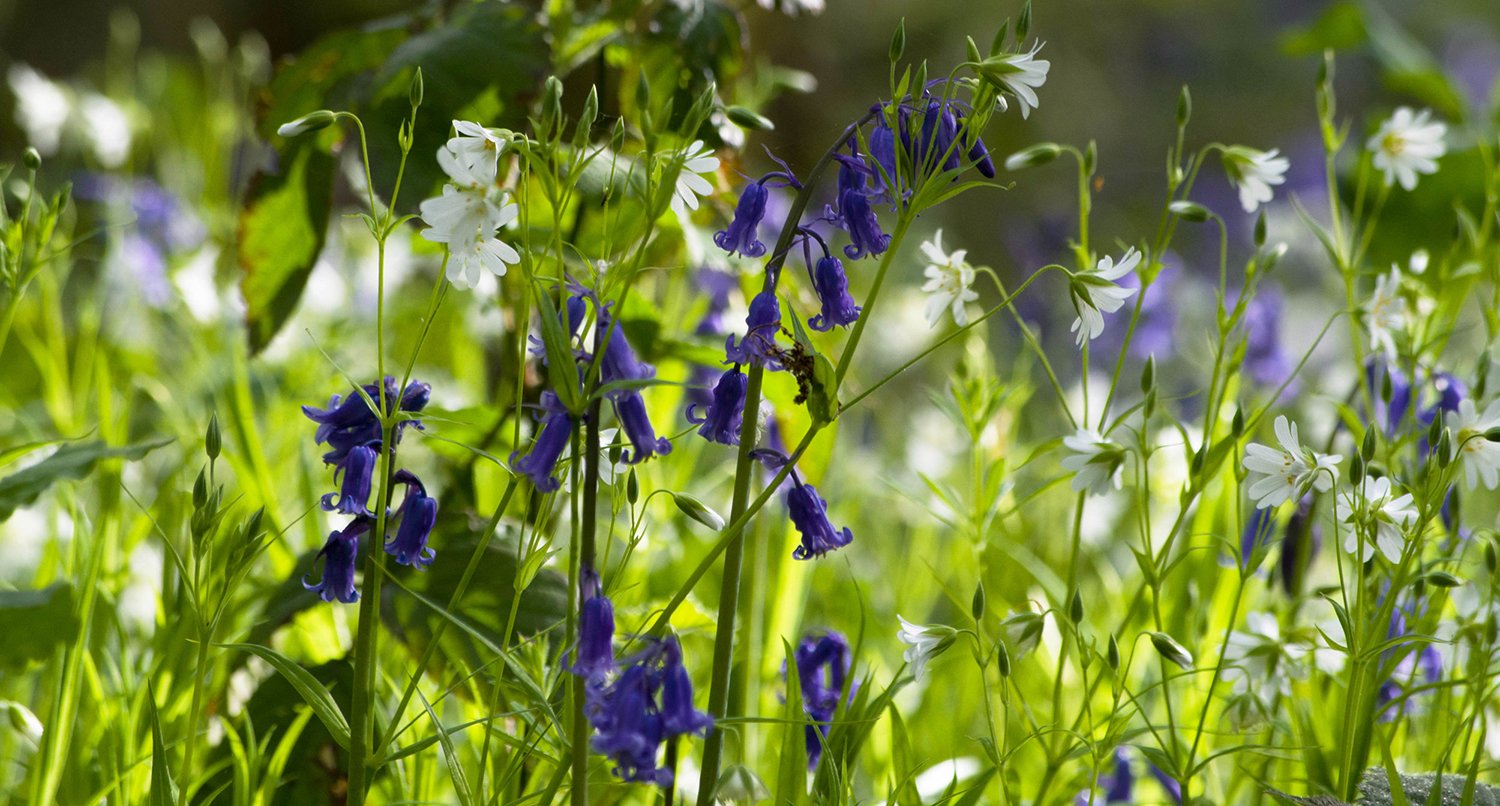
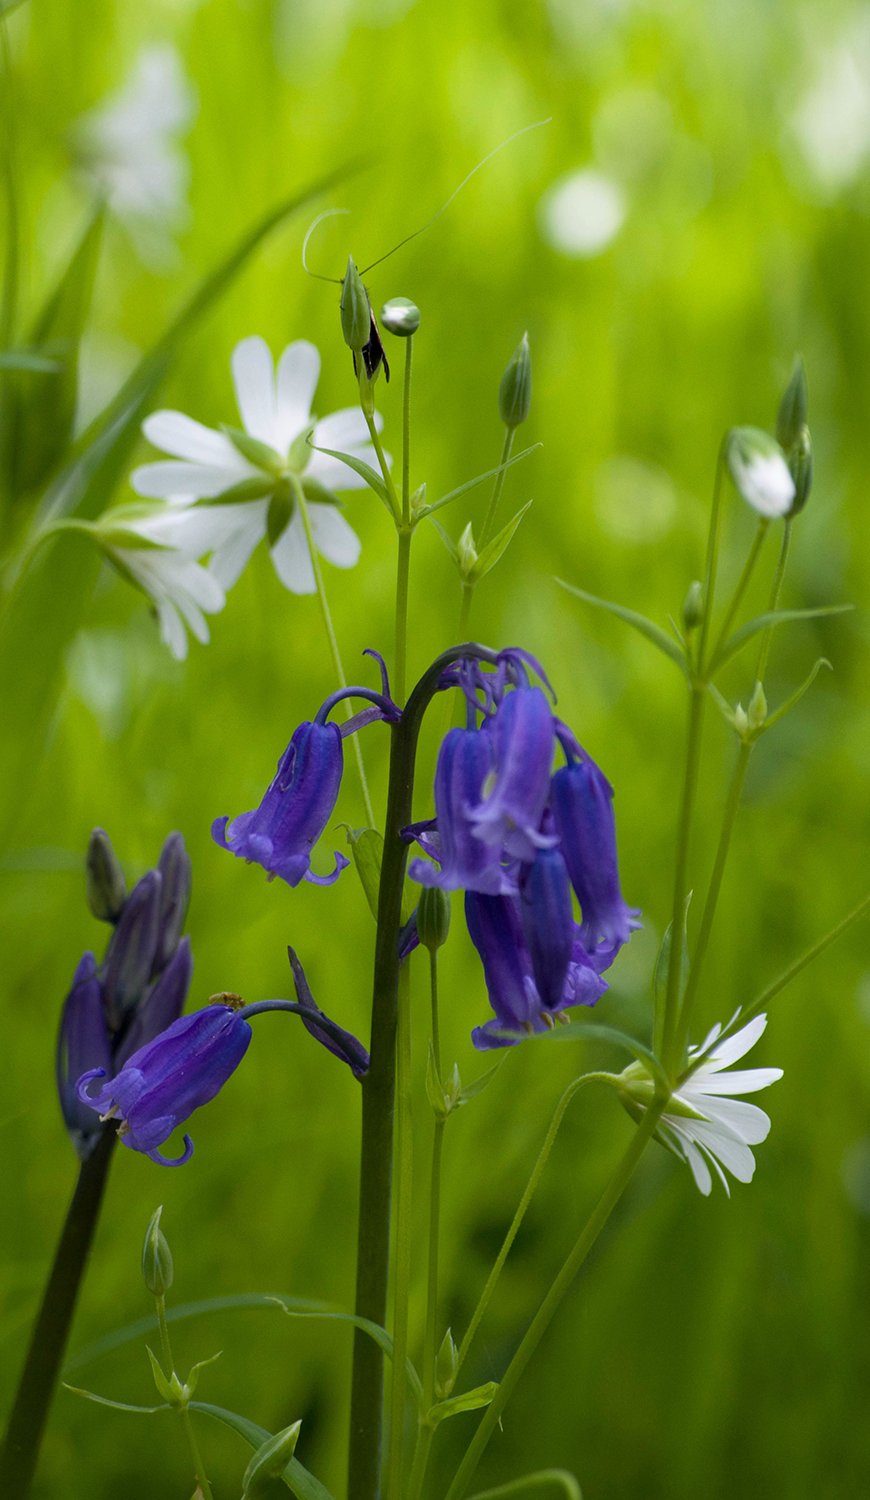
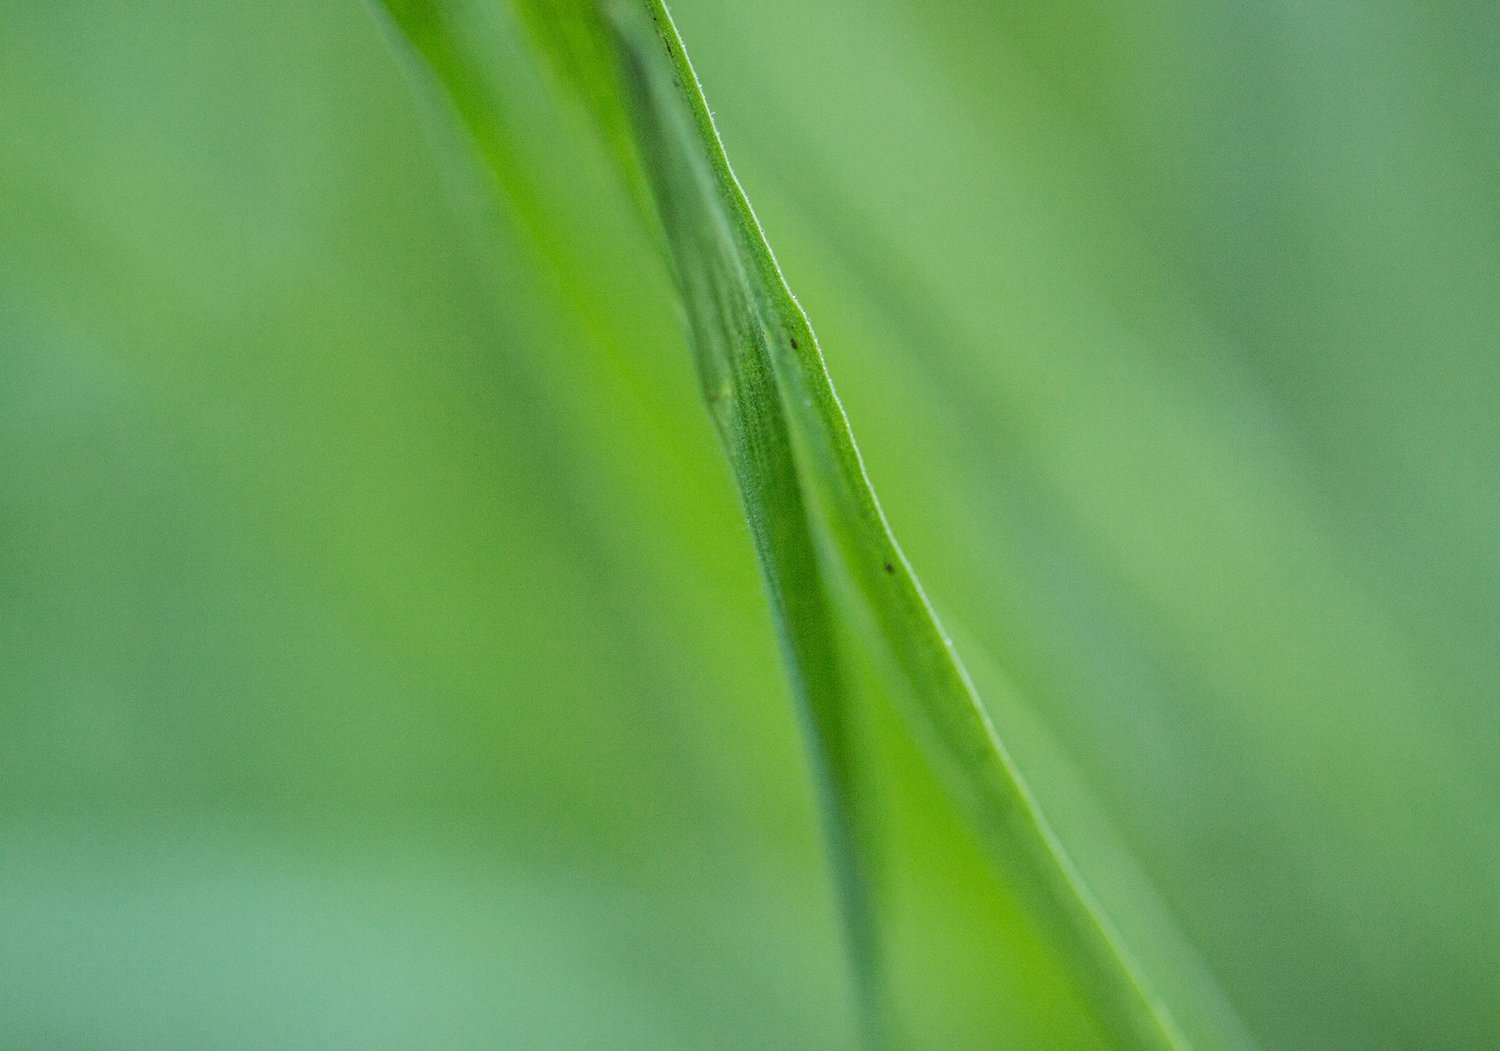
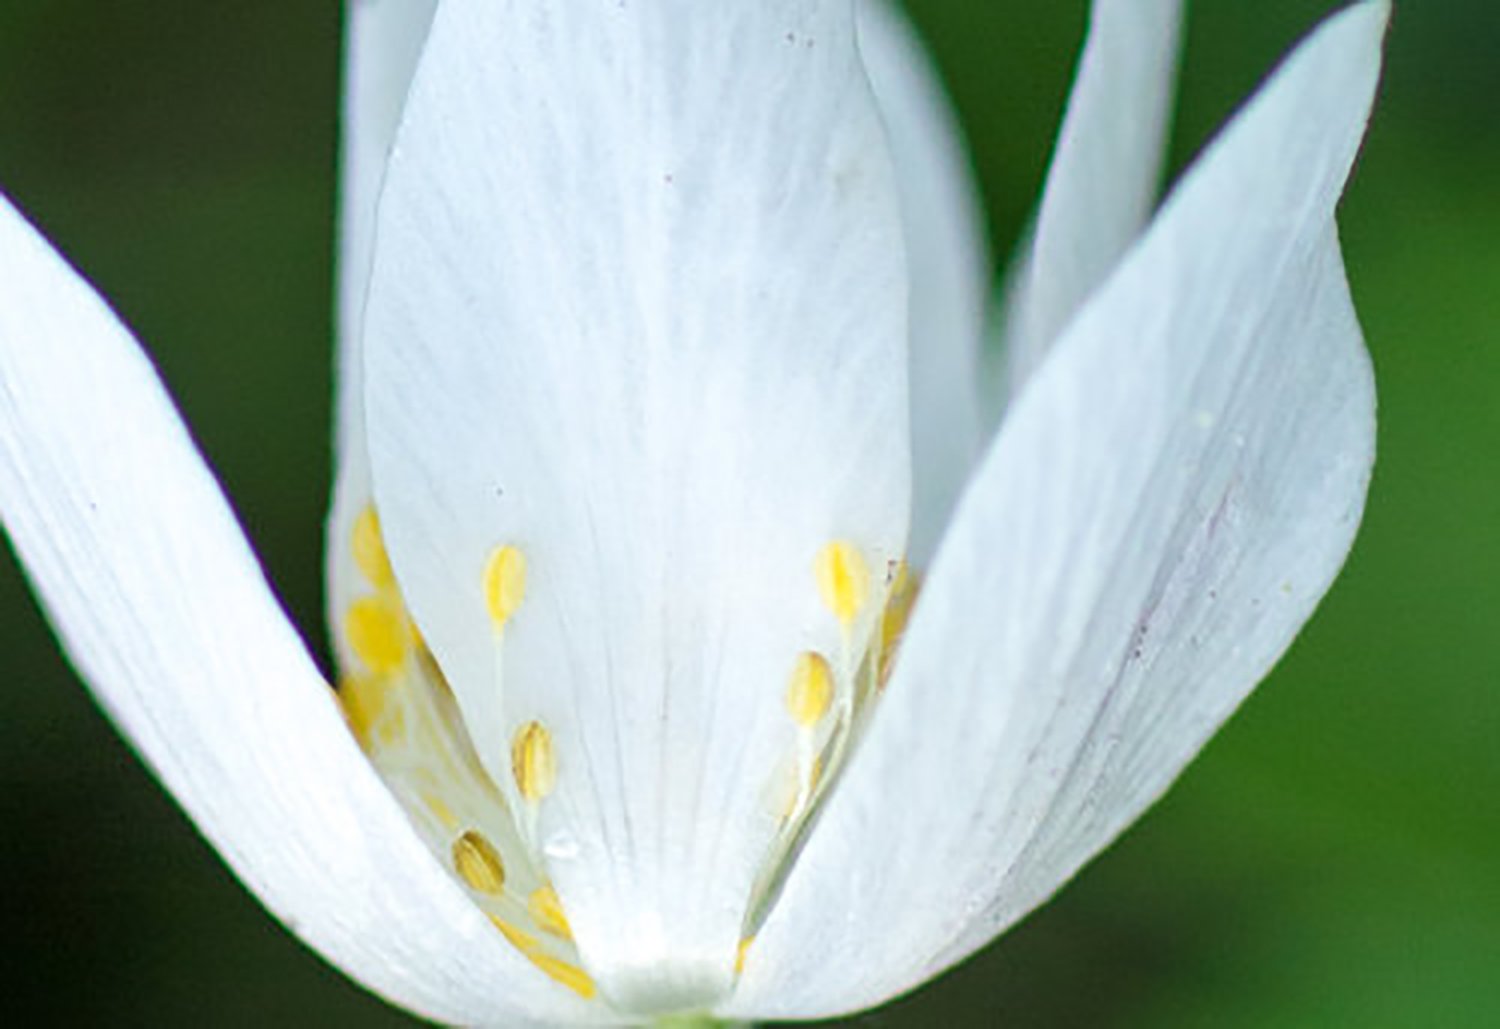
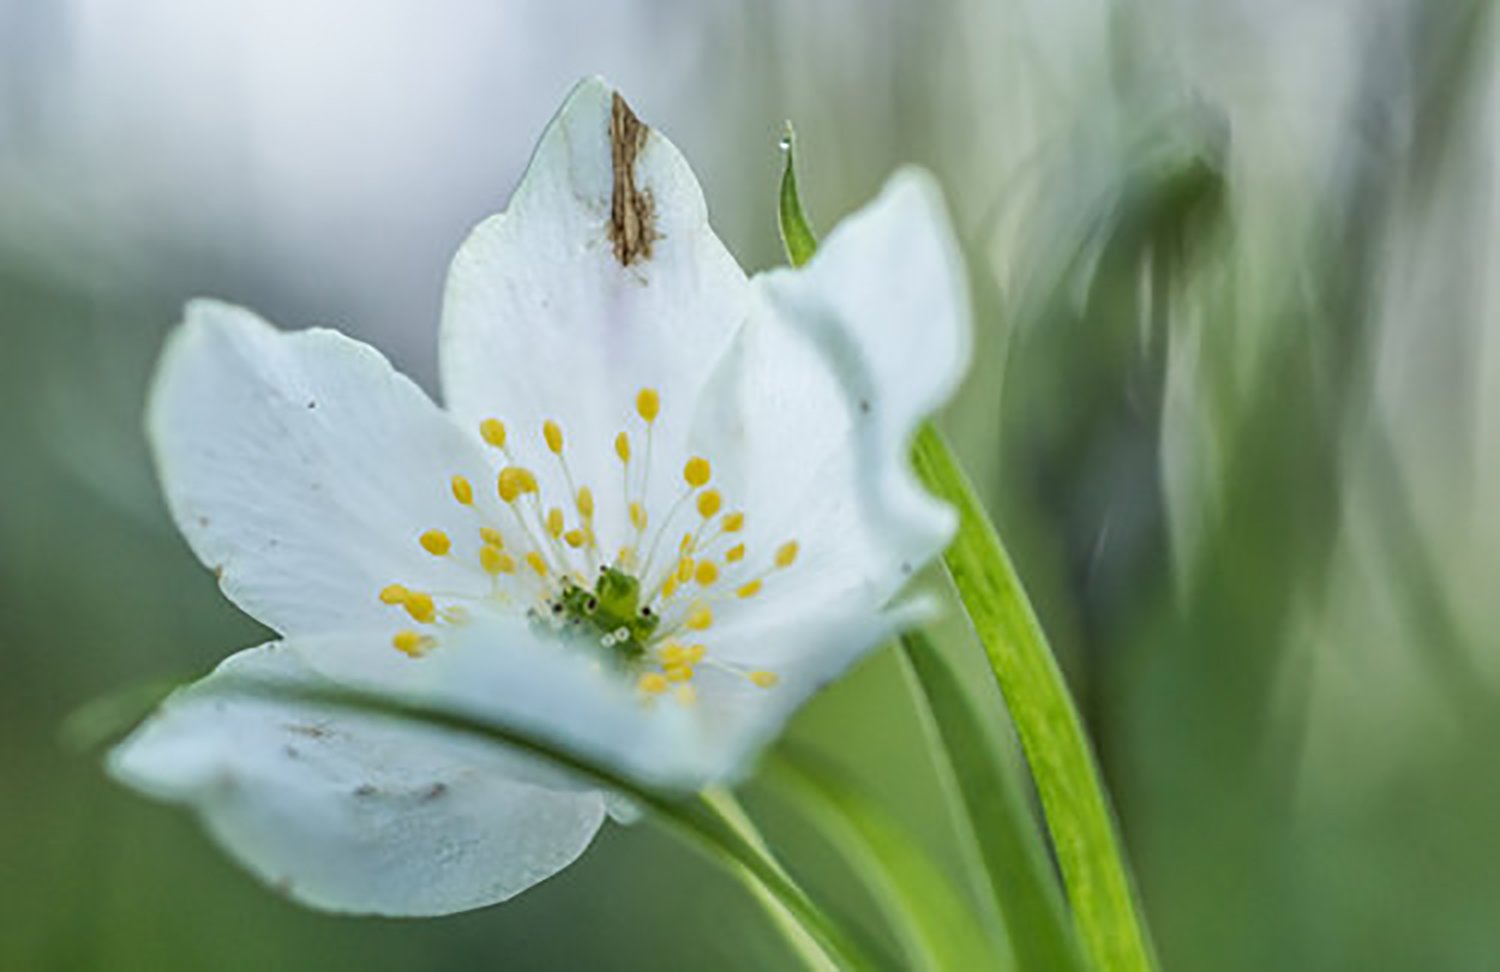
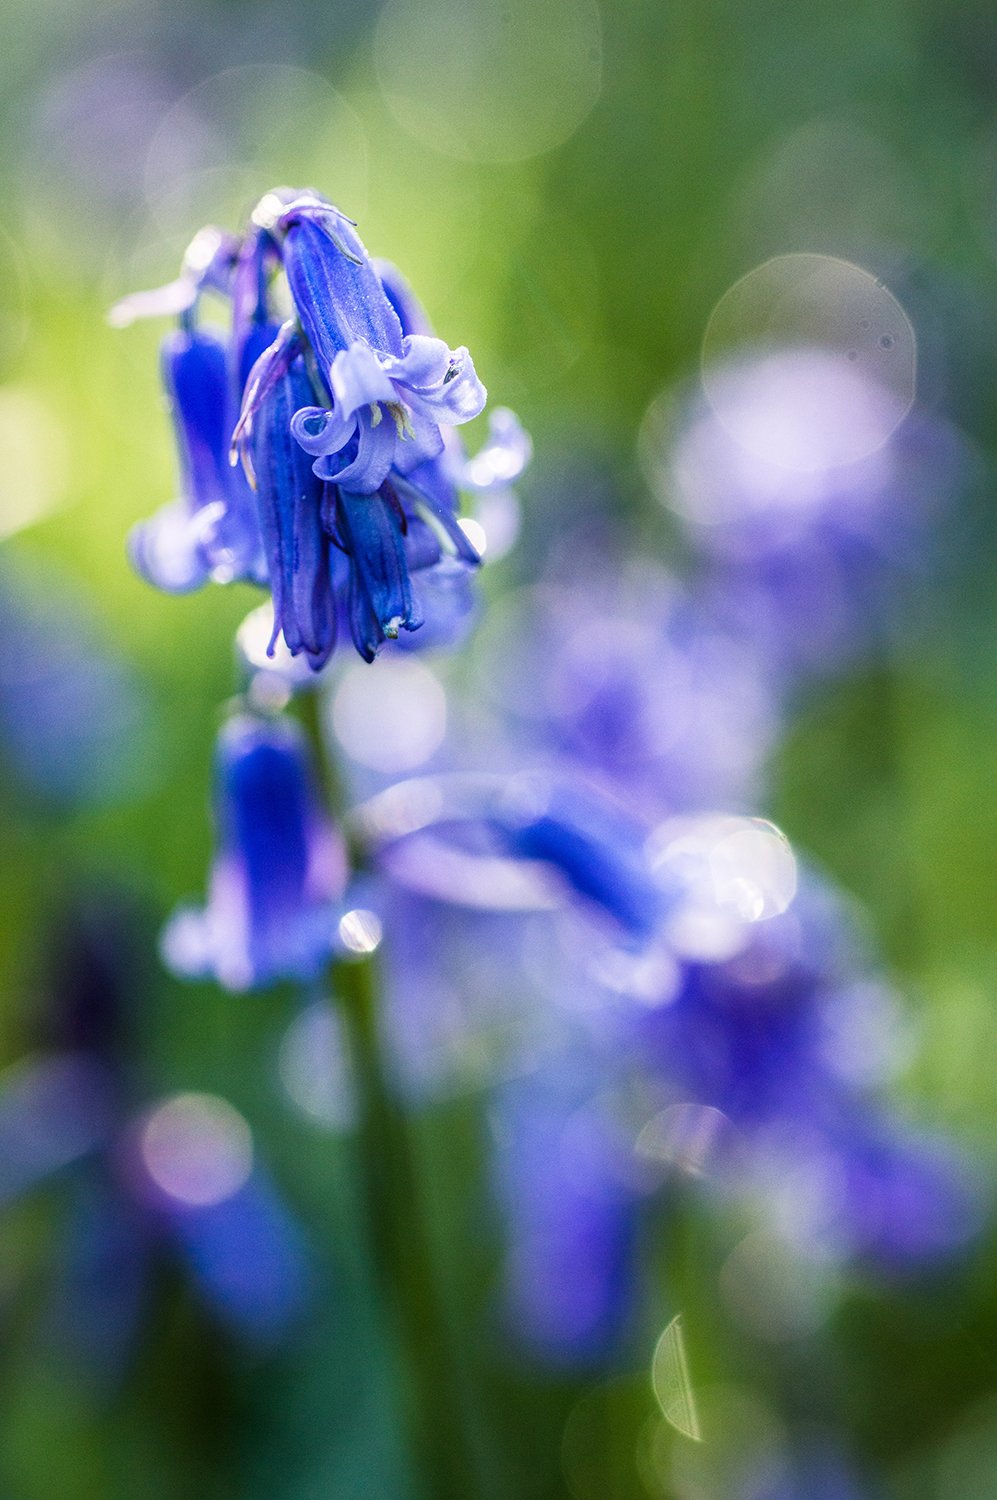
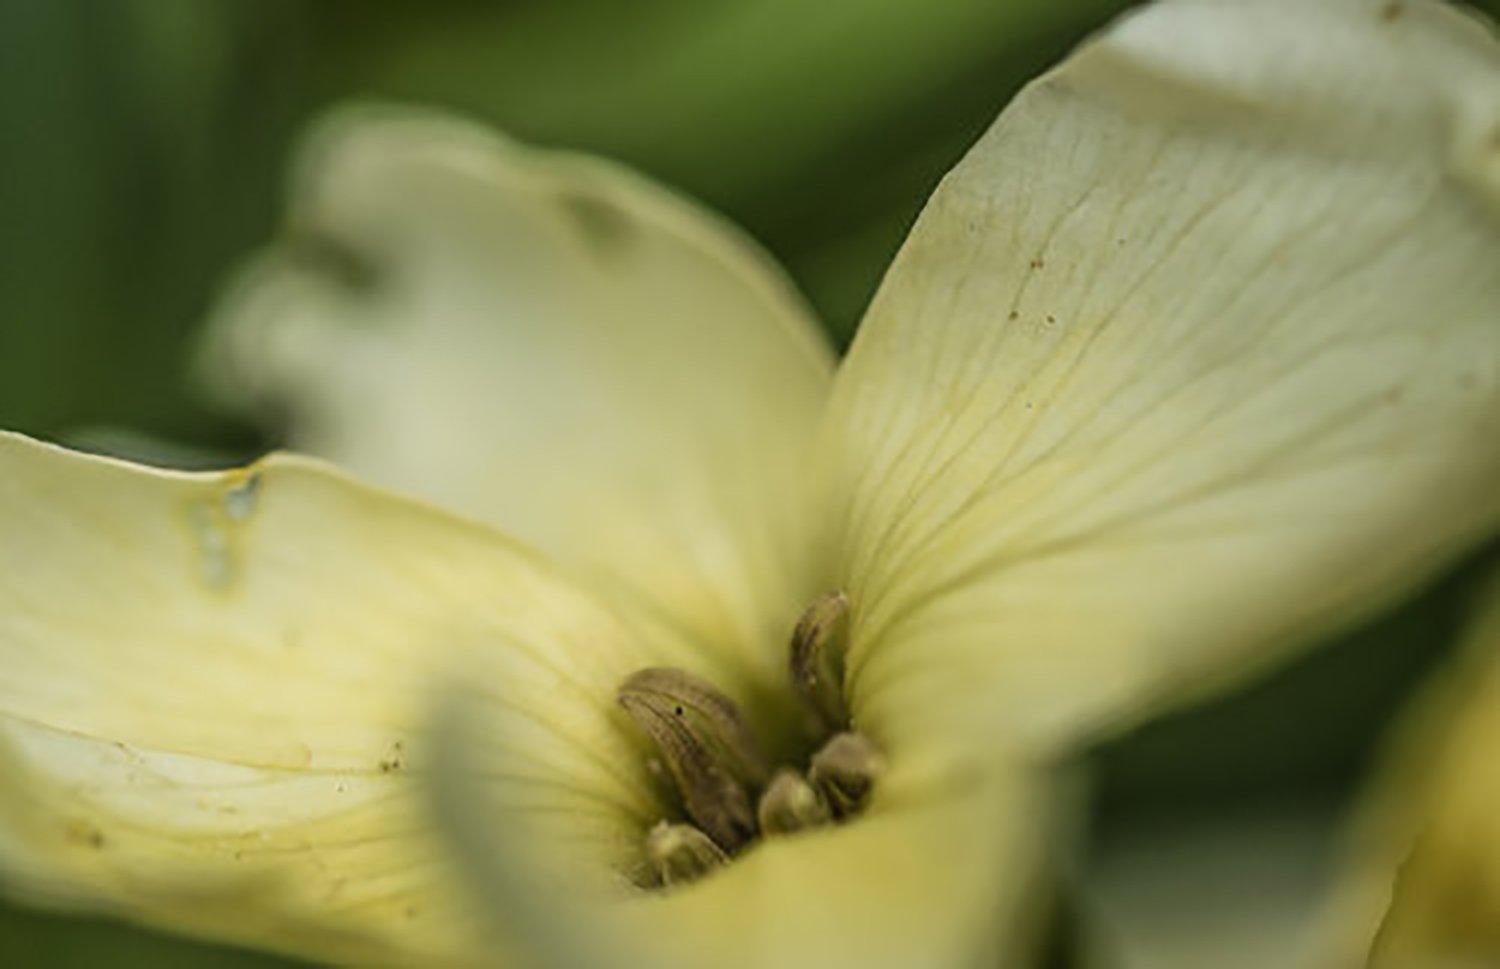
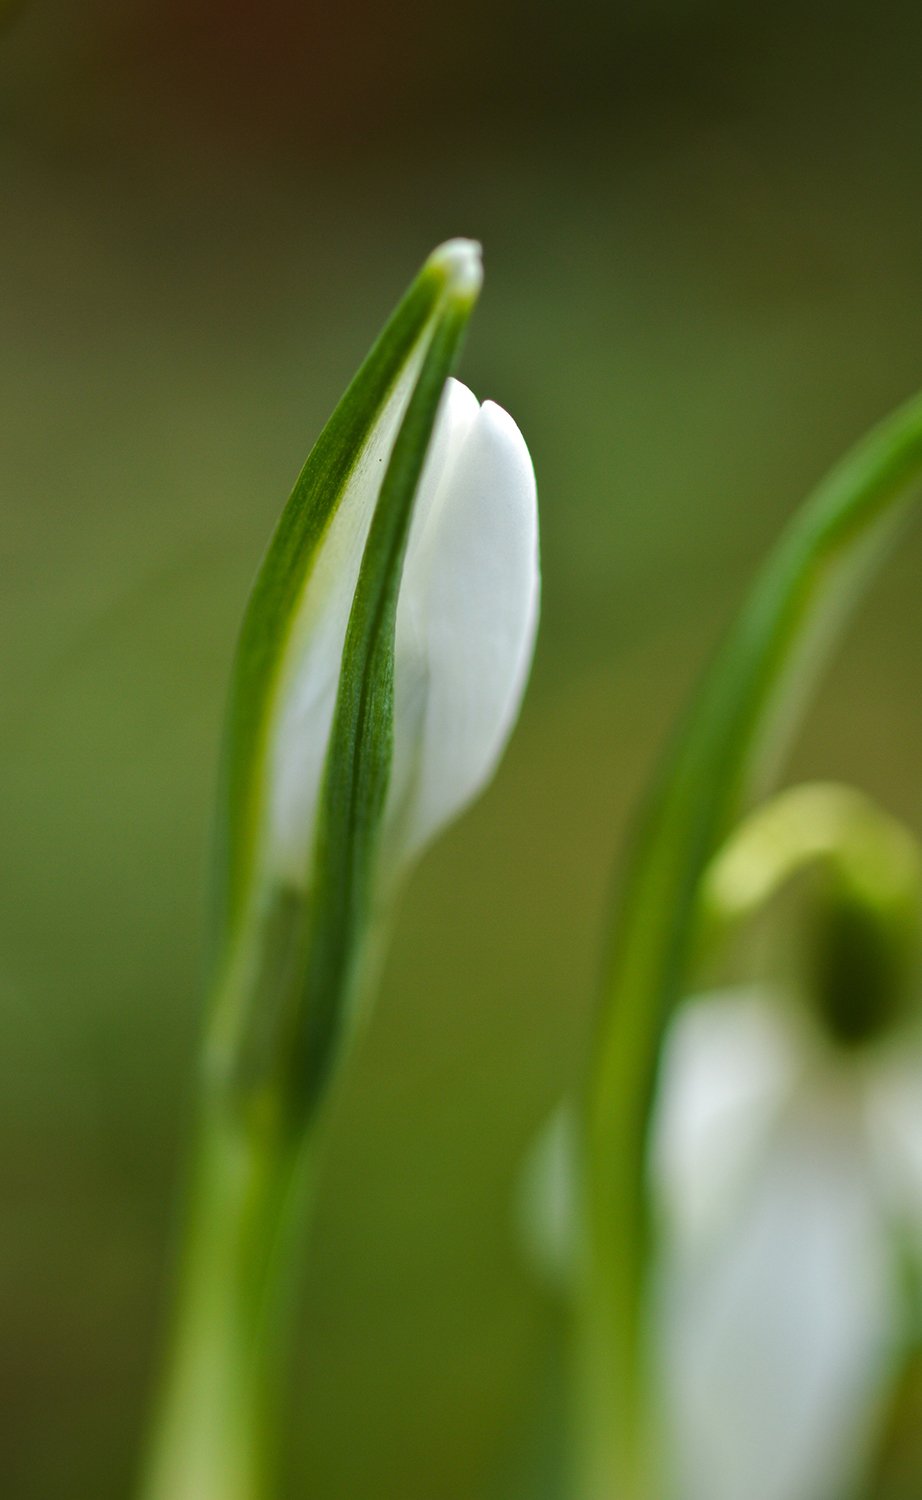
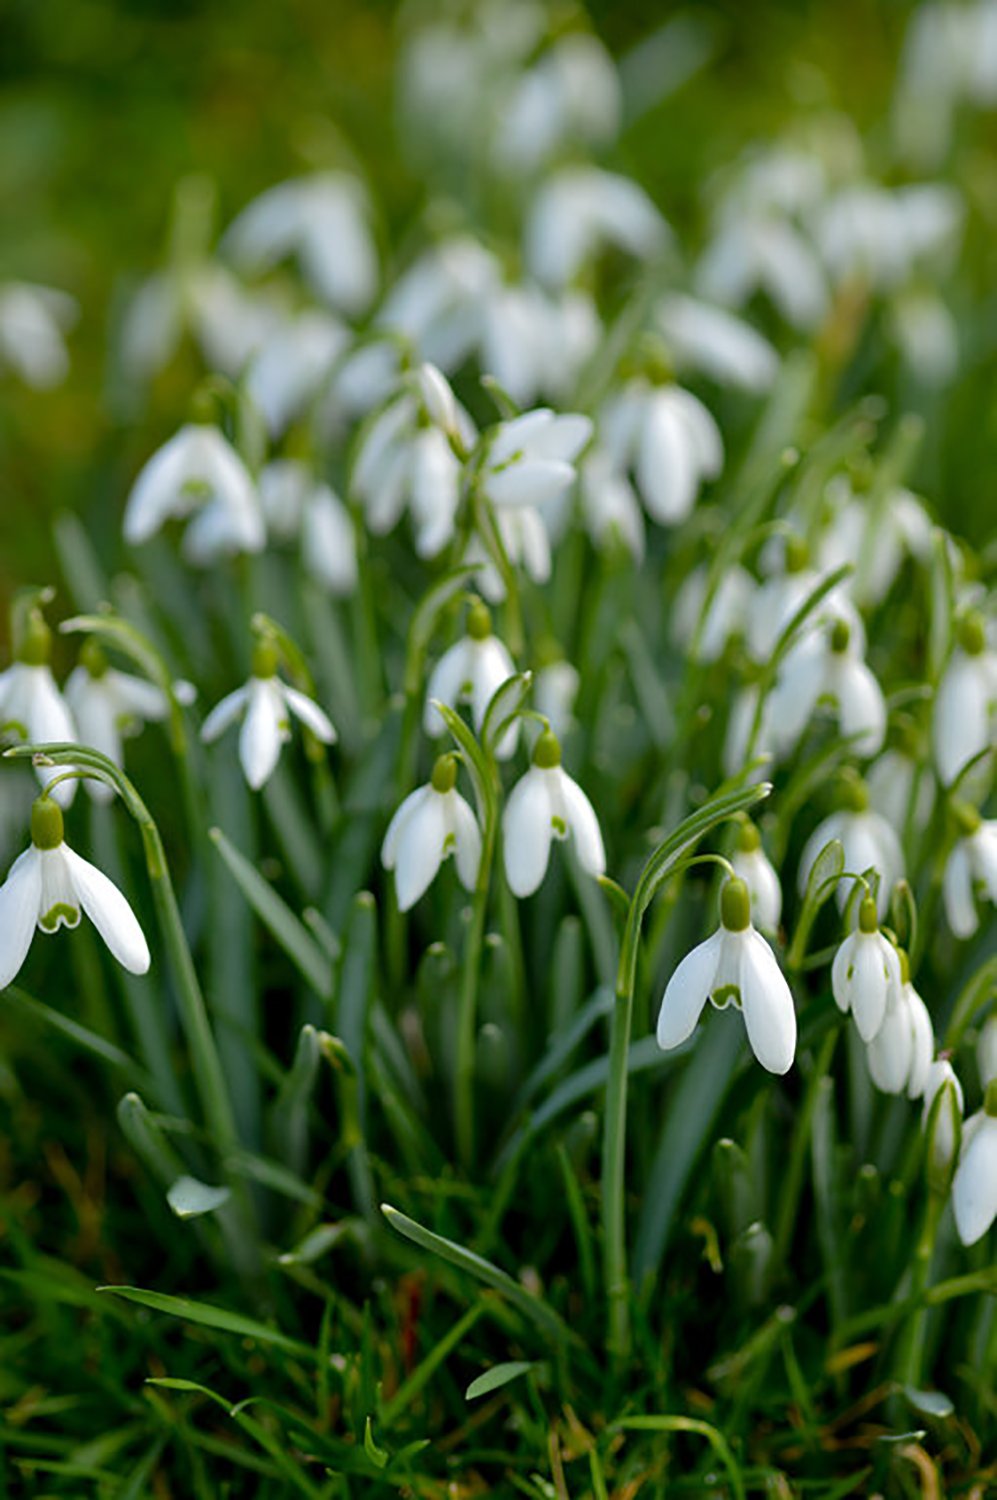
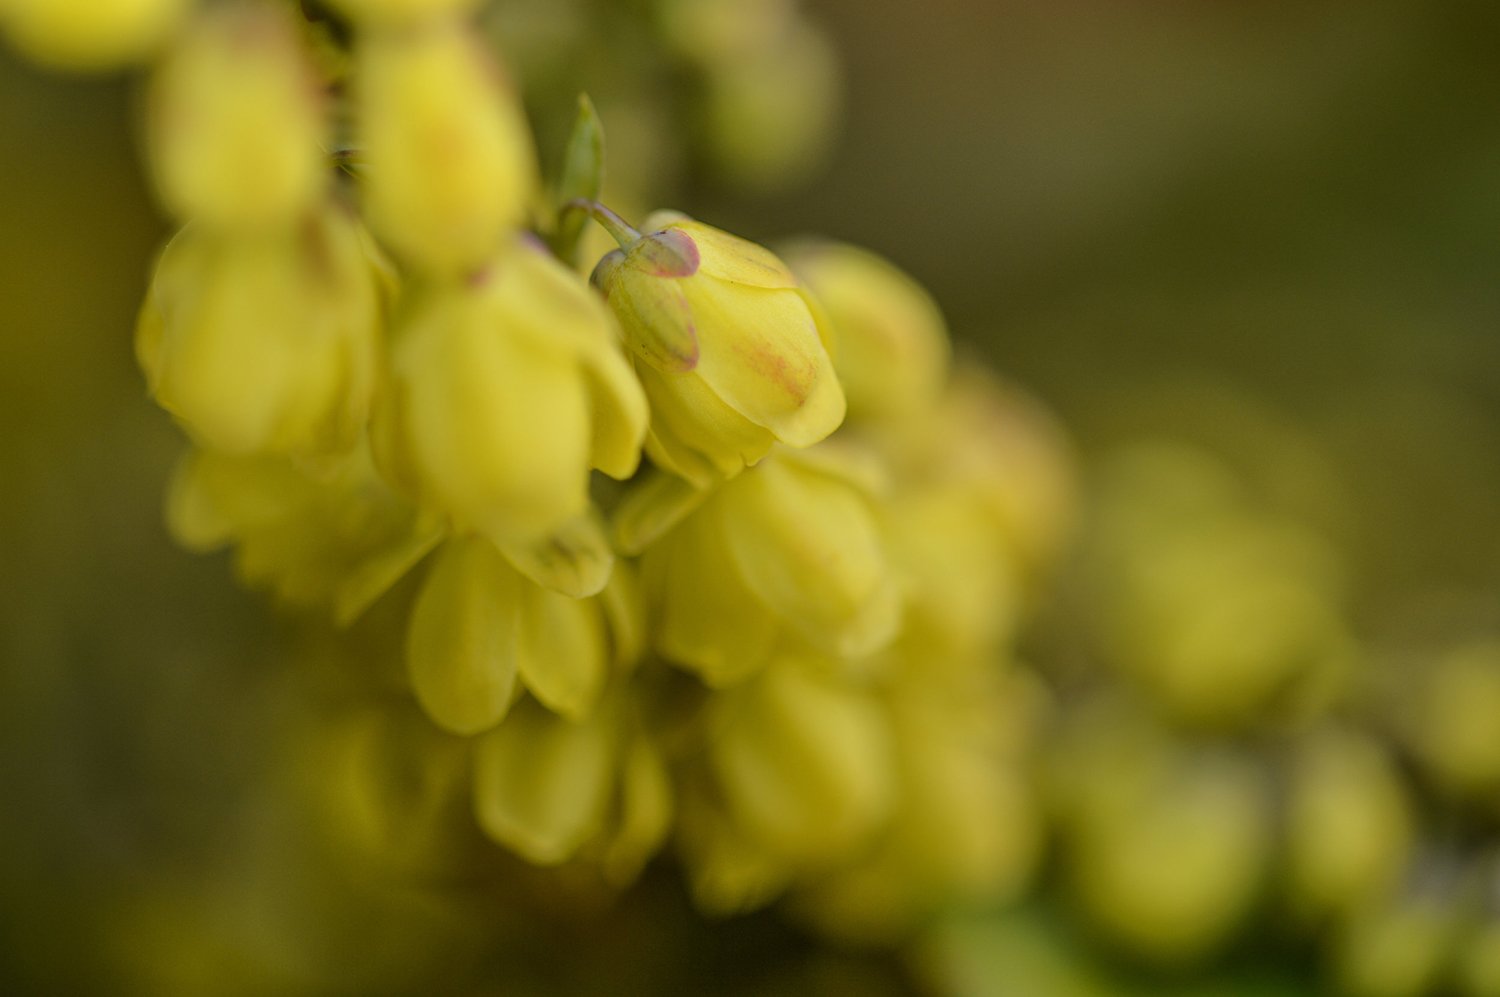
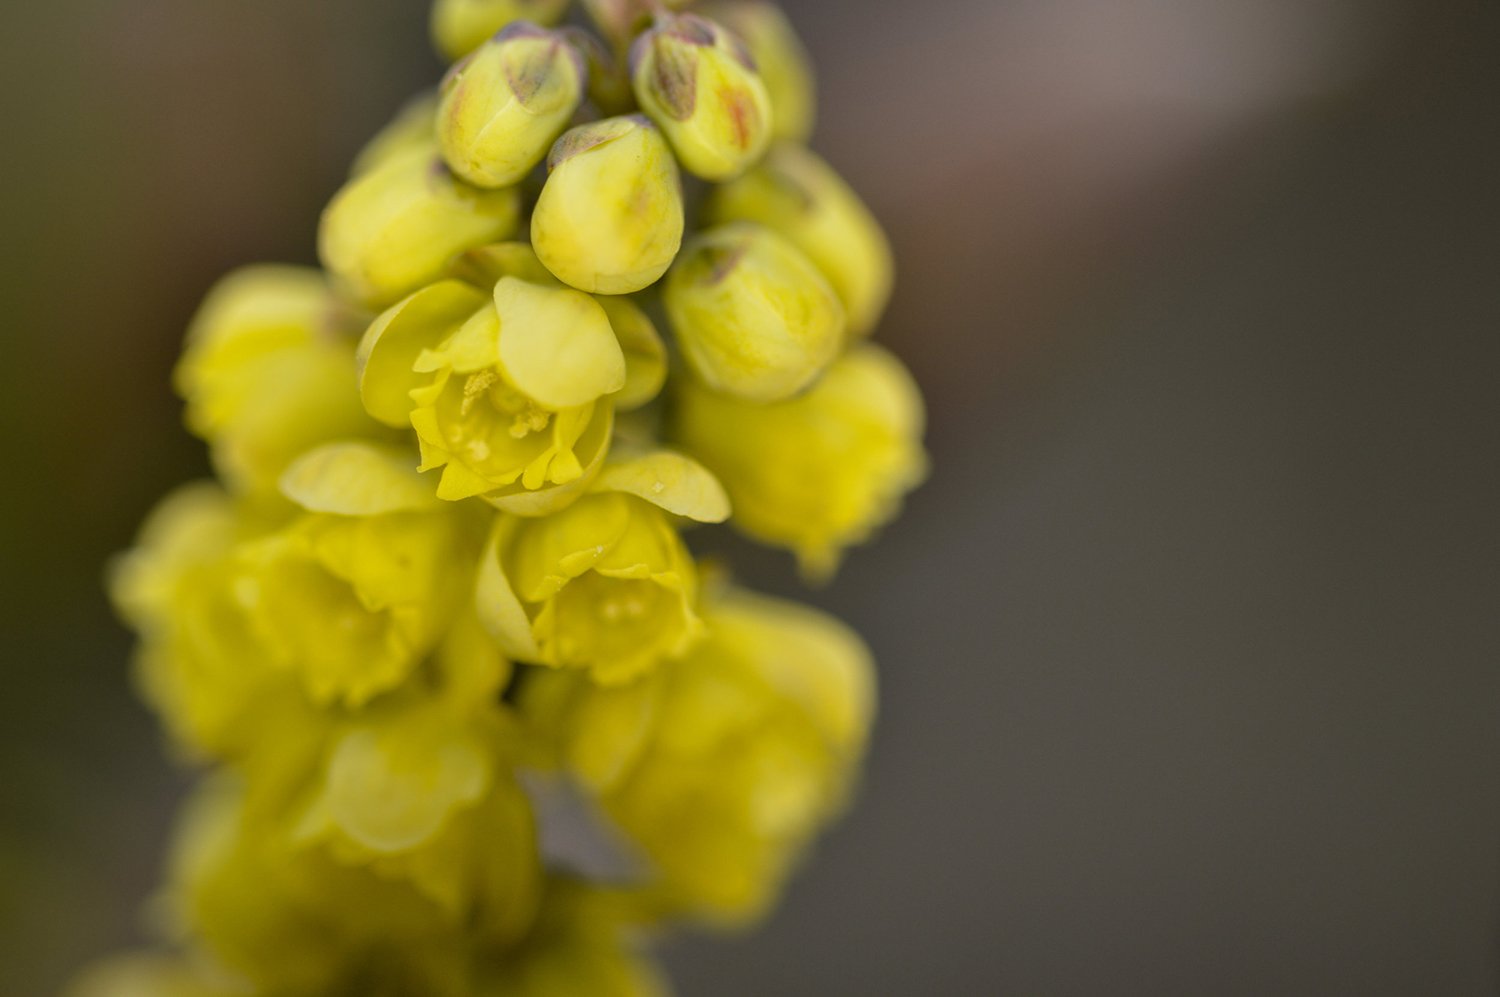
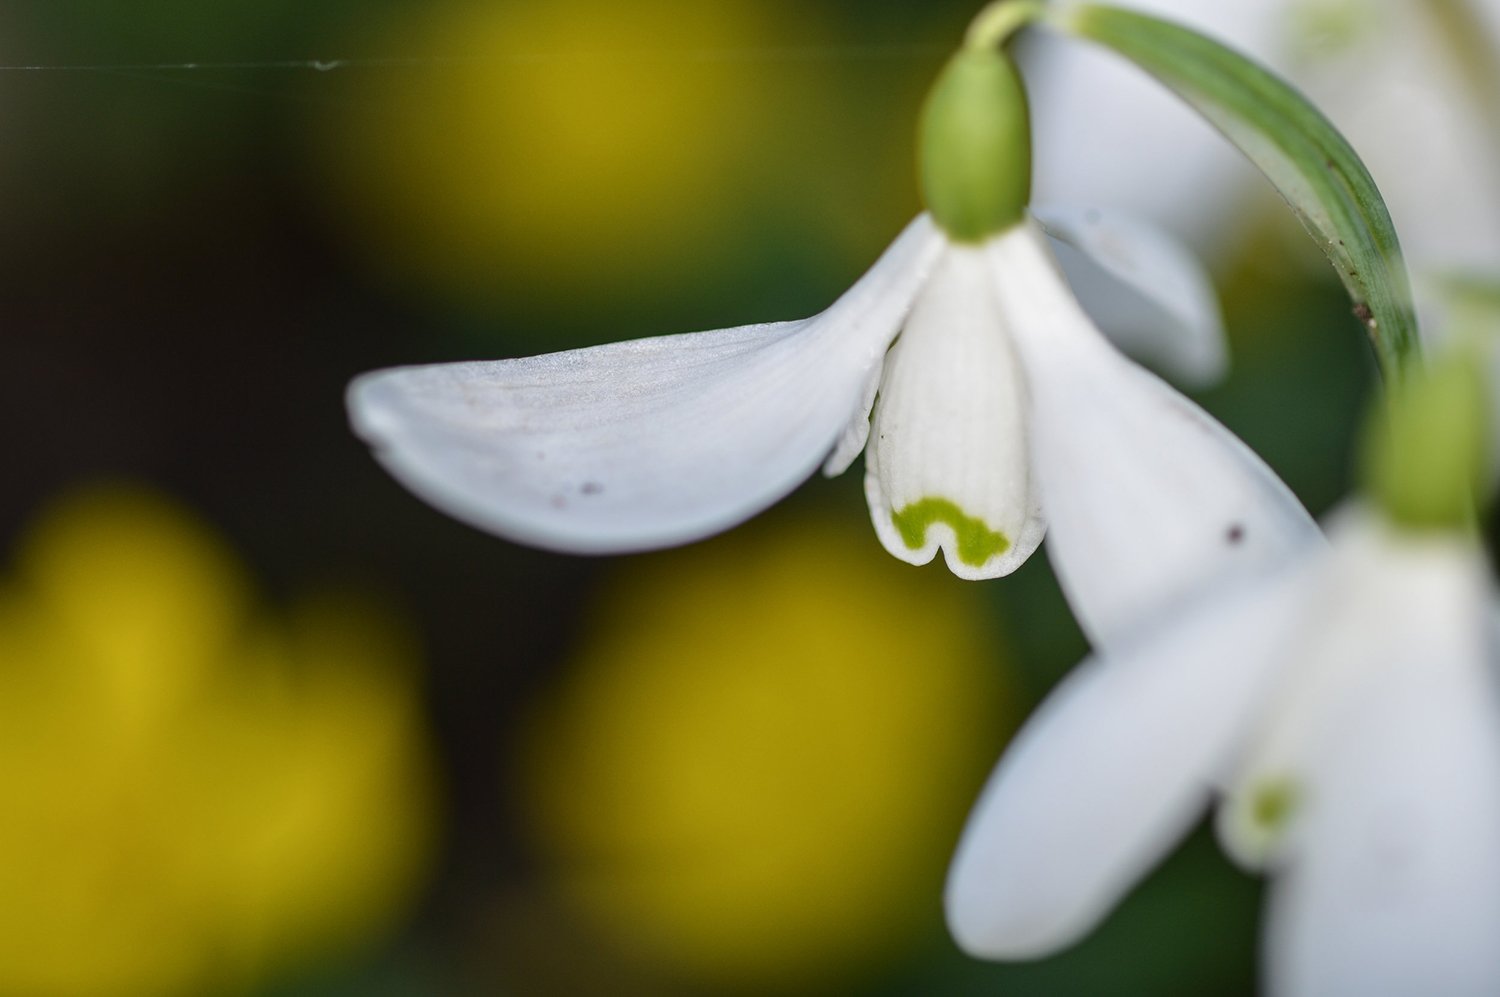
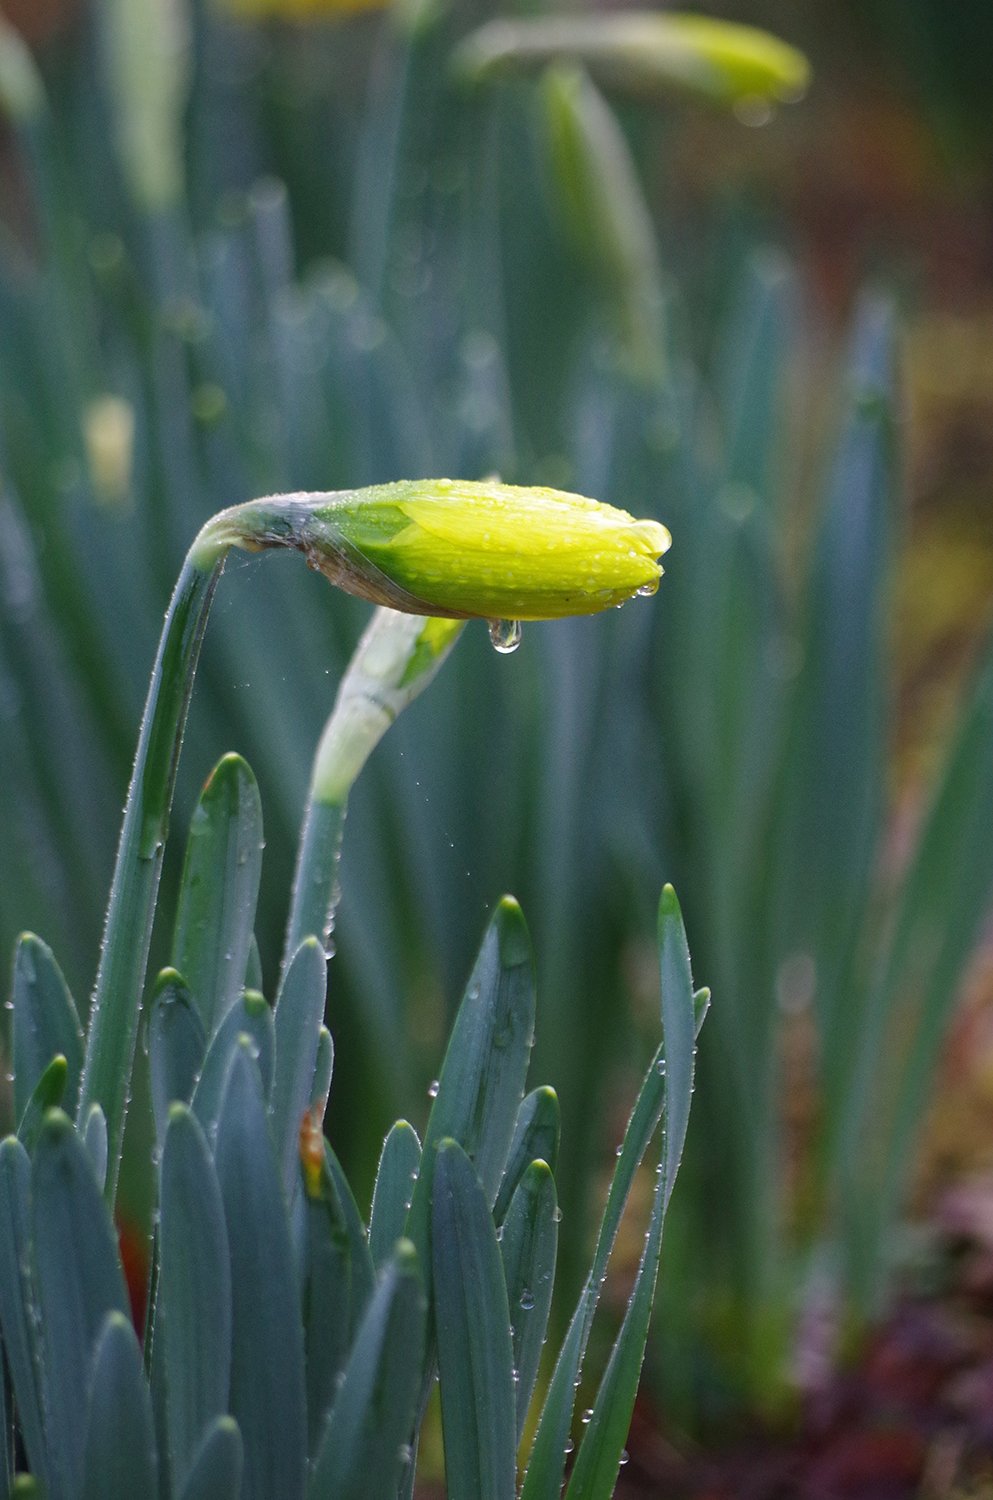
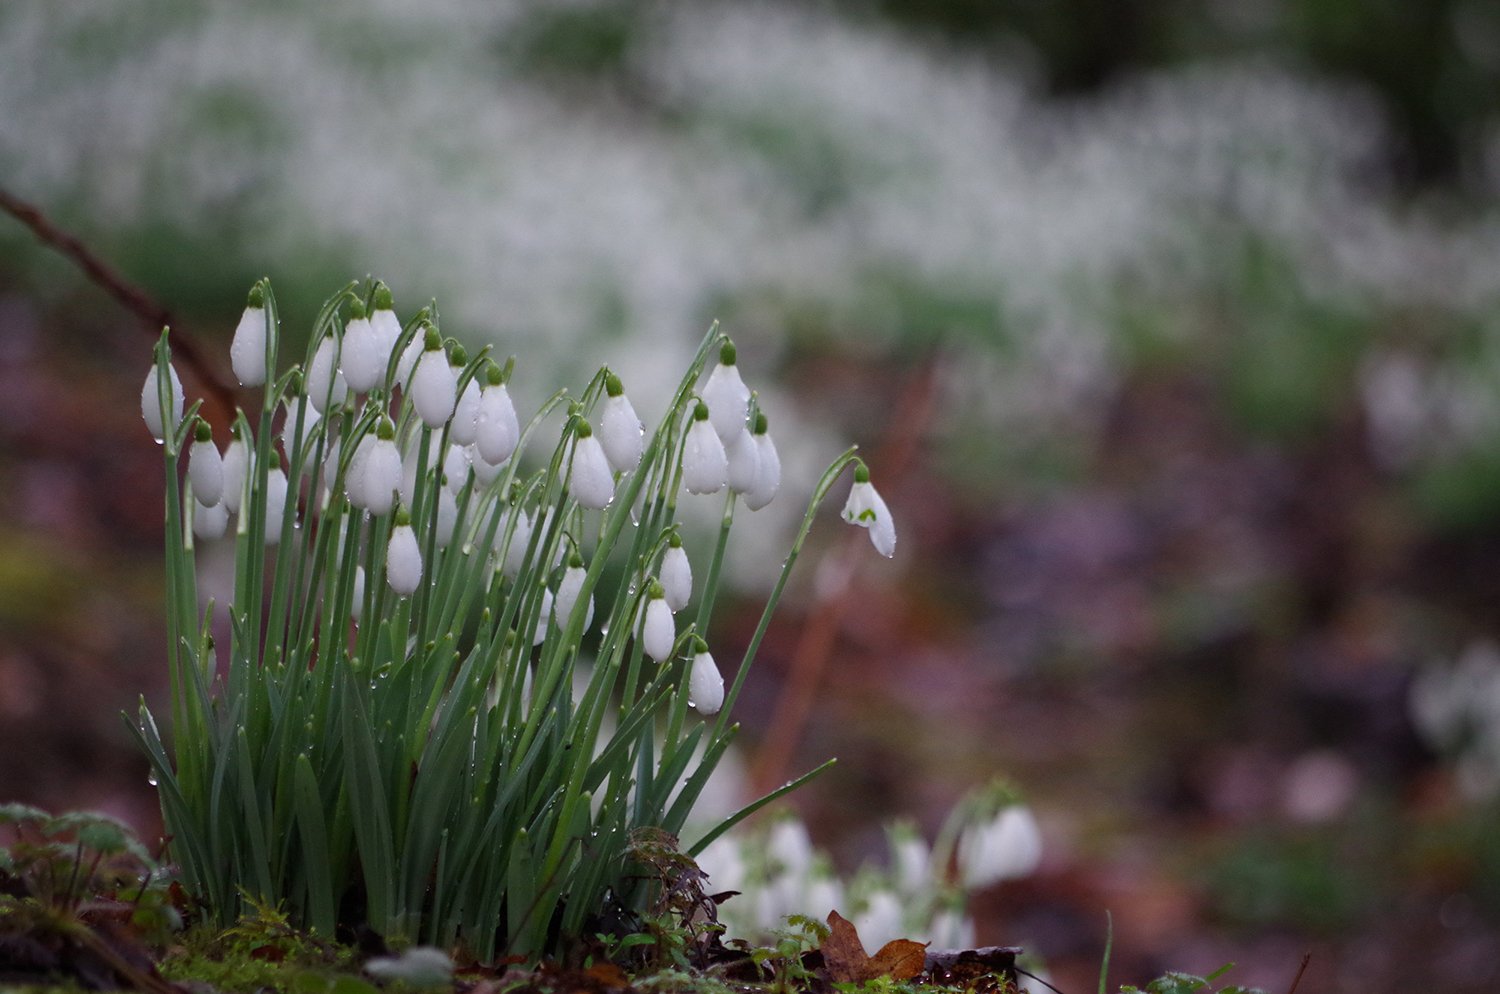
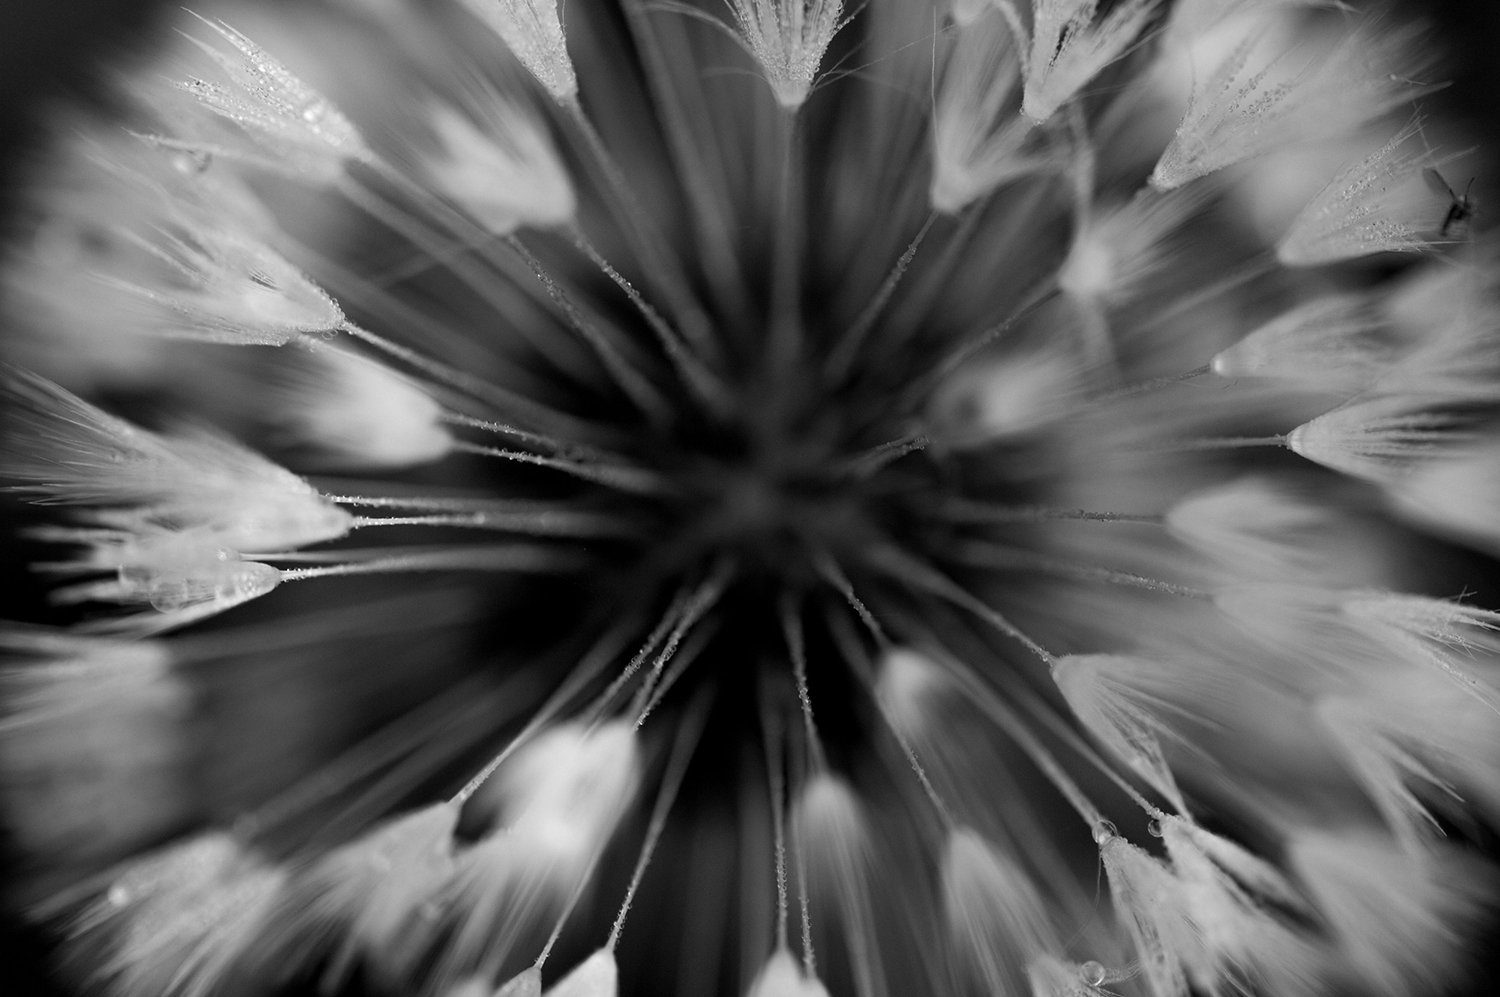
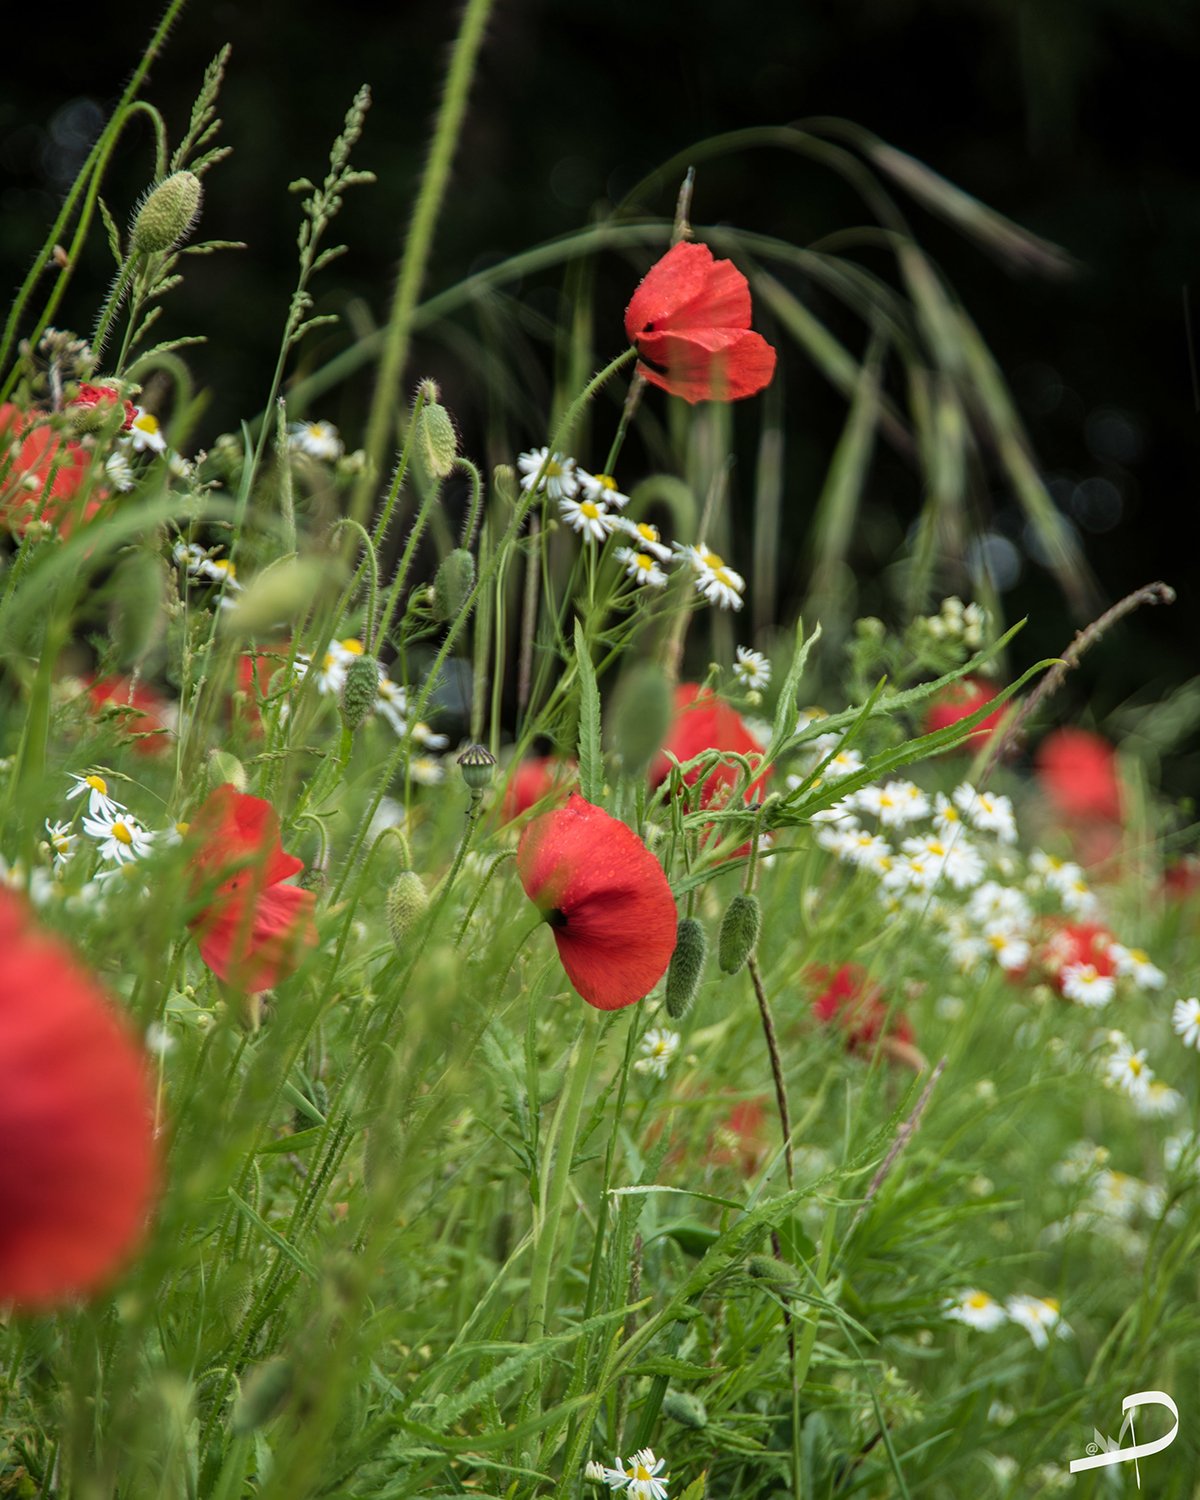
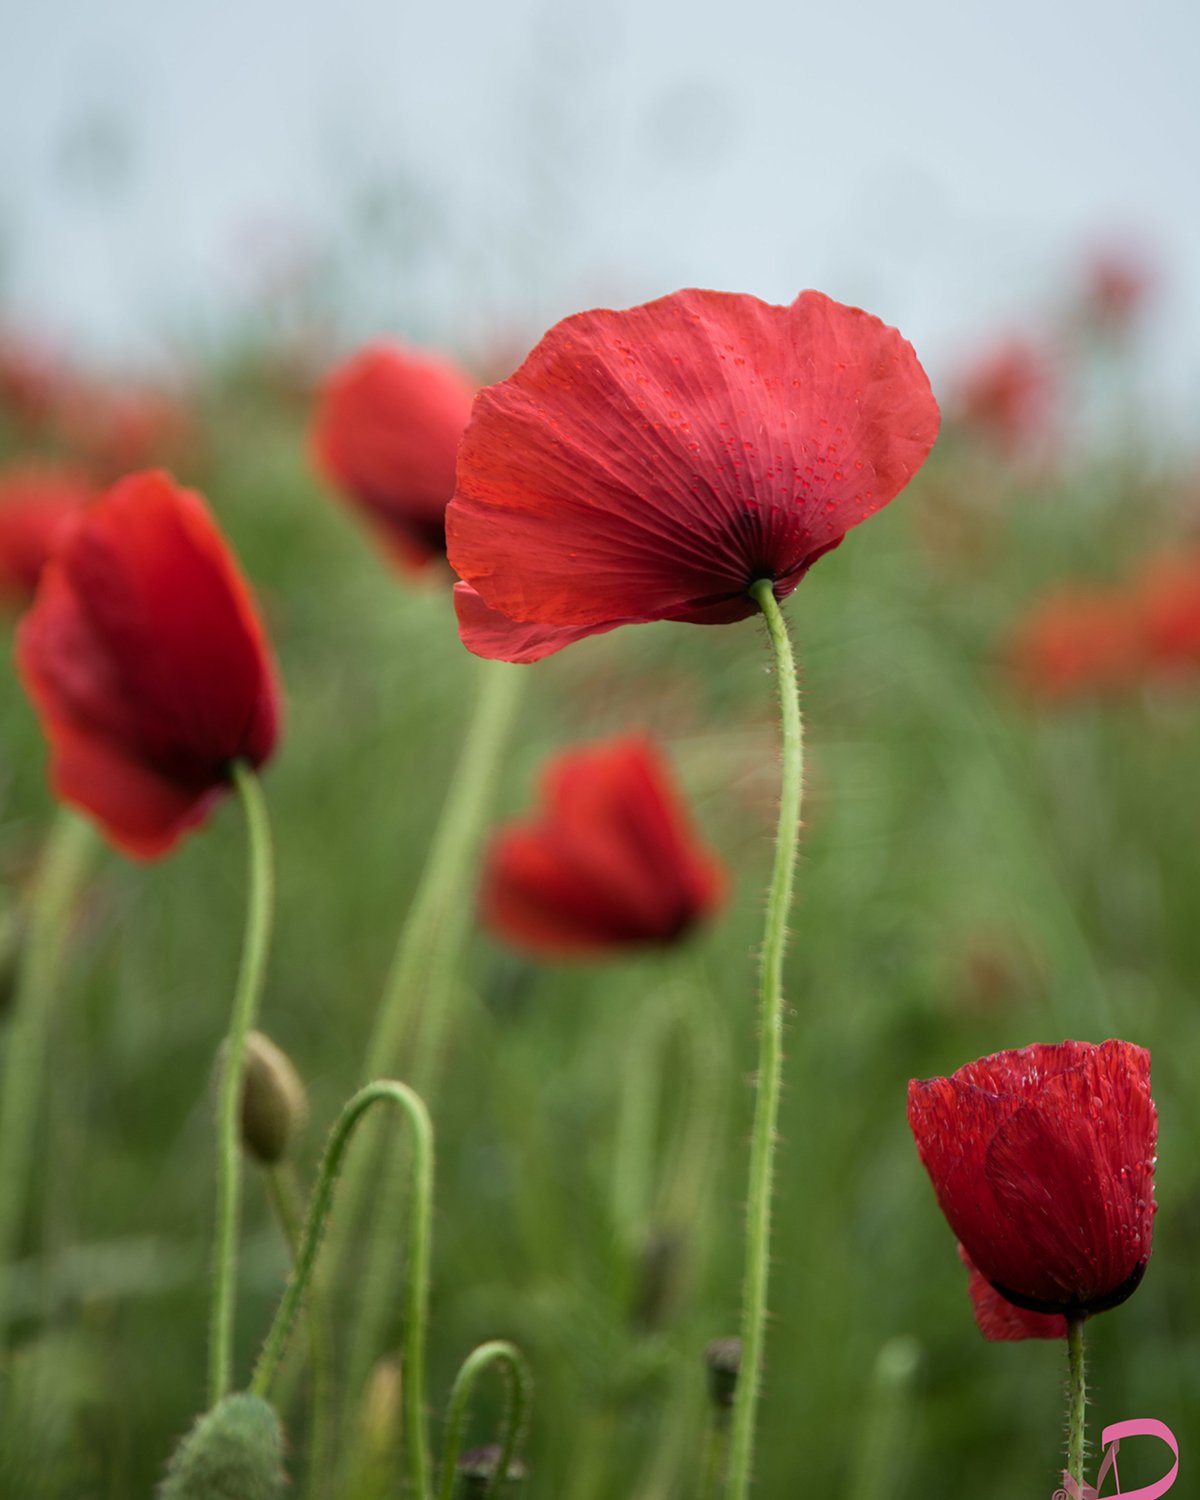
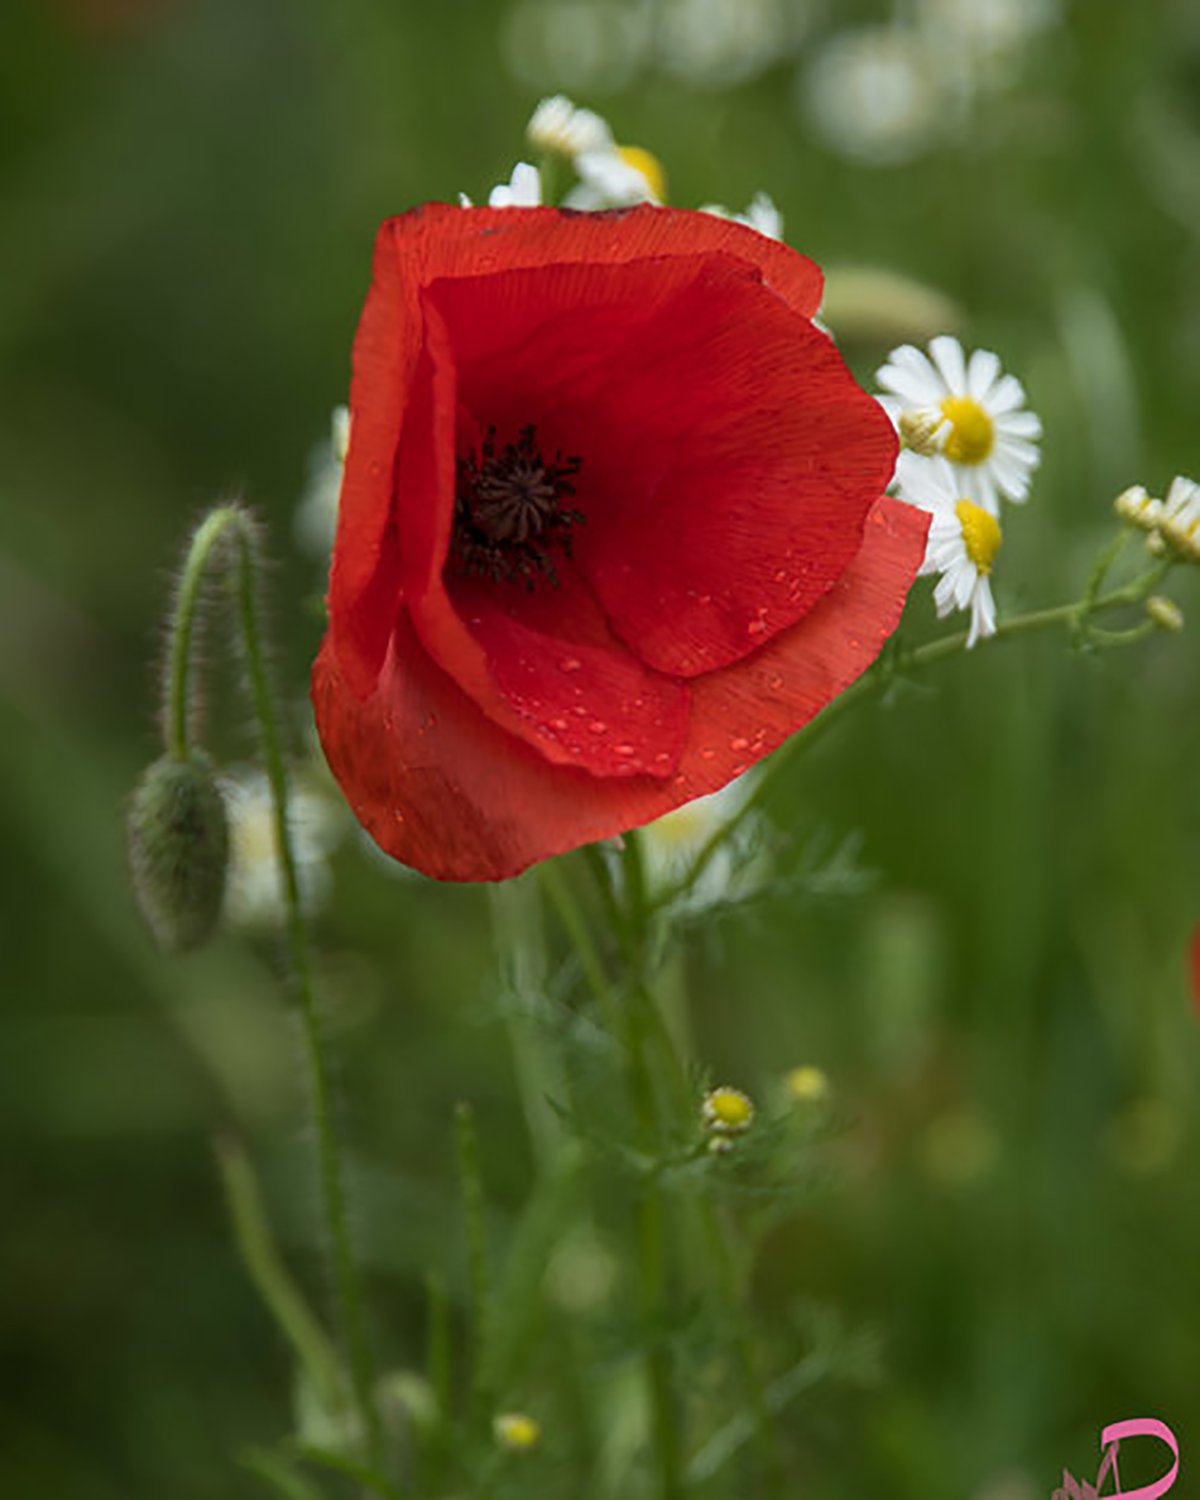
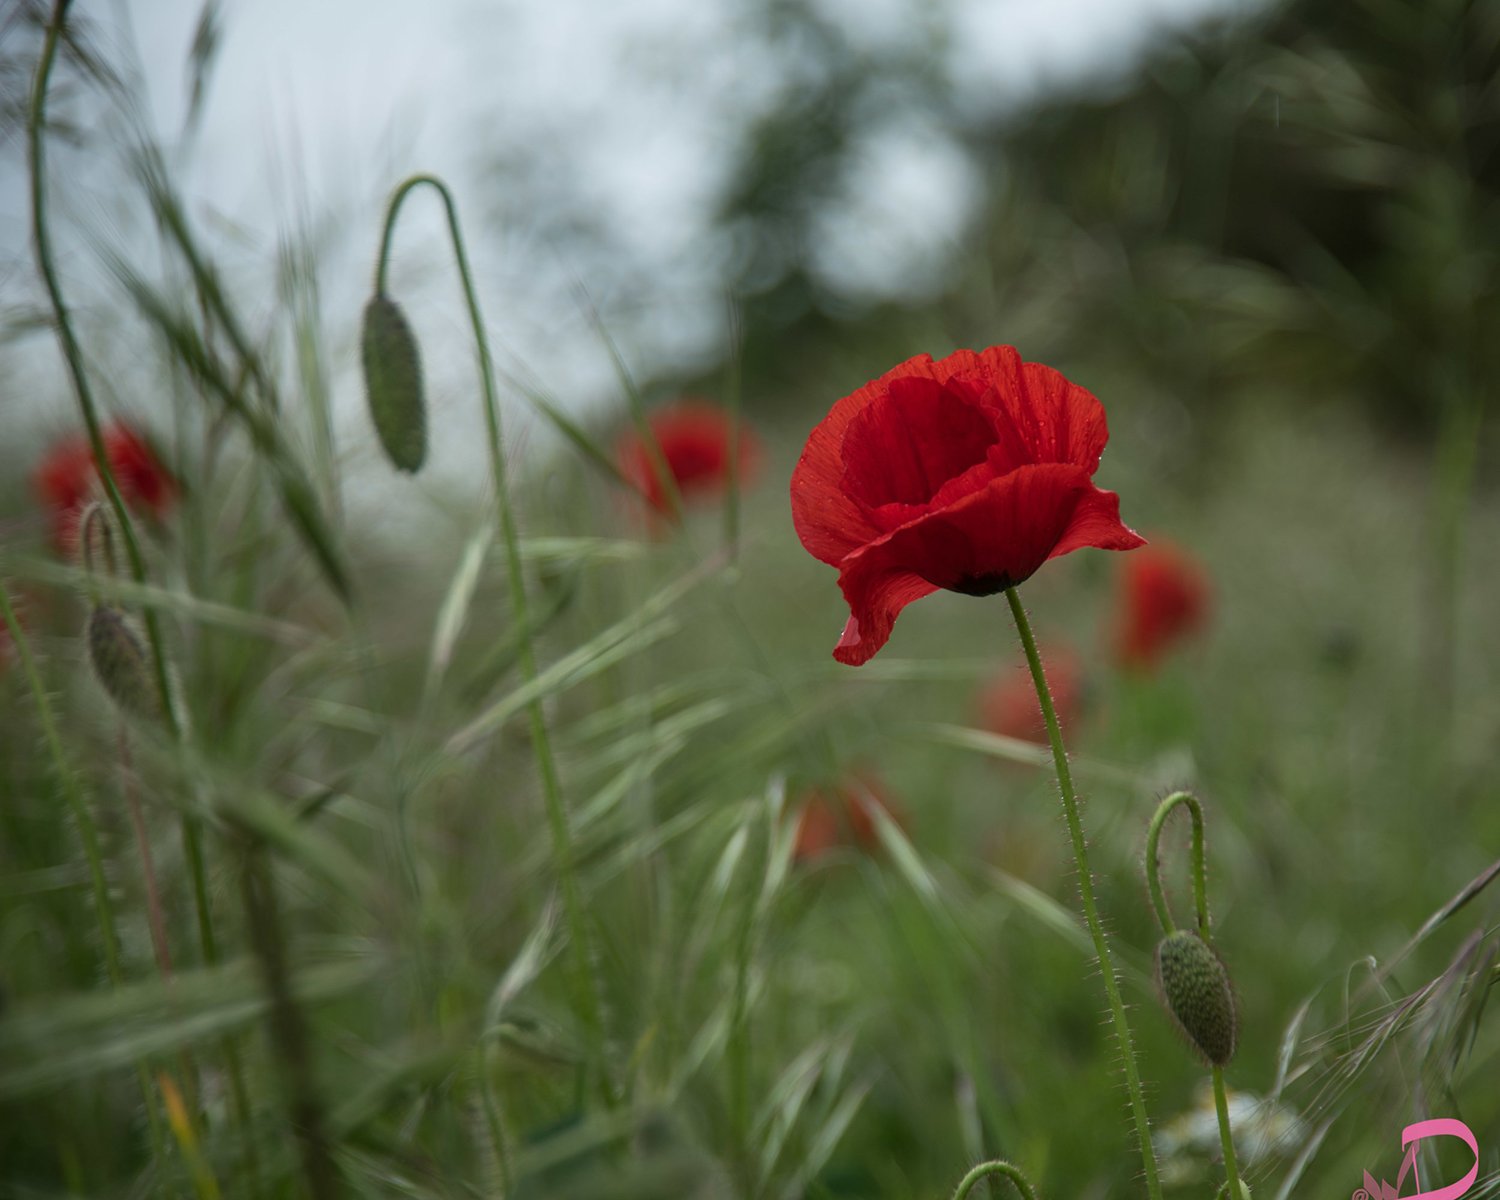
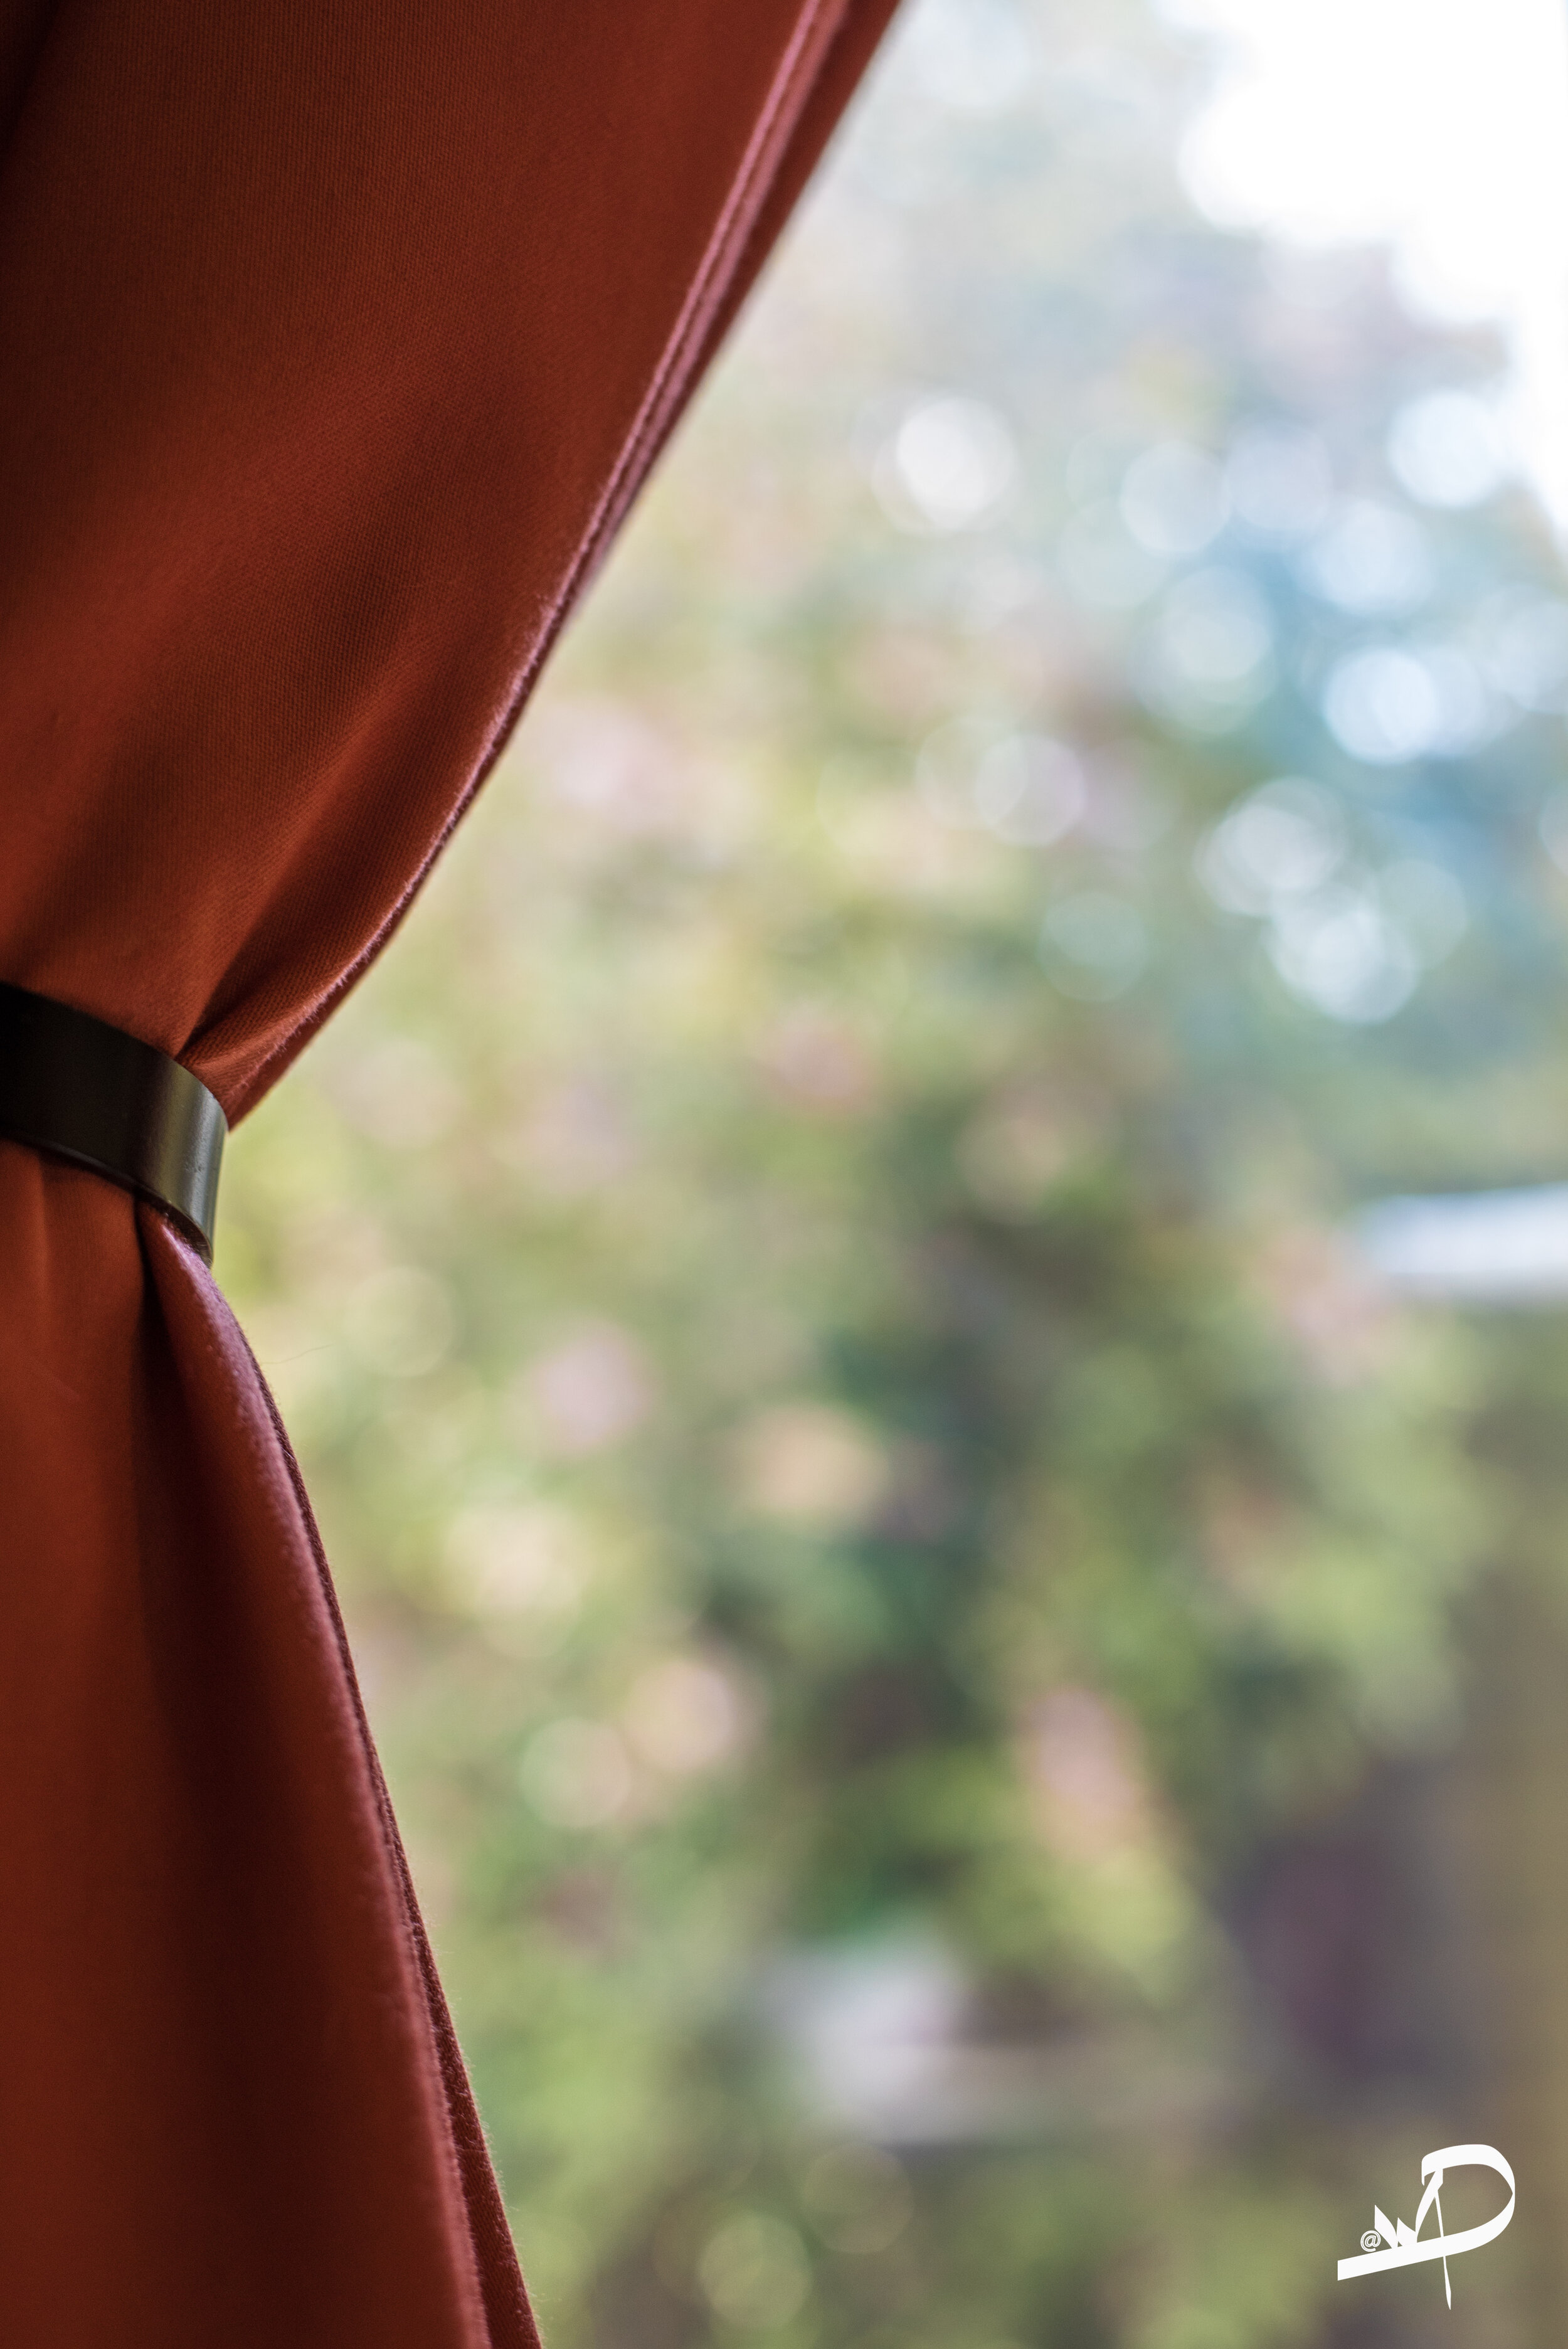
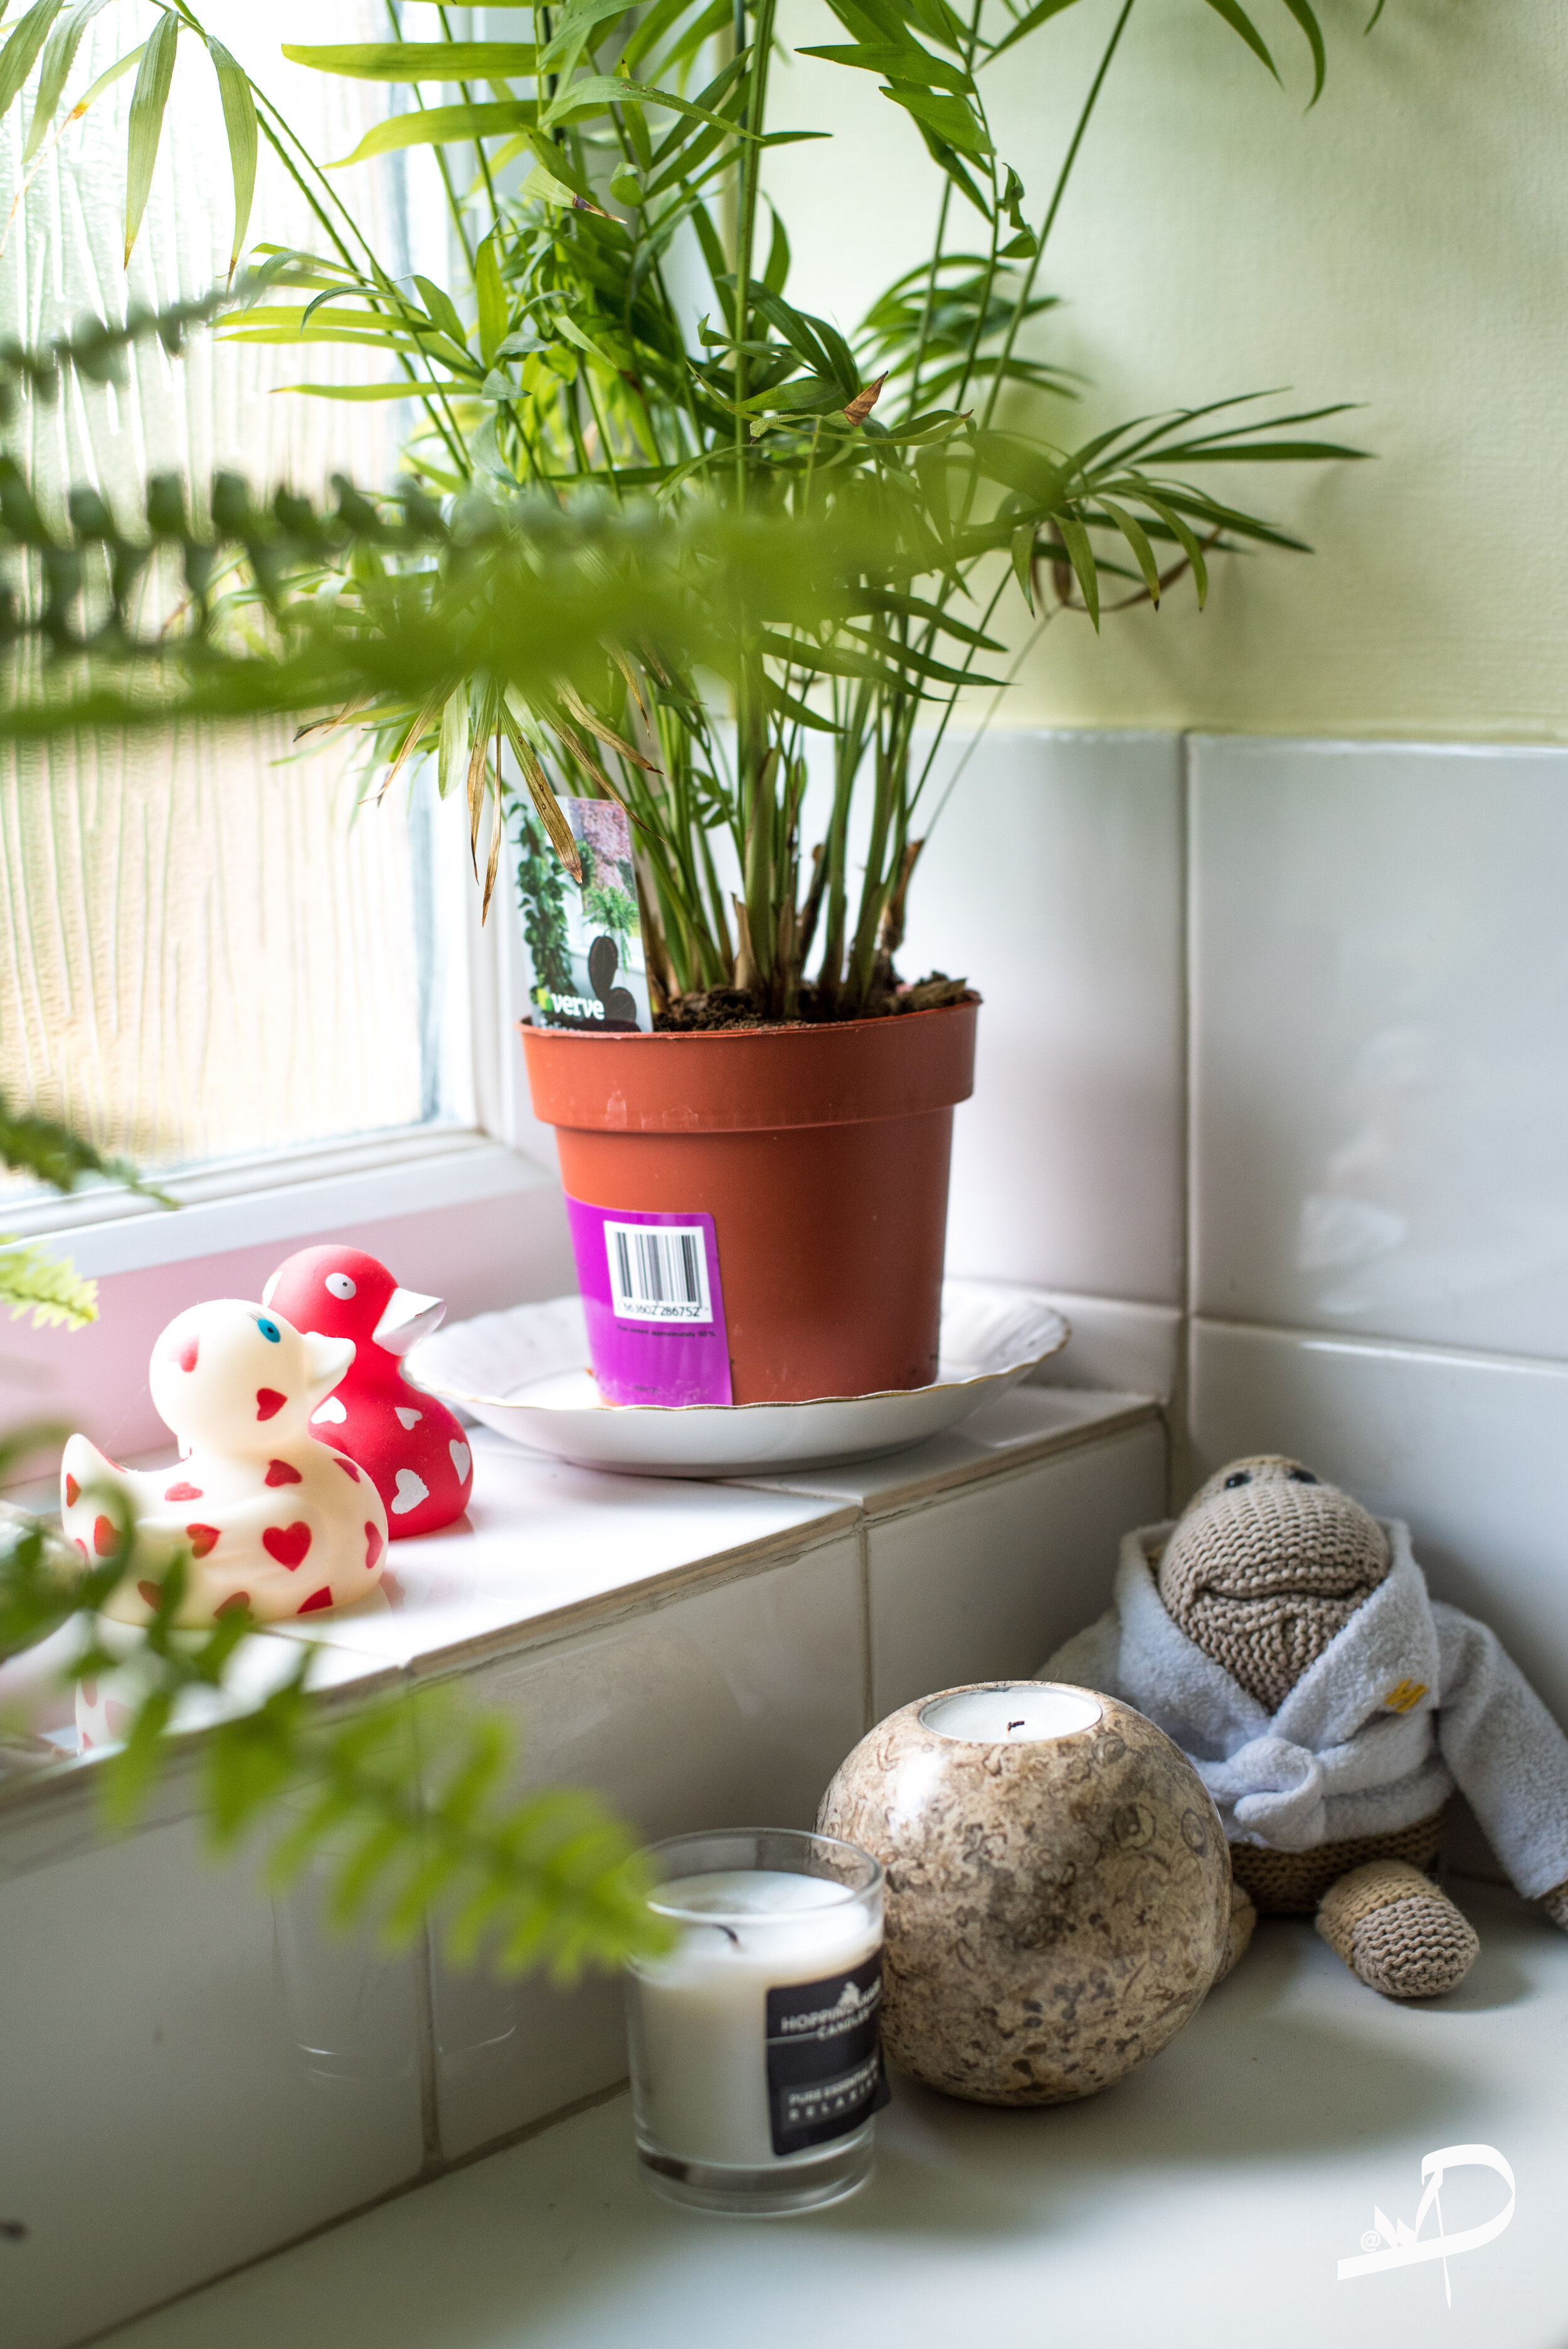
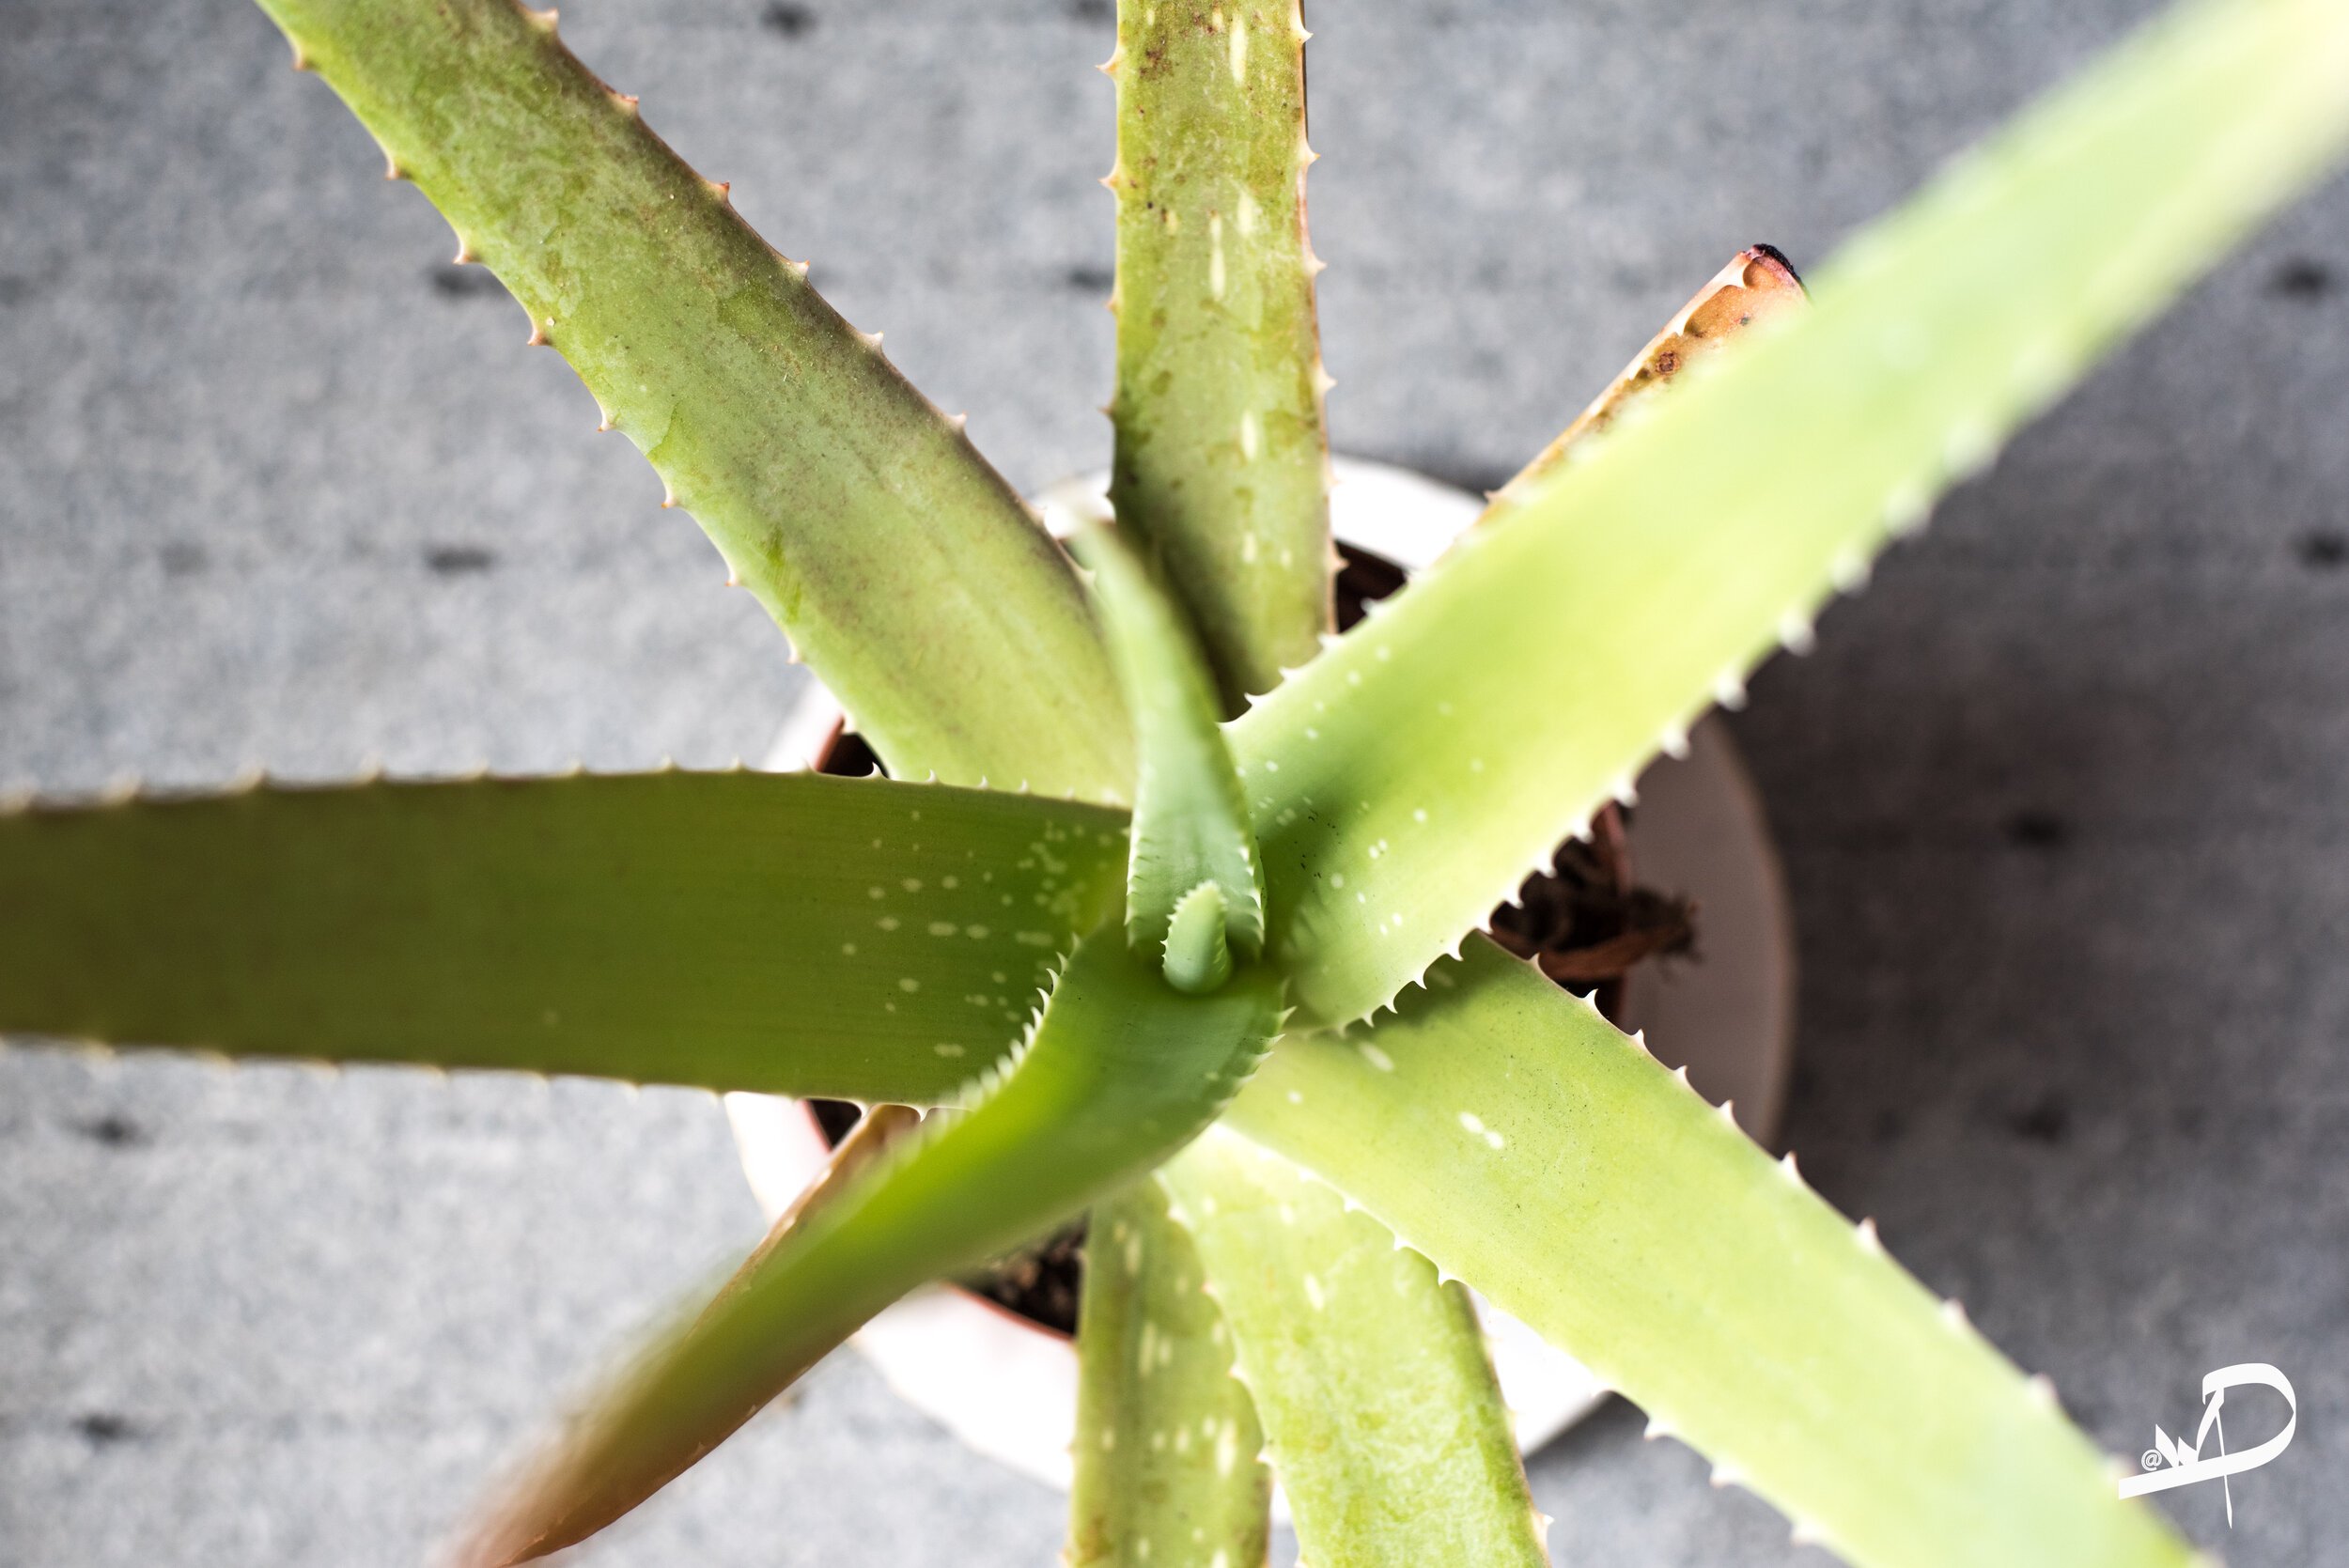
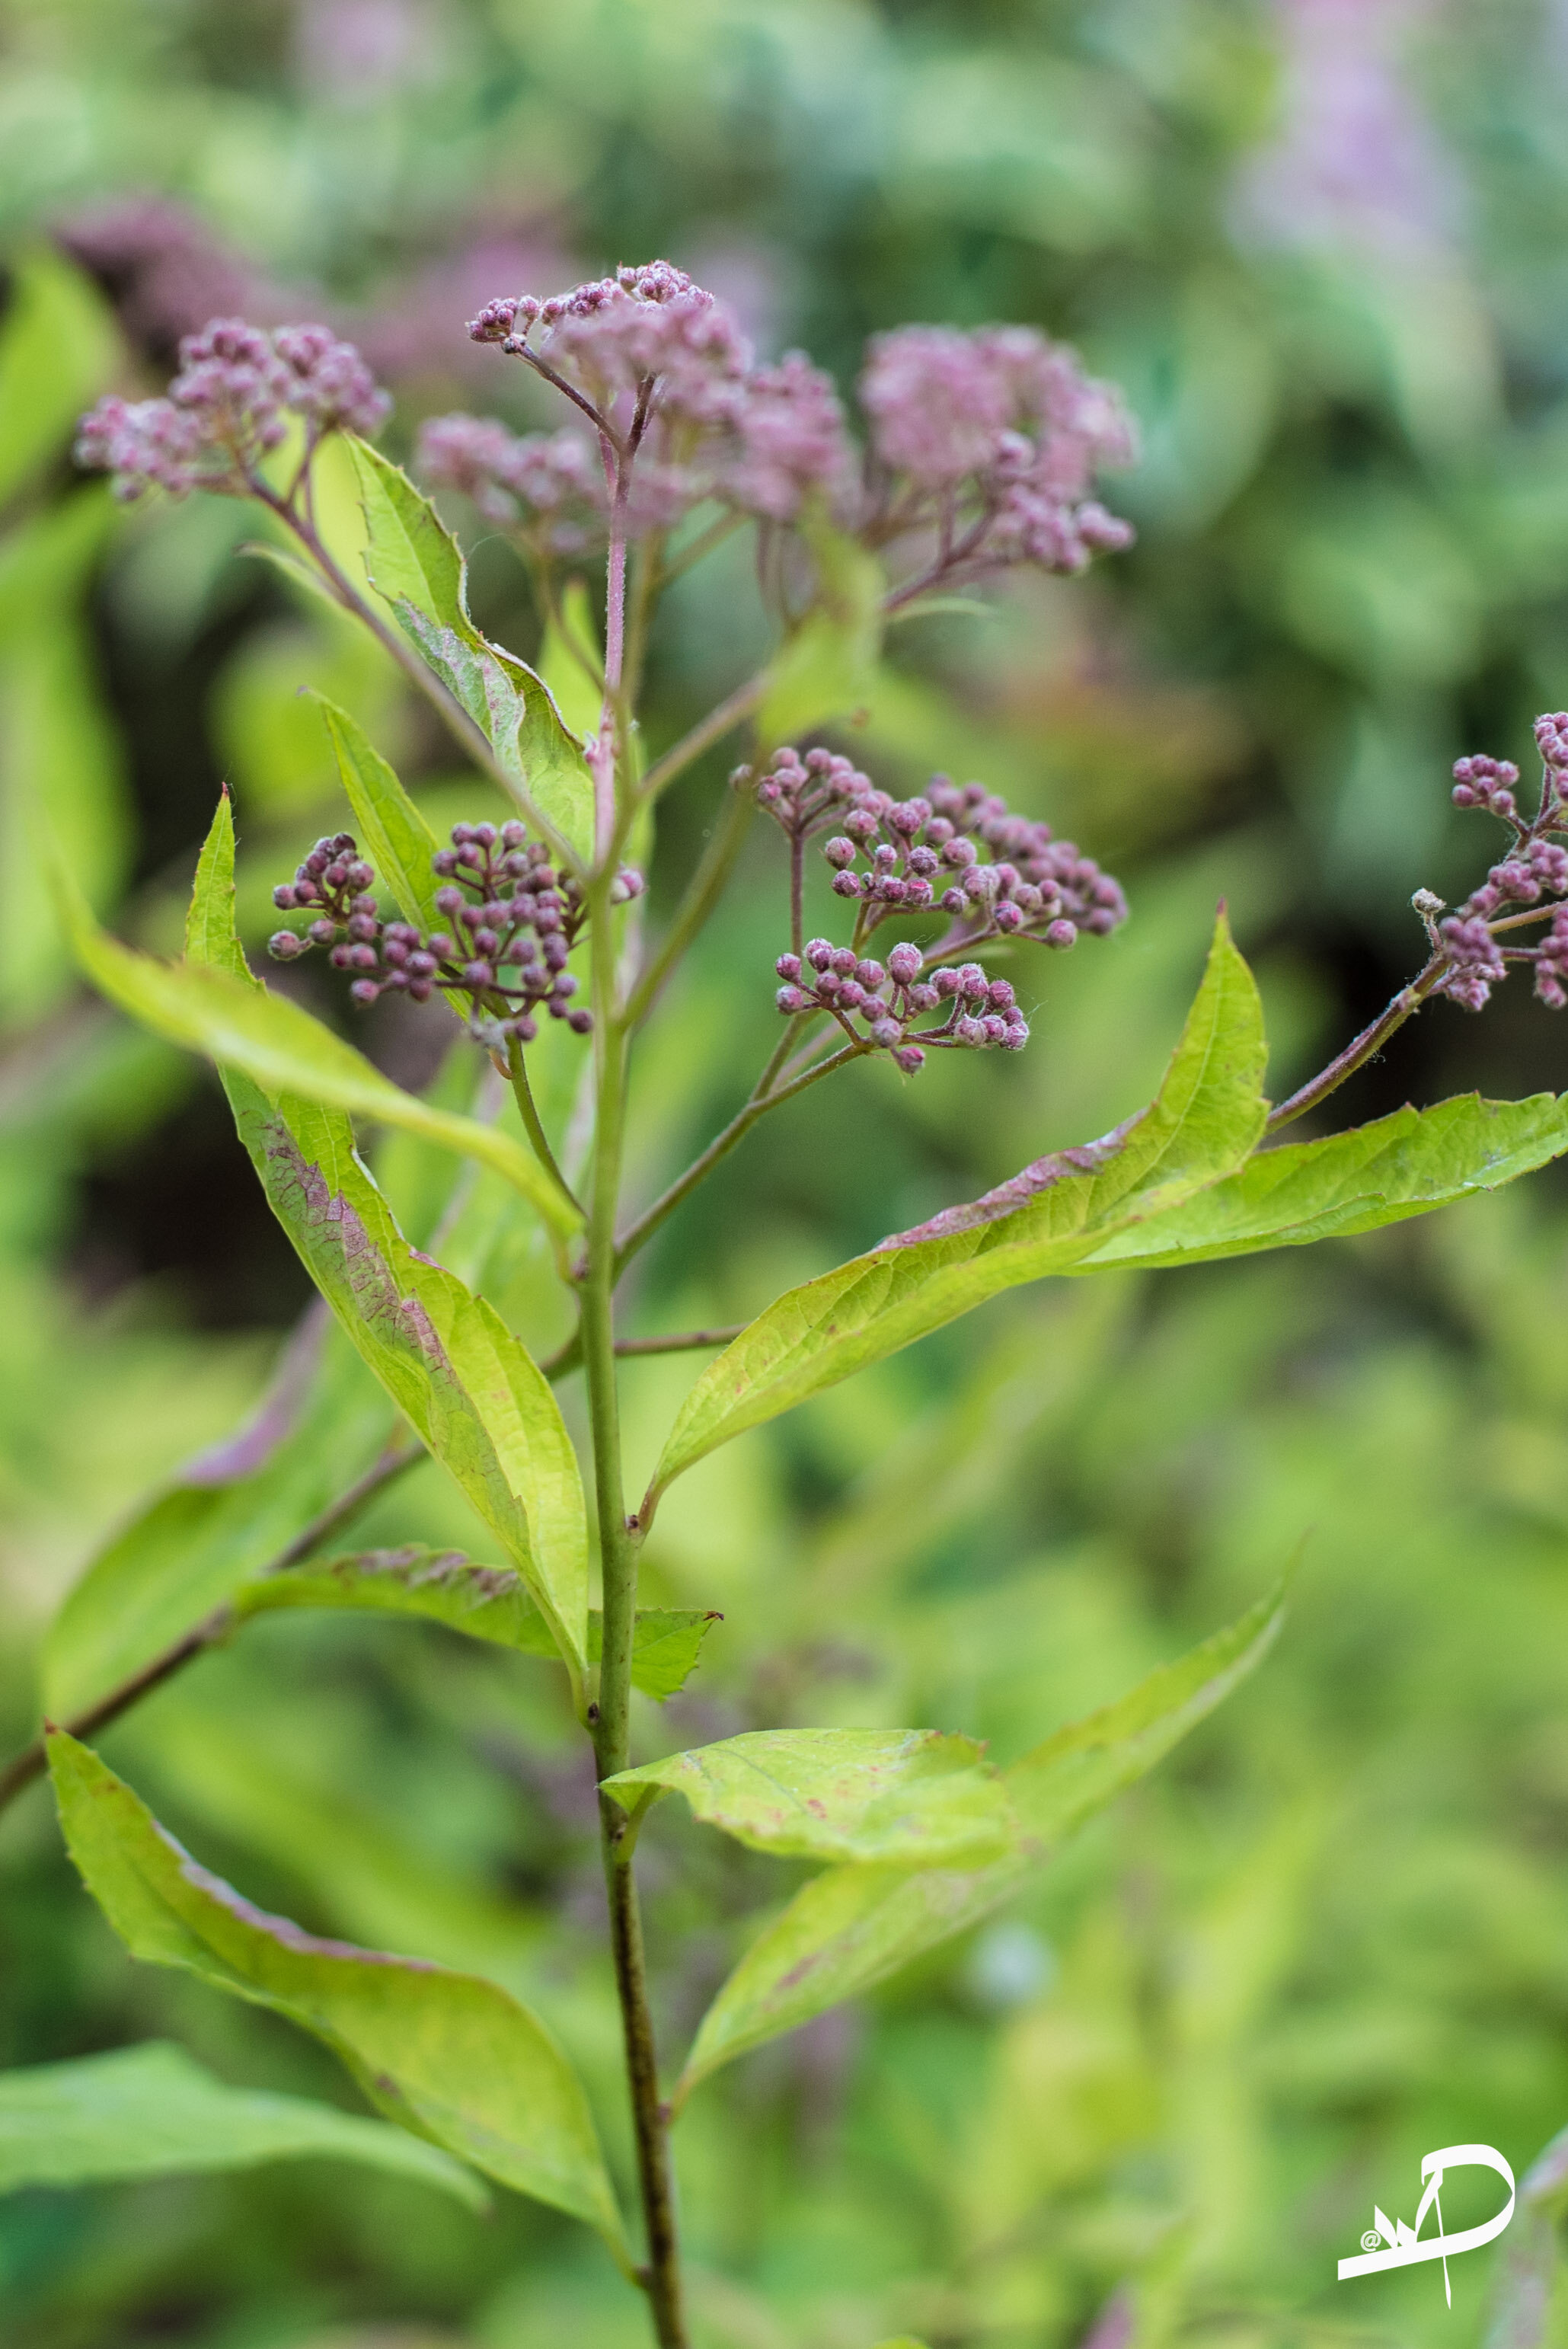
Here are some examples of my flower photography, where I have used depth of field to keep the main focus on the flowers.
Bullet points to consider:
Take images between these two times of the day - the hour before and after sunset.
Use the square focus to pinpoint what part of the photograph you wish to be in focus. When using a camera, shot on live view if possible to focus in this way.
The closer your subject is to the camera, the shallower your depth of field becomes.
Use a tripod to keep your camera stable
Focal Length refers to the capability of a lens to magnify the image of a distant subject. this can get complicated, but the simple answer is that the longer the focal length the shallower the depth of field.
Using a shallow depth of field is a good way to make your subject stand out from its background and is great for portrait photography. Wildlife & sport
For deeper DOF - In landscape photography, it is important to get as much of your scene in focus as possible. By using a wide-angle lens and a small aperture you will be able to maximize your depth of field to get your scene in focus.
HOW TO….
The point of my blog is to explain the process of taking a depth-of-field photograph with either your camera or phone.
CAMERA MANUAL SETTINGS
The process I use is to use my prime 50mm lens on manual and aperture priority when I use a zoom lens. I use aperture priority with my zoom lens so that I can control the lens & keep it at a wider aperture.
Most photographers would recommend buying a lens that can take images, with your aperture, below f5.6, which is a good investment, but you do not have to once you begin to learn how to control the aperture with the depth of field technique. When it is in manual mode, try and photograph at the widest aperture (below f5.6), although most lenses bought with a camera (kit lens) will go either f3.5 or f5.6. You can check this by looking at the side of the lens or around the front of the lens.
If you are restricted to f5.6 as the aperture, then you need to make sure that you have at least 2m between the foreground & background to see the blurry effect. Play with this and decided upon the distance you prefer.
Key settings and actions
Shot at either f5.6 or lower
If you can only shoot at f5.6 you will need to have at least 2m between the object and the background for the blurred background.
Use a tripod if you plan on shooting at a speed lower than 1/60 sec.
If you combine this with a macro lens, then I would recommend using a tripod.
Shoot in either auto or 400 ISO. If you have more confidence with understanding ISO then shoot at 100 and use a tripod if your speed drops below a 1/60 sec.
Auto or the appropriate white balance for the light type.
Understanding narrow & large depth of field.
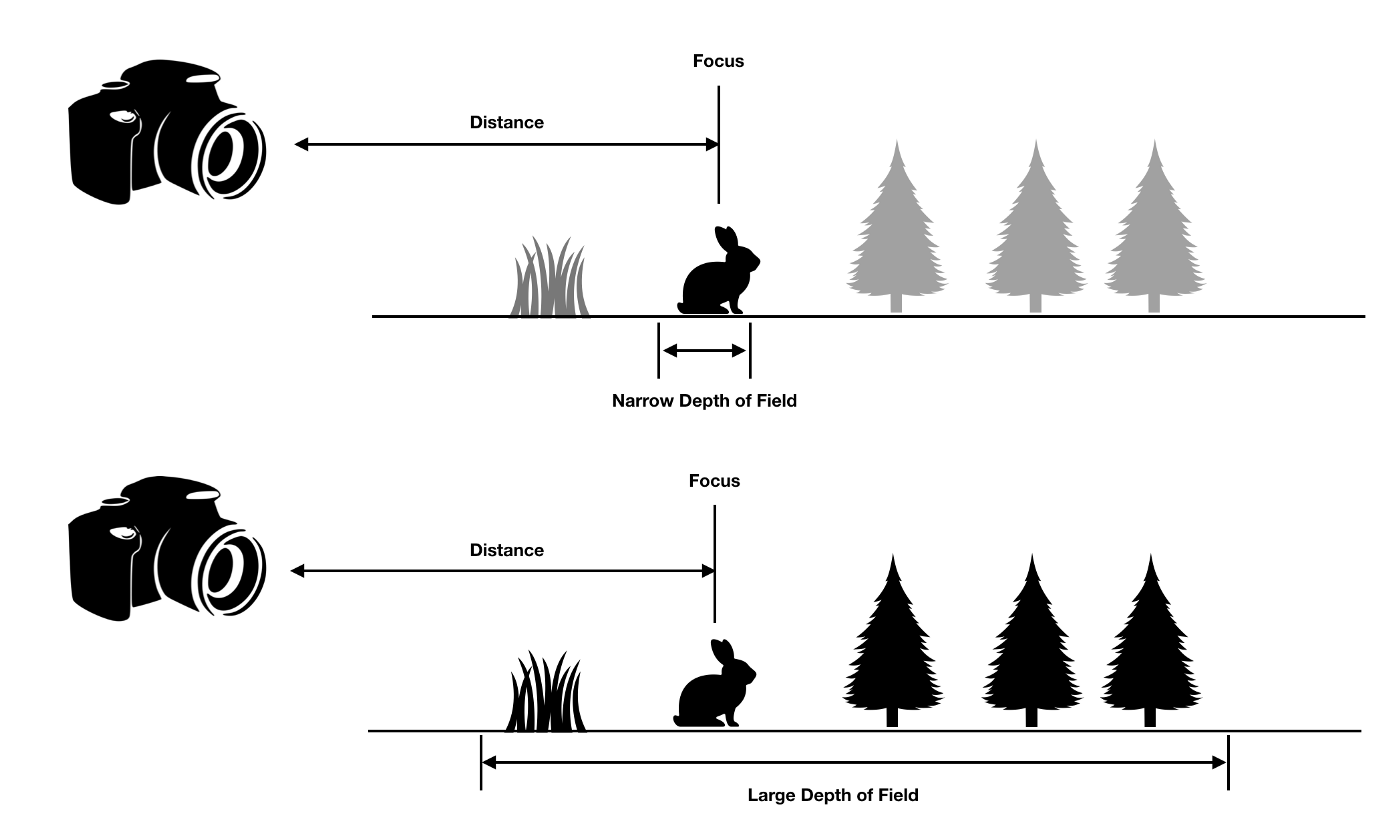
Narrow Depth of Field — Only a small part of the image is in sharp focus. Narrow or small DoF, you only focus on the subject and blur out the background. Used for flowers, objects & portraits. This is below f5.6
Large Depth of Field — More of the image is in sharp focus. A large DoF focuses more on an entire frame and has a wider angle. It has a much sharper focus on a large part of the image, rather than just a small part of it. Used for landscapes. Above f5.6
APERTURE PRIORITY
To take a depth of field photograph you can use the aperture priority mode on your SLR or bridge camera.
Here is an activity to try during the day with aperture priority, but you need to remember that when using aperture priority the camera will control the speed. To prevent camera shack, make sure that you keep your speed no lower than 1/60 sec. If you are not able to do this, then let more light into your camera by opening the aperture up wider (f5.6 lower) or increasing your ISO to above 800. I would never recommend raising the ISO above 400 as you will start to increase your chances of having noisy images, as ISO controls the light sensitivity, so where possible use a tripod.

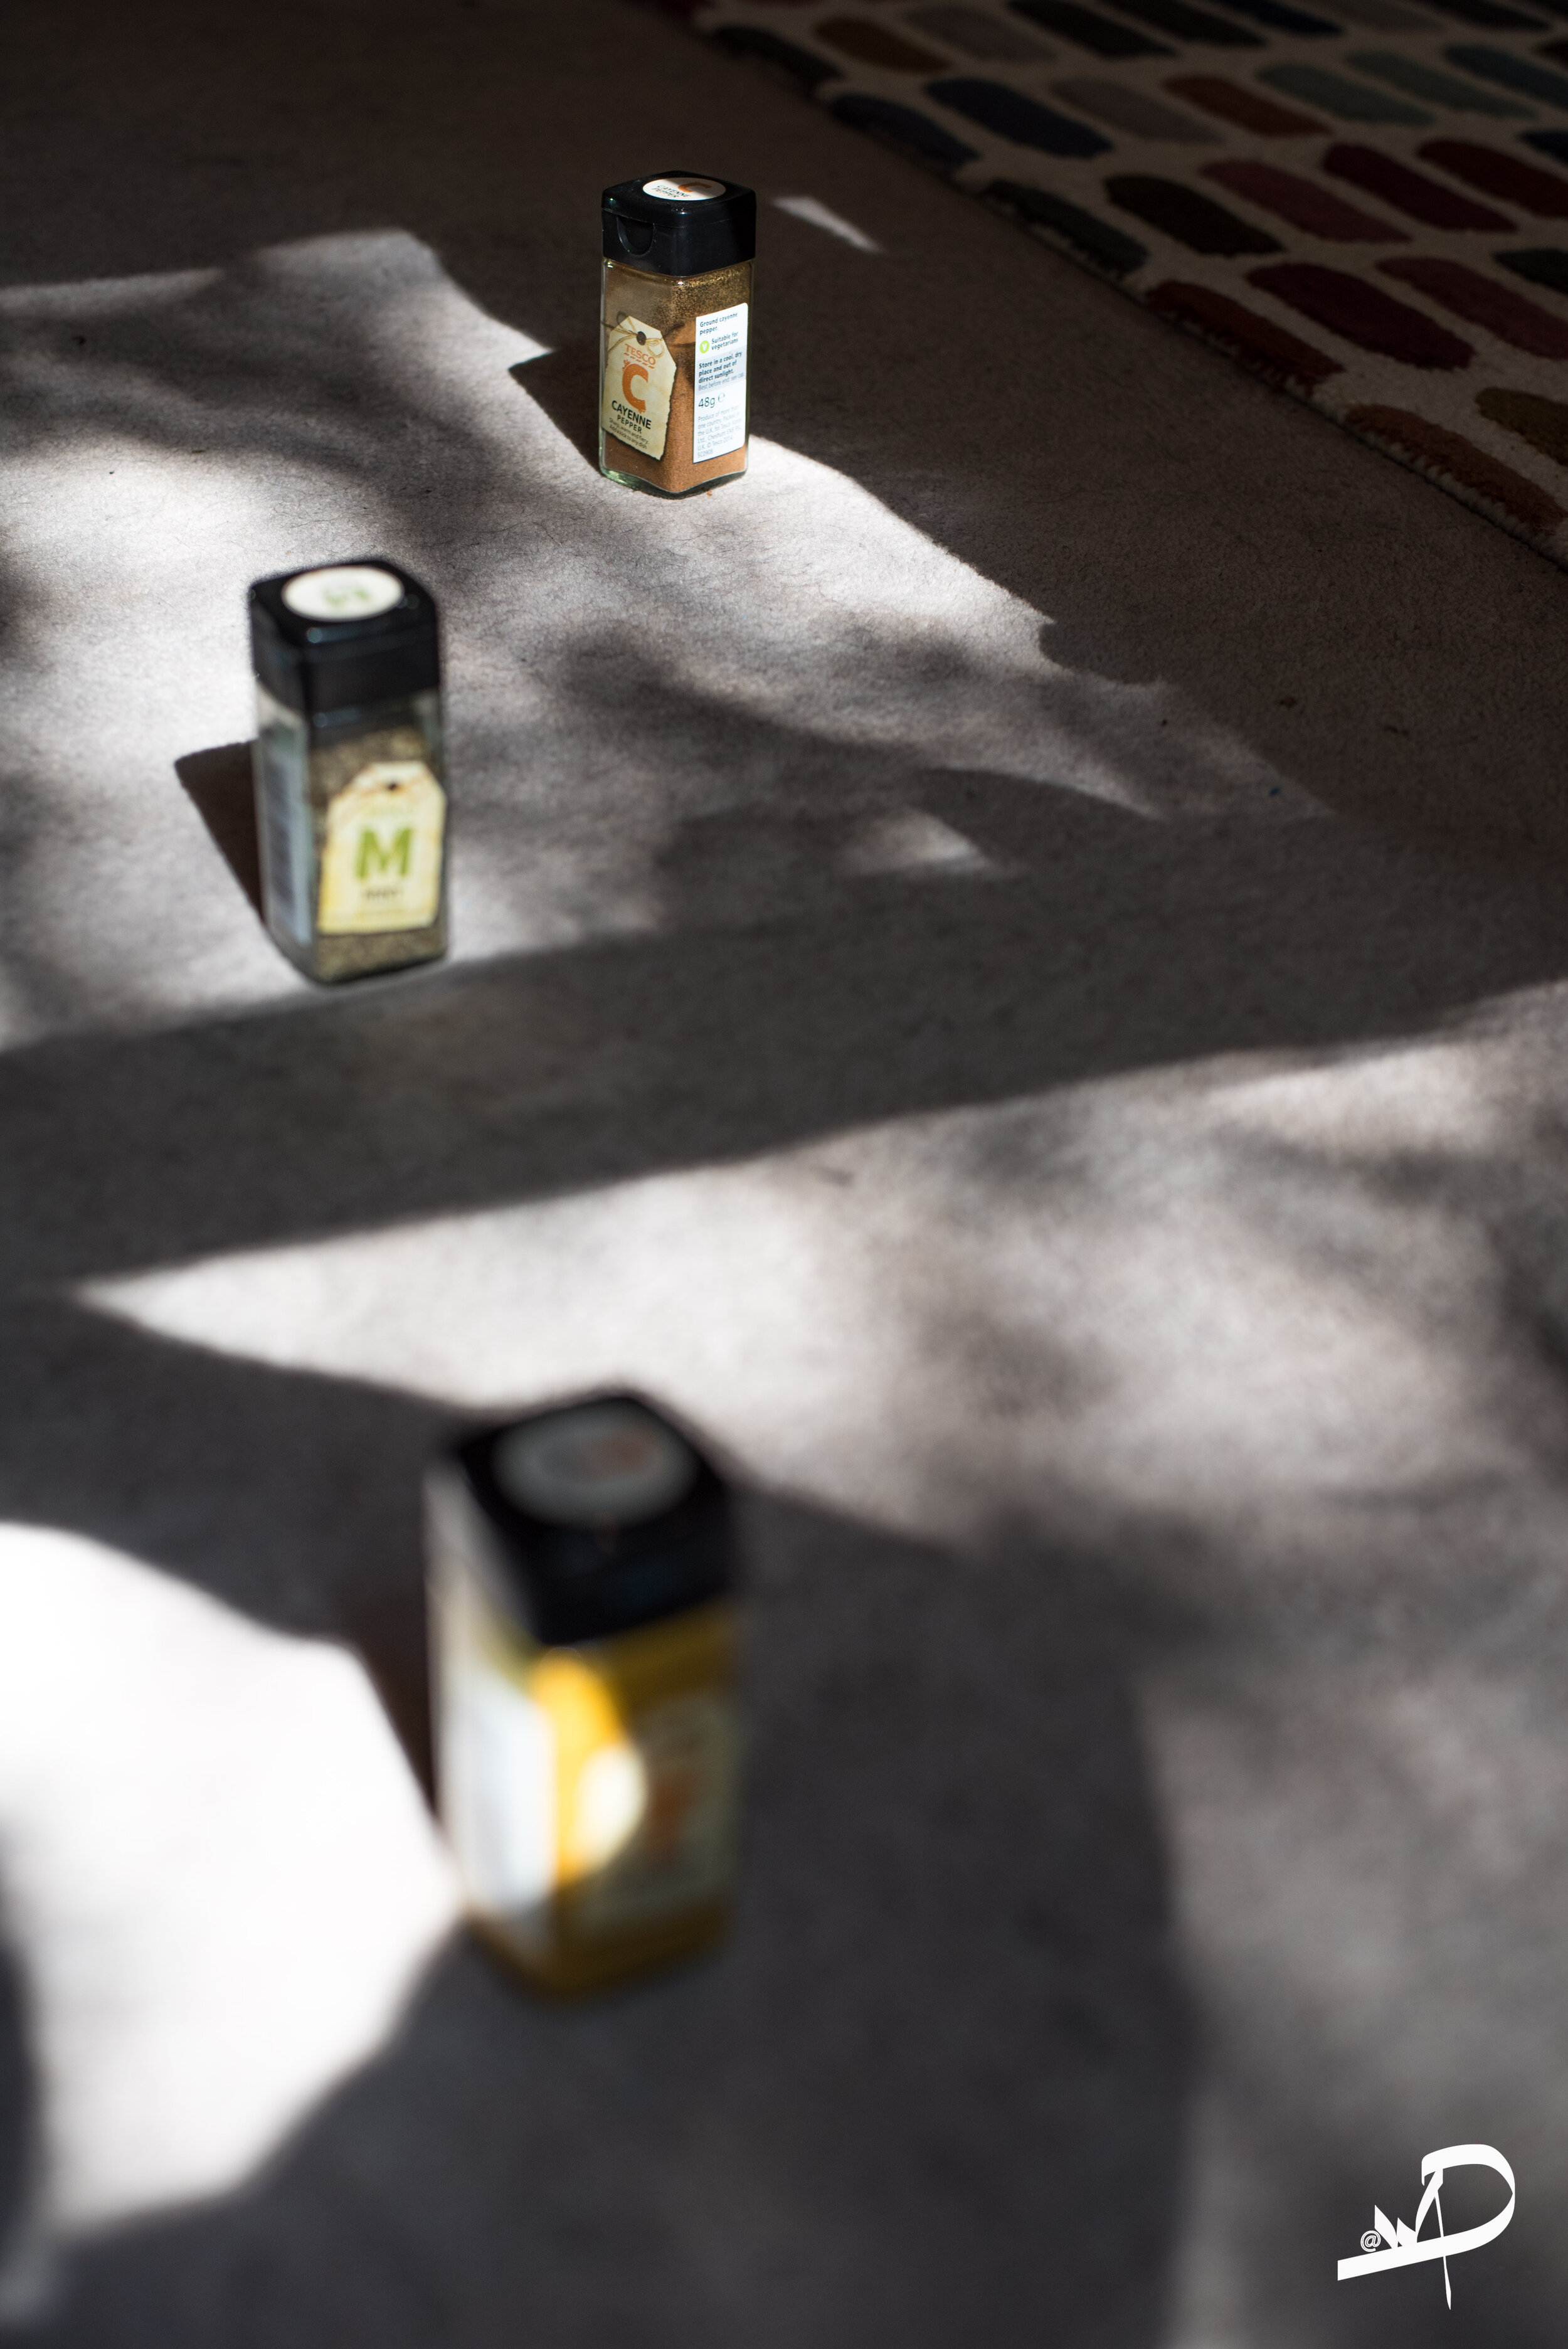
By completing this activity you will be controlling the area of focus within each photograph and this activity can be completed in either manual, aperture priority, or with your phone. This image shows you what you do each time you move the focus.

PHONE
The process of taking or creating depth of field with your phone is really easy and you may already be completing this task each time you take a picture with your phone. If you have the latest phones, you may have a mode called portrait, this mode has been formed so that each time you take pictures of a person or an object the camera focuses and the background becomes blurry. If you do not have this mode on your phone then all you need to do is use the focus square.
If you remember depth of field works with distances. So I suggest that you have a go at the aperture priority activity, with your phone.
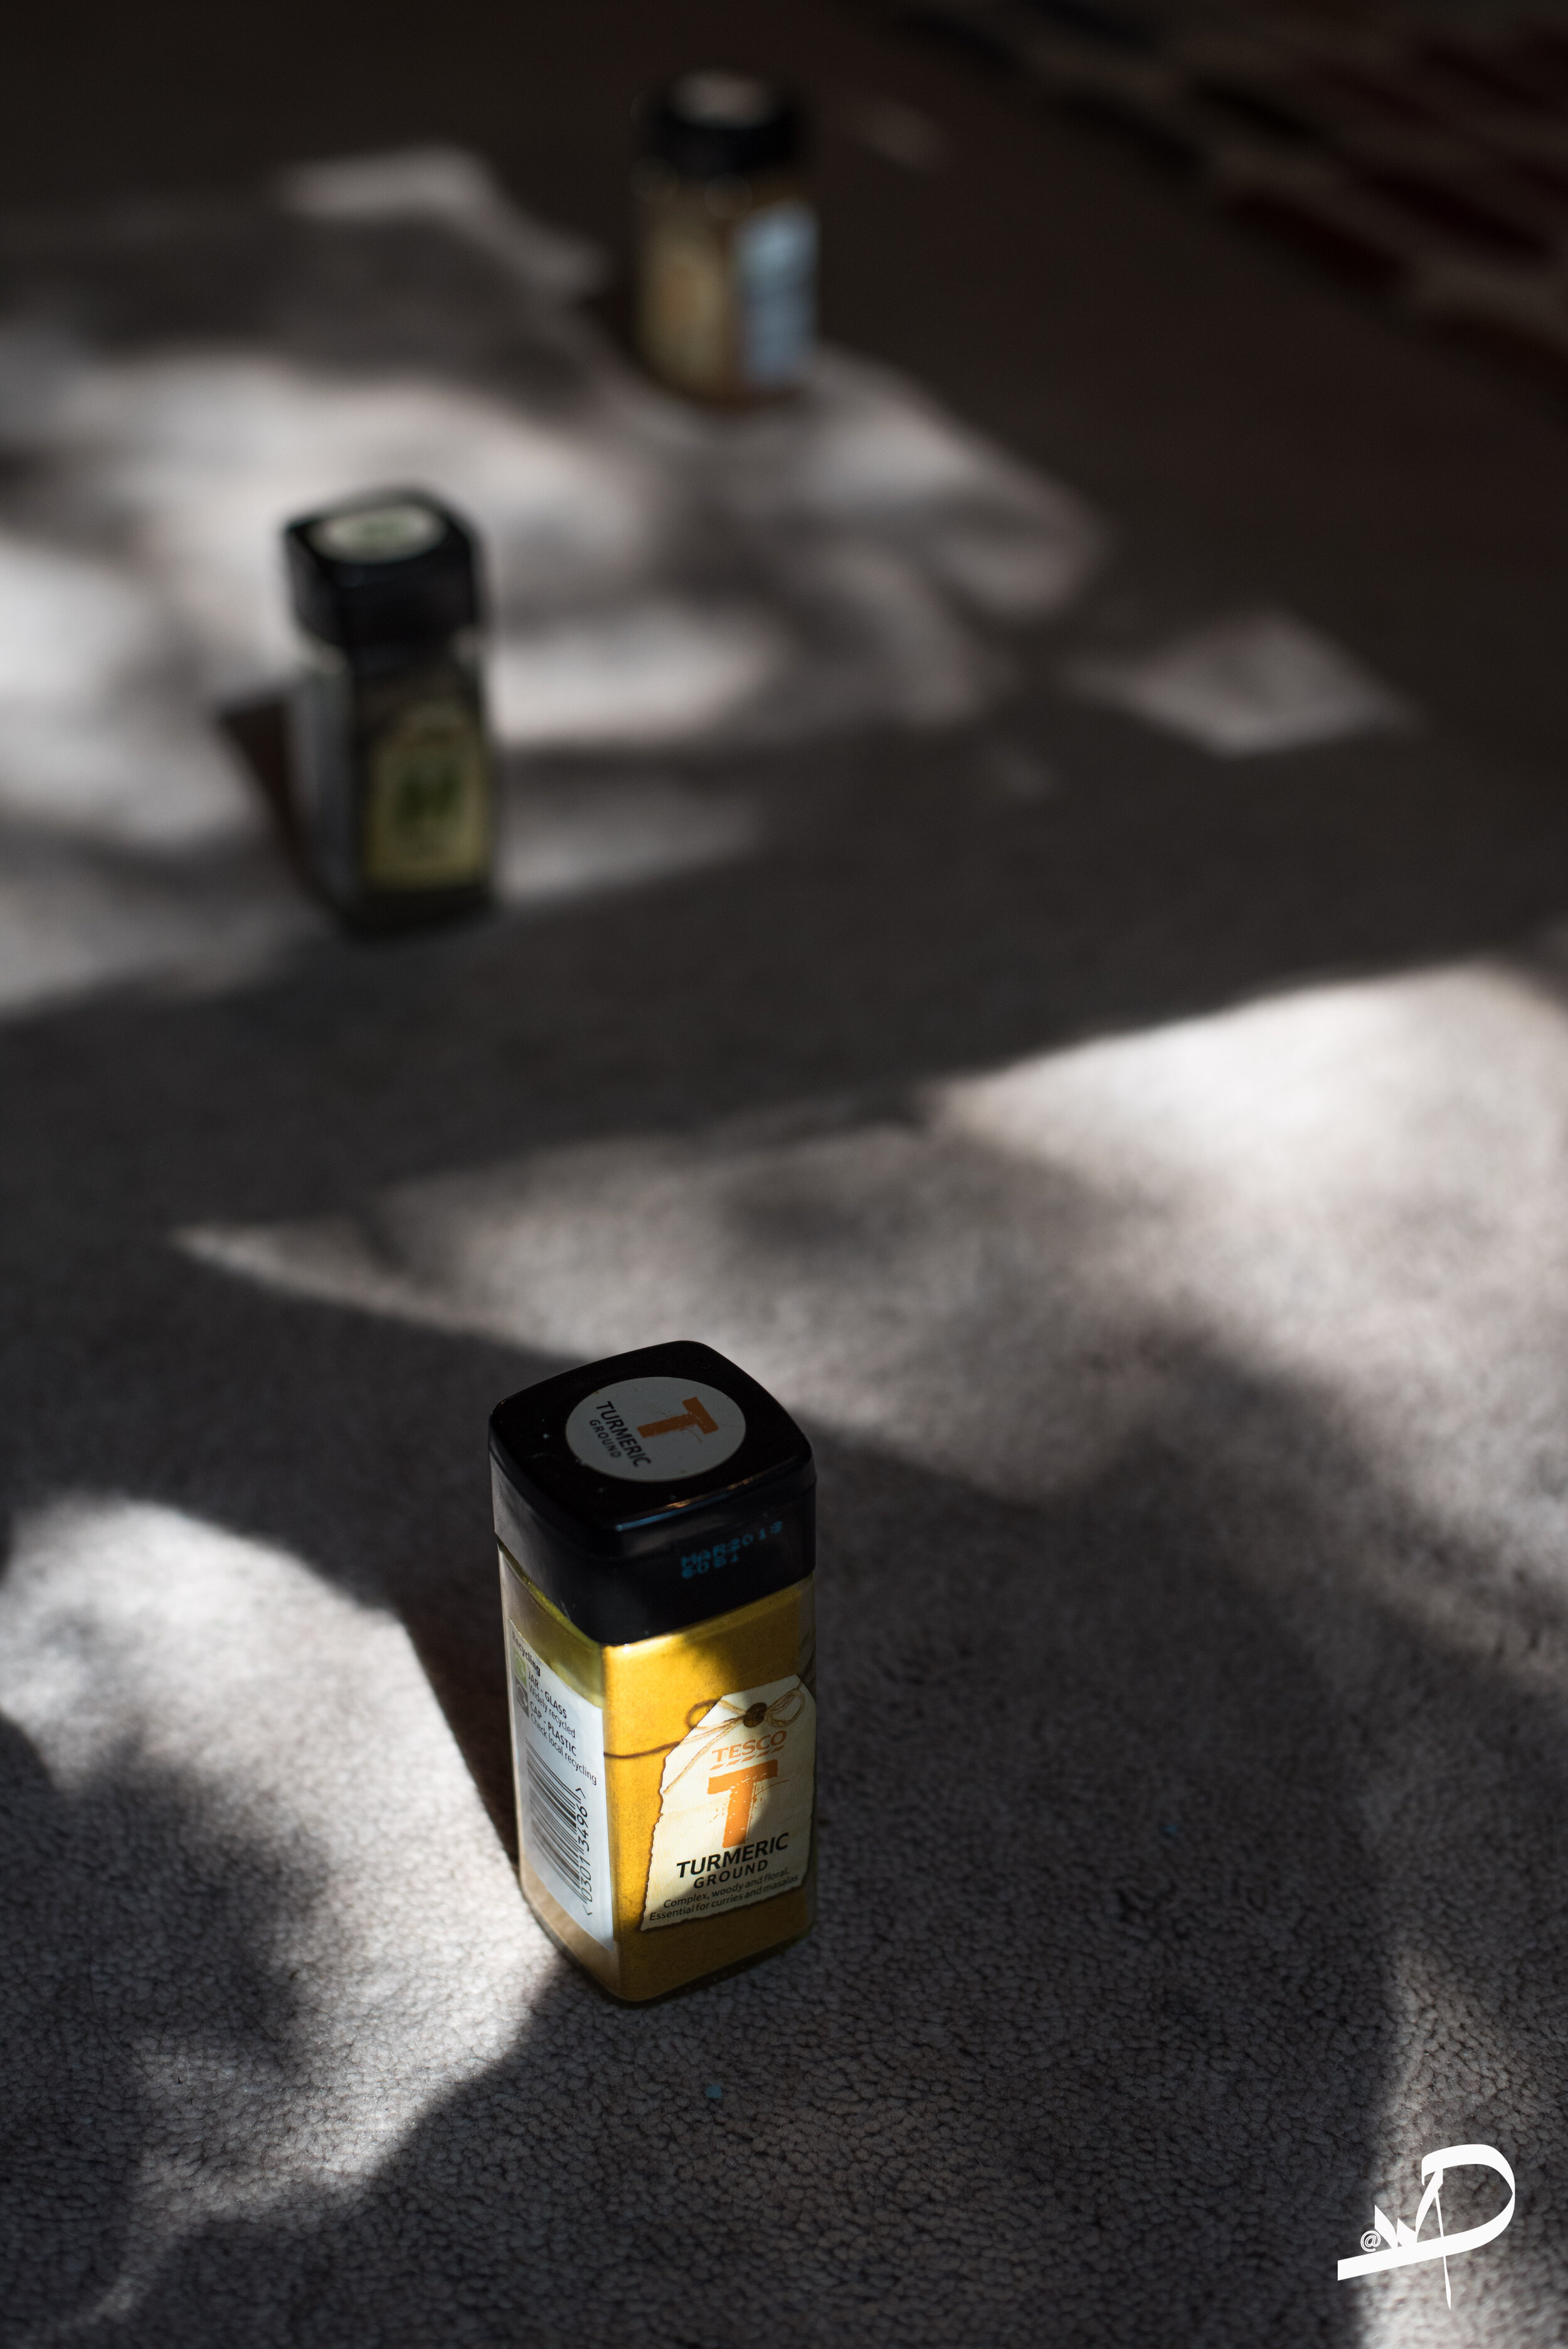
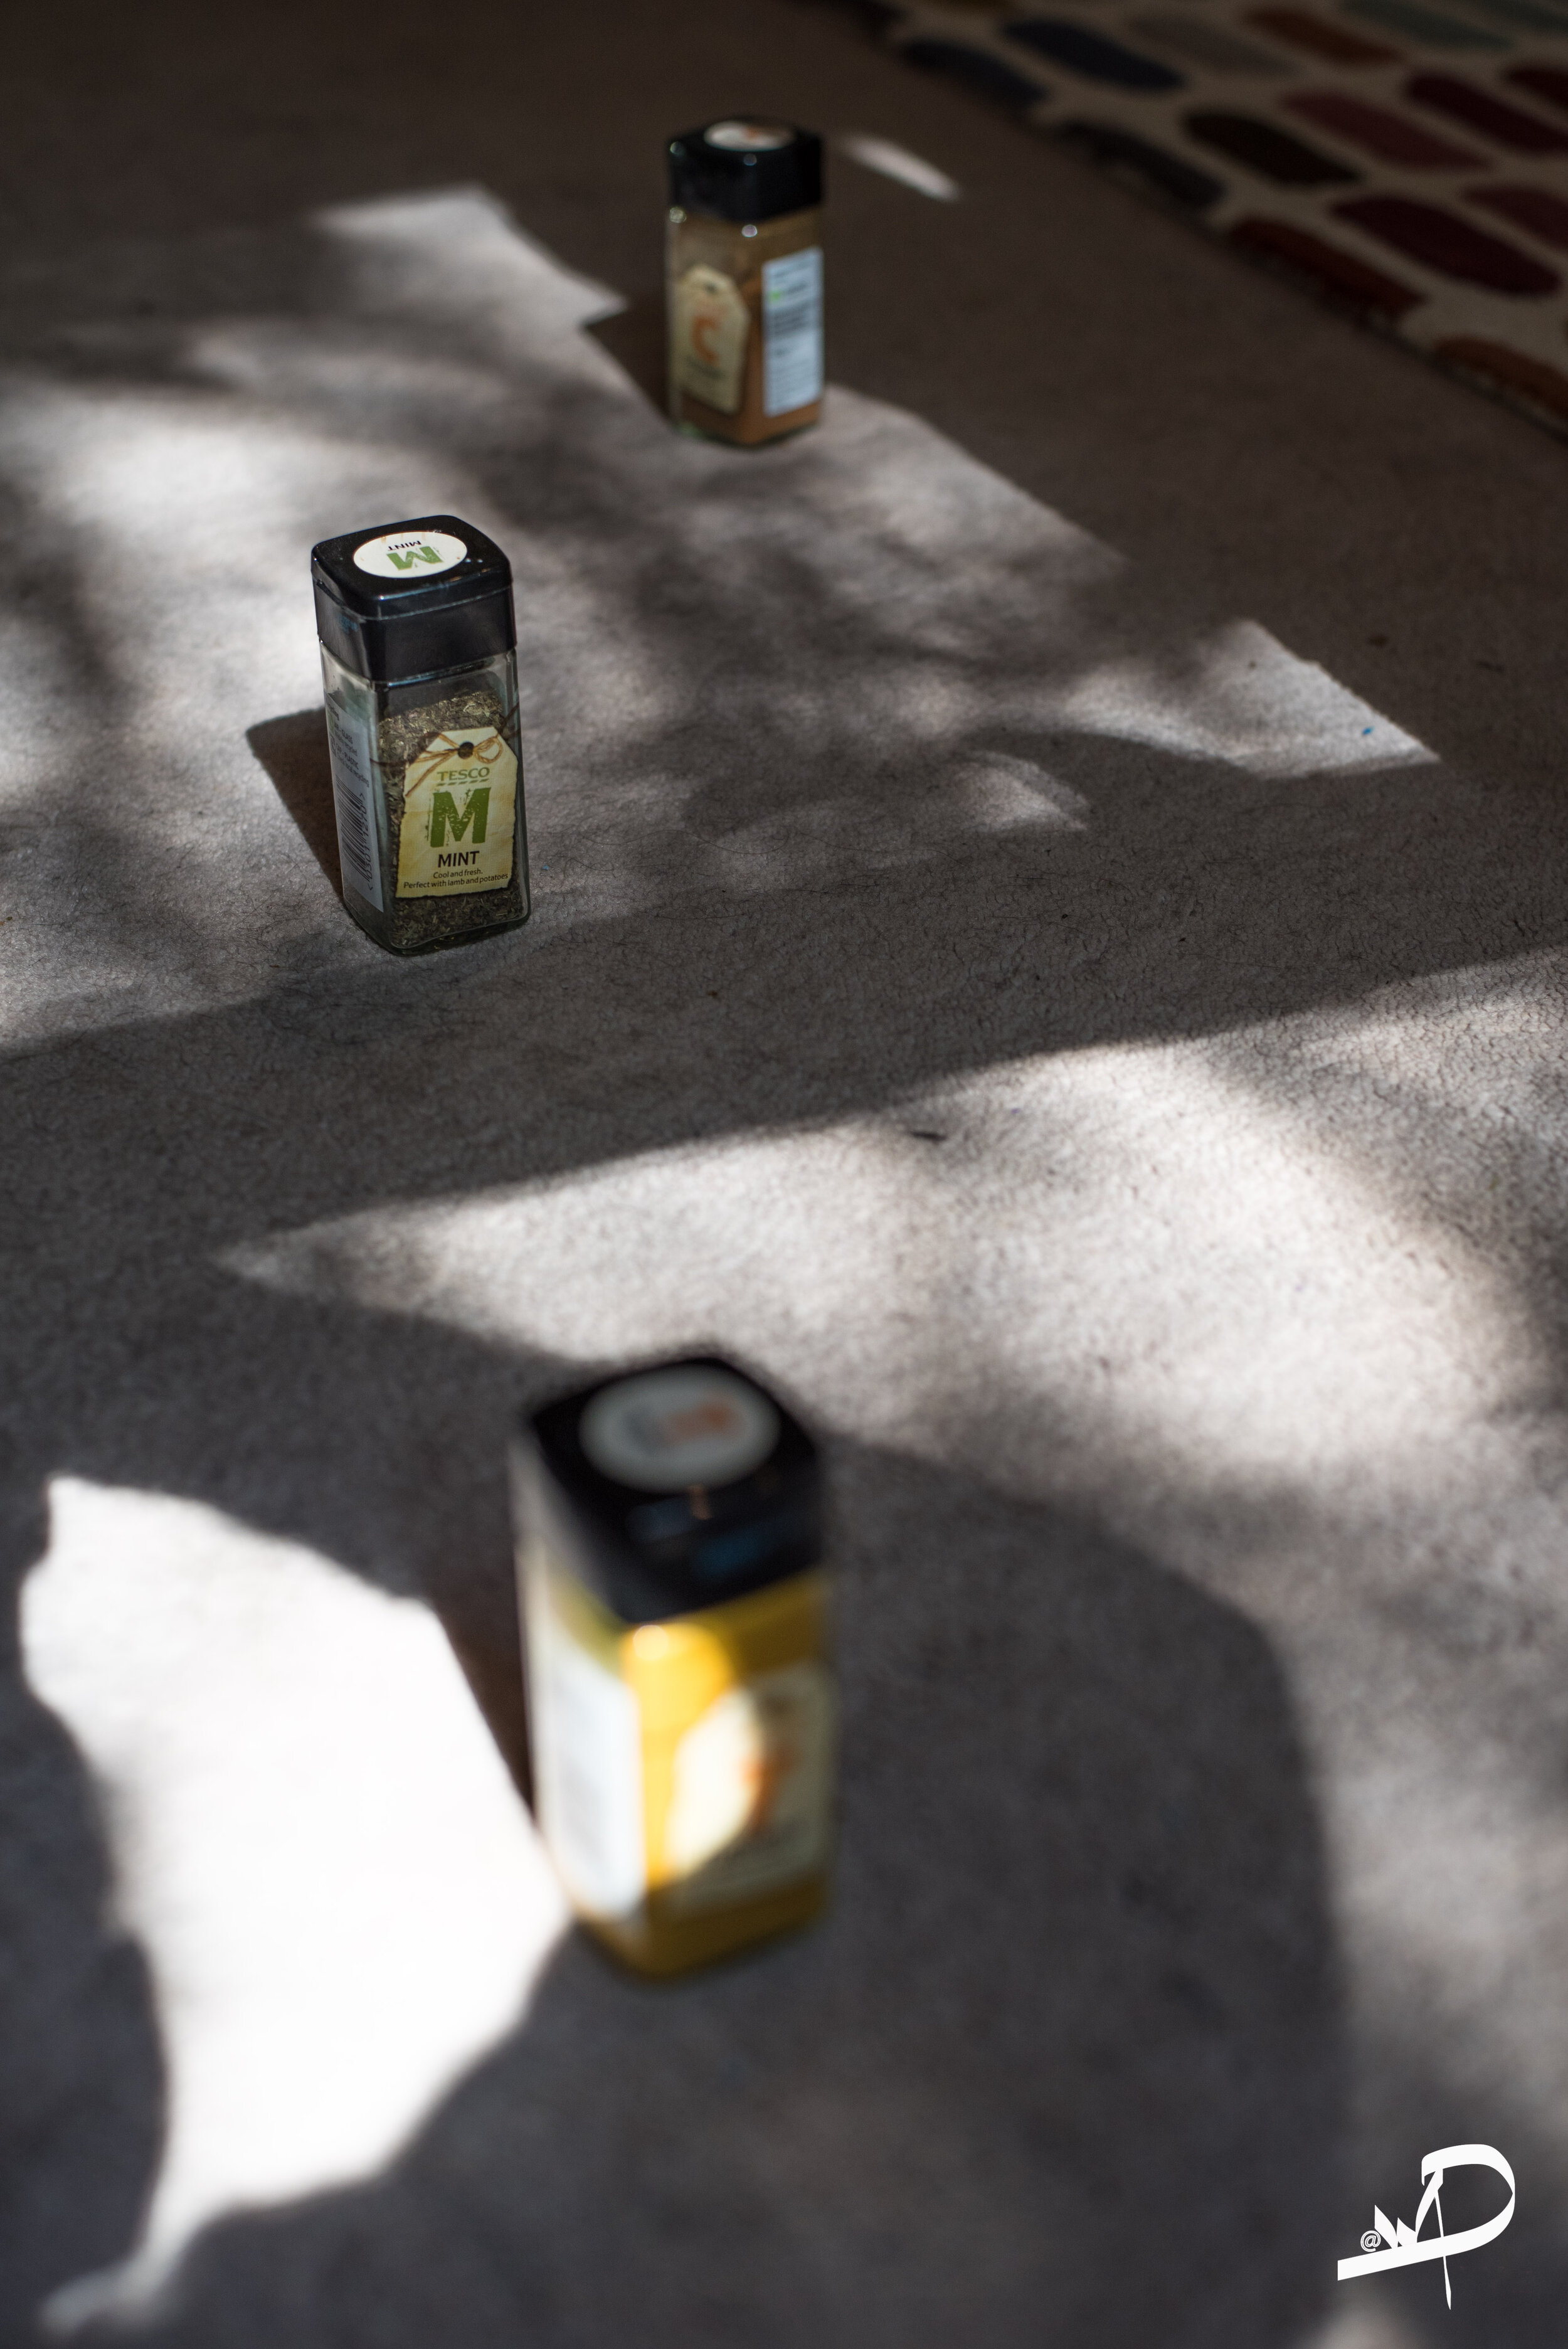
Line up three objects diagonally and place them at equal distances away from one another. Now take three photographs and for each photo move the focus square between the three objects and see the visual results.

FOCUS ON THE FIRST OBJECT

FOCUS UPON THE 2ND OBJECT

FOCUS UPON THE 3RD OBJECT
Summary
After reading this blog and watching the ‘YouTube’ clip that I have included, I do hope that you have a better understanding of how to use aperture to take a depth-of-field image. Once you begin to try out the recommended settings and play with your distances you will see the blurry effect and you may capture the lovely effect of Bokeh, This can be captured from the sun during the day or at night with street lights or Christmas lights

NIGHTTIME BOKEH

NATURAL BOKEH

Focos
In this app, you can take photos with shallow depth of field, without manually painting or making selections
You have the option to take a depth-of-field image with either your camera or phone and I have explained the use of portrait mode or how to use the camera itself. I have found this one app for iPhones that you could purchase and use with your phone. You can purchase a macro lens for your mobile to use to take macro images which will form depth of field photographs.
See below.
Now that you have considered your options, I suggest that the best way that anyone can understand and learn is to try. So I have included an activity to have a go at while at home. This could be done by yourself, with family or for your kids to try.
ACTIVITY
Try this technique:
Go around your home and garden
Look for objects to use, always try with three objects at different distances apart.
Play with moving nature
Capture the sun rays through the trees as a background (natural bokeh)
Look at repetitive areas in your home
Here are some examples that I have done throughout my home and garden. I have also used my cat and you could also or each other.


Thank you for reading the blog
Contact me if you have any questions about the content of the blog.
In May I decided to introduce a new series of ‘How to….’ blog subjects.
If you are interested in my ‘How to…’ blogs, I have also published these three for this series so have a read:

Sign-up for the regular blog newsletter.
If you enjoyed this blog, then please sign up for my regular blog newsletter.
Any questions or comments please state below and follow my blog.